Why Are My Fern Leaves Turning Brown?

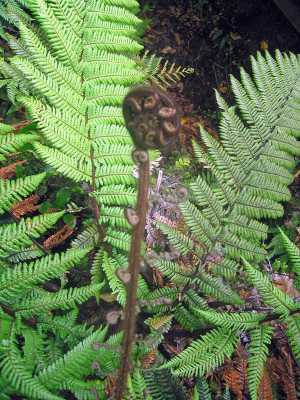
Fern is a large member type of the group used for various vascular plants that are known to produce with the help of spores. They don’t have the seeds or even the flowers. They are very much different from the mosses. They are very much beautiful in nature and character. Ferns are very much great species and are great to place anywhere. They have discrete characters and are loved by many from time immemorial, but when you are doing everything, and they turn brown, you feel very much angry and depressed.

So you must know the reason why your fern leaves are turning brown.

Why Your Ferns Are Turning Brown?

Whenever you see your ferns turning brown, it’s always a matter of concern. You will notice your houseplant turning brown, and this will shock you to a great extend. The various reasons for this species turning brown includes 

  • A lack of humidity.
  • Watering issue and the over fertilization of the soil.
  • Presence of too much bright light.

The first problem is the easiest one and is excellent to fix very easily.

Lack of Humidity

  • The ferns are known to love the humidity and are great lovers of the humid environment. So if your home has the presence of a very dry kind of air, then increasing the humidity level seems the right solution for you as the lack of humidity turns the everything brown and dry in nature. You can also mist the leaves with the help of the water-contained spray bottle after every now and then. Try to make your plant stay and sit in a tray 
  •  When you make the plant sit and stay in the tray with water and pebbles into it, it can grow very quickly. You can also use a humidifier. Ferns very much love the humidifier very well. Make sure that the outside air is not too dry as the ferns will not grow very well.  
  • Move away your ferns from the air conditioning unit as well. Take them away from the radiators as radiators are known to create hot and very dry air. The radiators have the capacity to destroy your plants.

Also Read: Why Do My Money Plant Leaves Turn Yellow?

Too much brightness or the presence of very bright light 

  • Light is very important for these species as they can grow very well under the light. If your ferns are getting too much bright light, then you will surely notice the fronds’ tips turning brown in color. This surprises the plants to great heights. Ferns are known to be burning because of too much bright light on them. So try to reduce the brightness of the light as much as possible.
  • Try moving your ferns in a shady area, but if there is no visibility of improvement, then you will have to move it a little bit more to a much shadier area and find it a perfect place in a perfect location as well.
  • This does not apply to the Boston Ferns that have the capability of dealing with the more brighter sunlight as well. If you are not sure that how much light the fern must receive, then you should use a light meter.
  • The light meter has the capability of telling you how much light is present in your house. Hence try a light meter. You will be able to monitor the light very easily throughout the year without any issues.

Watering problems

  1. Proper watering of the plants is also very necessary. It forms an integral part of the puzzle that you are involved in. You should start looking whether you are over or underwatering the plants whenever you feel your plant turning into brown or even the yellowish tone. This step must be taken at that moment.
  2. Use the finger rule to judge this thing. Press one of the fingers directly in the soil, and if the soil feels dry, then you are completely underwatering the plants, and you need to water them, and if you dip your finger and the soil feels soggy, then you are surely overwatering the ferns, and you must check that the overwatering must not happen.
  3. You can easily use a good moisture meter for this purpose and check when it is the right time to water the plant. A lot of people use moisture meters on a daily basis and are growing the plants beautifully because of the moisture meter.
  4. The moisture meter tells when it is the correct time to check the soil and also helps to know for a very certain reason when it is the correct time to water.
  5. It is really good to know what is wrong and right for your plant, and giving the plant the correct amount of nutrients is also very important. Please pick up your plant to water it and see if it feels happy receiving the water. If your fern desires more water and looks dry, then try to add more but not too much. Keep this thing always and ever in your mind that too much of anything is very dangerous.
  6. Most ferns are known to come up with a very good amount of peat moss present in the pot. They tend to possess pretty roots present at the end of the plant, but on similar grounds; this makes the water pass through in a very difficult manner whenever the roots are dry or destroyed.
  7. If you really forget to water your fern, then you must you a self-watering technique. This pot is known to give the plant enough water without you being present at home. So you can now easily go on vacation and worry not about your ferns turning brown with the help of the self-watering pots.

Also Read: Why Is My Fiddle Leaf Dropping Leaves?

Overfertilization and its dangers on the fern

The fertilizers and various other generic foods of plants have to be put in certain quantities in the ferns. If you overdose these ferns with over-fertilization, then your ferns will turn in brown color, and this will surely impact their health. Try to feed half the recommended quantity, then see the miracle happening. If you still notice the browning of the fern, then you can do one thing that is flush the complete feed out, containing more amount of water. 

Next time you must try again to water with the needed quarter of the dosage. The plants have always liked various amounts of liquid fertilizers and are very best for the plants as well. These liquid fertilizers are the very best for the plant growth and make the growth of the plant a very efficient one.

Overall the issue related to browning can be spotted very easily and is very easy to cure as well. With a total of ten minutes of the time of great attention as well as great care, your fern will be seen thriving happily again in no time. 

Transplant Level of the Shock 

  • Have you transplanted a fern recently into a new pot. The ferns are known to grow through transplant shock, and this leads to the various tips relating to the fronds turning into the brown.
  • The brown tips are known to be very concerning in the nature. It is definitely something to be worried about. Moving the ferns here and there during various times of the year poses a greater risk for the ferns and leads to transplant shock in the ferns. The common e.g., can be when keeping the ferns outside. Transplanting in the late part of the year. All these activities can result in transplant shock and hamper the health of the ferns as well.
  • Transplanting the ferns in early springtime will definitely be a safer option, and then there will be no chance for the plant to experience this kind of shock. Hence follow the above steps before it’s too late and feel happy growing these ferns very well.
  • Always feel careful when repotting or transplanting these ferns. Do lift them very carefully and ensure to try to put them at the place where they will grow in a healthy manner.

Also Read: What Causes Holes in Peace Lily Leaves?

Various types of Ferns to take care of 

There are various varieties of the ferns that you must care about. The various types of common ferns include 

Boston Ferns 

These are very popular houseplants. They are capable of growing wild in the outdoor areas. They are known to possess a very dark green type of leaves. There have evenly spaced types of indentations in the edge. The Boston ferns are known to benefit from the various light misting of the fronds.

Holly Ferns 

This variety has green leaves that range from 3-4 inches. They are largely available in 3 different species. These varieties include Hawaiian, Japanese, East Indian holly ferns. 

Maidenhair Ferns

This unique type of the plant has the very thin, very black type of the stems. They have the very small and dainty types of leaves. They are a great challenge to grow. They are best to prosper in high humid weather conditions. Their leaves are not able to withstand misting. They are known to grow largely in the corners of very big bathrooms because of the presence of humidity but are known to die in the presence of sunlight. 

Staghorn Ferns

These species are known to grow on the various barks of the trees. It is a very good kind of household type of the plant. These plants have sets of fronds. The green fronds are very fertile. They are known to resemble stag horns. The brown infertile type of fronds are known to grow outside of the green ones. They are very short, round, and very flat in the nature.

Outdoor Ferns 

The greatest benefit of growing ferns is that they can be grown indoors as well as outdoors. They are great outdoor plants. There are various varieties associated with this fern, namely Ostrich ferns, Japnese painted ferns, Australian Tree Fern, Asparagus ferns, Bird Nest kind of ferns, Cinnamon Ferns. There are also various varieties of the ferns that can be grown indoors as well as outdoors as well.

Also Read: How to Revive Dying String of Pearls?

Conclusion 

Growing ferns and protecting them from browning may seem difficult, but it is a very easy process. So follow the steps and precautions while growing ferns. Take all of these pieces of advice as stated in the above article, and rest assured to save the ferns from the browning. These ferns are capable of becoming your life, and saving them is a great option for you. So try to protect and save these ferns from turning into brown and stay happy forever and ever.

So enjoy growing these ferns and stay healthy and happy in the long run. We hope very well that now you will be able to protect your fern leaves from turning brown. So enjoy this growing experience and stay healthy and happy forever and ever.  

Why is My Croton Dropping Leaves?

Growing houseplants with the utmost care is one of the most amazing feelings for garden lovers. Croton plant is a popular houseplant and is preferred by many, primarily due to the forgiving nature of the plant. If you observe closely, the croton plants don’t usually demand strict requirements, but if not taken seriously, they can start to show signs of resentment.

One way of telling how your negligence is affecting the plants is croton leaves dropping. This is not a healthy sign, and once observed, it should be taken seriously. In the preceding article, we will look at which of the habits are contributing to drooping leaves of the croton plants and some tips reflecting on how to fix these causes.

Why My Croton Dropping Leaves?

Here are some of the most probable reasons for why you witness your croton houseplants drop leaves. It is important to note that the causes for dropping leaves are not confined to what is mentioned below, and there may be additional non-common features. However, if you take maximum precautions, your plant will restore its health and lush green texture.

Further, we have some quick solutions for each of your croton plant problems. Follow through the below mentioned causes and tips on how to fix them tips to revive your plant.

Also Read: Holes in Peace Lily Leaves: Why and What Causes

Right Container

The container in which your croton plant is placed serves as a home for your plant for most part of the time. Choosing the right size, material, and shape of container is very important to ensure that your plant grows to it

ontainer that is significantly smaller than the overall size of your plant, it can cause the roots to be soggy, wet, and rotten. In addition, it also restricts the drainage quality of your container. Not to mention, dropping of croton leaves can be a good proof for this.

If you cannot find a container of an appropriate size, use gravels and a potting mixture that absorbs excess moisture to keep the plant fresh.

Soil Conditions

Soil provides an adequate breathing space to your plants. Hence, it is important that we select a potting mixture that is nutritive and has good drainage properties. If your soil does not dispense adequate nutrients and drainage qualities, it can reflect in your crotons dropping their leaves incessantly.

Well draining potting mix is commonly available commercially. If you have difficulty finding the most suitable mix for yourself, you can manage the drainage levels by adding vermiculite and perlite to your soil mixture. It would improve the moisture and drainage conditions of your soil.

Also Read: Why Is My Fiddle Leaf Dropping Leaves?

Meeting the light requirements

Surprisingly, when it comes to crotons, they react very specifically to their light requirements. They cannot survive in low or very bright light conditions and it does impact how they stand, look, and feel. If you want to give a suitable amount of light to your plant, make sure that it is available for at least 4 to 6 hours each day. Do not exceed the lim[it though, it can cause the leaves to drop off.

To meet the light requirements of your plants, it is important to know and decide where you are most likely to place your plant. Is it indoors or outdoors? If you plant your croton houseplant outside, always make a popper arrangement for moving it to shade as and when required.

Exposing your plant to bright direct sunlight is never a good option. Partial light is what your plants require. On the other hand, if you opt to increase the beauty of your indoor setting by placing the plant indoors, the most suitable position is in front of an east or west-facing window.

Also Read: Why Do My Money Plant Leaves Turn Yellow?

Temperature

Crotons find it hard to tolerate sudden temperature changes and they are very particular about the temperature range in which they are placed. If you live in moderate conditions, you will not notice any difficulties with temperature ranges. However, it is challenging for people living in extreme weather conditions to give proper care to crotons.

The ideal temperature range for your croton plants to thrive is between 15-29 degree celsius. However, as mentioned earlier, they are not very specific in their expectations, which is why the ideal temperature range covered is huge.

Anything below 10 degrees Celsius and above 35 degree celsius is a hazard for your plant health. You can use various methods to regulate the temperature requirements of your plant. Extremely hot and cold environments can be fatal for your plant.

Additional temperature regulation tips include moving the plant away from cooling/heating vents, uninsulated windows, entrance doors, and heat registers.

Humidity

Croton pants prefer to survive in humid environments and low humidity can cause their leaves to droop down immediately. This can also be made evident from the fact that they are natives of the Southeast Asian rainforests, which are known for their intense humid conditions.

Crotons expect you to replicate the same conditions. If you fail to do so, they display their resentment by shedding and dropping their leaves. Unfortunately, this is not a healthy sign for your houseplant.

The ideal humidity range for croton plants is 70% but considering the flexible nature of the plant, it can survive in conditions that go as low as 40% and still support humidity.

If the situation is grave and you find yourself at a loss of solutions, then investing in a good quality humidifier seems to be the best decision, one that you won’t regret.

Also Read: How to Revive Dying String of Pearls?

Watering needs

Ensuring that your plants get adequate water involves both overwatering and underwatering of the plant. Either of the situations can result in bad influences on your plant, and it is not limited to croton houseplants.

If you are underwatering your plants and are not able to identify it, reach out for the soil. If the texture is dry, arid, and cranky, that means the plant is essentially devoid of water.

 The good news is that it is not difficult to fix this issue. You just have to opt for a proper water soaking method and fix the issue. Make sure to follow a regular schedule for catering your croton plants, till they revive their moisture levels.

In case of overwatering, you will have to evaluate the damage that is done to our plant. Idf you feel that the roots are fine and just wet, simply stopping watering for a few days will resolve the issue. However, if root rot has already happened, you’d have to shift to safe and careful repotting measures as soon as you detect it.

Apart from the quantity of water that your plants get, it is also important to analyse the quality of water it receives. Most people neglect this point, but this is as important as anything else.

Most of us rely on tap water to feed the plants, but do you ever inspect the quality?

Research shows that bad quality water can promote unhealthy growth and development patterns in plants, and it is definitely true. One should install a proper and safe water filter that makes sure no harmful chemicals are making their way to the plant through the water.

Using fertilizers

It is a known fact that fertilizers act like food for plants. But there is a limit to how much food we can eat, right? Same goes for plants. They cannot bear excessive amounts of fertilizers and it can even impact their Health in the fertilizing agents can cause root toxicity which can lead your plant to death.

The ideal amount for applying fertilizers varies from one plant to another. However, you can start by applying them once every month and not more than that. Observe how they are reacting to such conditions and then continue as needed.

Additional tips

As you know the croton plant does not support sudden changes, you should wait out before introducing new environments to the plant. Nothing really much that you can do.

Since your croton plants can be a home to pests like spider mites, you can use an ingredient as simple as water to wash off these termites from the plant and cleanse them with a cotton swab dipped in alcohol for best result. In cases of non-availability of alcohol, you can also use neem oil.

If you find that your plants are infected with diseases that could be fatal to the health of the plant, which they usually are, then you should immediately isolate them from other plants and keep them under sunlight for a few days, until the infection weras of and the plant is safe. In addition, don’t forget to take care of them as you usually do on normal days. They need it now more than ever.

Conclusion

If you are worried about your croton plants dropping leaves, following the aforementioned causes and tips would be beneficial and would ensure that the health of your plants is restored as quickly as possible.

For getting regular care tips about your croton plants, read our related articles!

How to: Growing Leeks from Scraps

Growing leeks from scraps are very easy. Leek is a very good vegetable and is a really tasty one. The parts edible of the plant include a bundle of leaf sheaths that is largely called a stalk or even a stem. This species is a really easy one to grow.

How to Grow Leeks from Scraps?

Leeks are very much used in various cuisines. The use of leeks in vegetables is due to its onion-like mild taste. In the raw type of condition, the vegetable is very much crunchy to consume and is also firm in nature. The edible parts of the leek have a white kind of base. There is also the availability of the light green portions, and there is also the availability of the dark green shades of the leaves.

The very dark green type of the portion is largely discarded due to its texture. The leeks are chopped into various slices having fine measurements of 5–10 mm thick.

Leeks can be grown in several ways, but today, we will be sharing with you some of the most uncommon ways to grow leeks. The uncommon way we will be talking about is through scraps.

You can really start to grow a new plant from the rooted part of a leek stalk’s end.

Also Read: Why Is My Cilantro Turning Yellow?

Various steps:

  • The bottom white root end is left and is not thrown in the garbage. This bottom part is chosen to regrow leeks.
  • These two ends are very much put in a shallow depth bowl.
  • For this, prepare a bowl of very clear water and try to put the ends in it very carefully and keep or put it on the windowsill. Change the bowl of water very carefully after every 2-3 days to be refreshed. 
  • These root ends are very interesting to watch. Whenever you are washing the dishes or even doing something near it, this is a great site to watch. These are a great addition to your most beloved windowsill in winter.
  • After a couple of time or weeks, there is an obvious growth shown. The leeks might seem to regrow, and the green leaves will be shown to grow upwards.
  • You can check the water, and you can see the roots growing in the water. This will be seen at the bottom portion of the leeks.
  • This is a very exciting thing, and people do consider this option. Planting these species in the compost is also very good and a suitable option.
  • After they are grown well, their tops are chopped off and are used for cooking purposes.

The leeks are known to grow in a very similar way, like spring onions and celery. The one and the only difference is the size of the leeks. Growing more nutritious leeks involves planting them in the soil and regrowing them with correct nutrients.

Also Read: Cauliflower Leaves Turning Yellow

Various Leek varieties to grow

There are various leek varieties that you can easily grow. The common leek varieties include 

The American Flag 

This variety is very much hard to grow and has the capacity to overwinter in the mild type of climate. This species is known to grow 1.5-2 inches thick and also 20 inches tall as well. The species is known to possess thick, blue-green leaves. The species matures up to 130 days. Find the seeds in various quantities.

Early Giant 

These species are great for planting in the early spring season. This species has a very short maturation kind of period and lasts up to 98 days. This variety is known for its very consistent size and also possesses great flavors as well.

Autumn Giant Leek

This type of species is known to grow up to 30 inches and also consists of various stalks that are very much capable of reaching three inches wide when it reaches the stage of maturity. This species is ready to harvest in 135 to a time span of 150 days. 

Lancelot

This adaptable type of hybrid is known to grow up to 12 to 14-inch White type of shafts and also consists of various dark blue-green flags. This species is known to grow in many areas and in various other zones as well. This species is known to mature in 75 days.

How to Cook or Use Your Grown Leeks?

There are various common methods by which you can easily cook the leeks. Cooking leeks require you to spend less amount of time. You can follow some of the above-listed methods to cook leeks after you have grown them from scraps.

  • You can easily boil these leeks till it turns very mild and soft in taste. During this process, special and extraordinary care must be taken to chop the vegetables. If you don’t do this, the vegetables will be tangled and will be turned in a ball kind of shape when chewing them. You can serve these boiled leaves along with the vinaigrette. This is a quite popular way of consuming leeks in France as well as in various other regions.
  • Frying the leeks makes them crunchier and helps to preserve the taste.
  • The raw type of leeks can be popularly used in salads and dressings. This especially does well when they are the superior or the prime ingredients used in the dishes.
  • In the Turkish kind of cuisines, leeks are popularly chopped into very thick slices. They are then boiled for further preparation purposes and then are separated into discrete leaves. These are then filled in the fillings that are made up of rice, herbs, black pepper, and onions. For the sarma, the people tend to add currants, pine nuts, and cinnamon, and the minced kind of meat is added to the various fillings.

Leeks are a very popular ingredient for potato and leek soup. These are used to make plain leek soups and are a super ingredient for vichyssoise. They have great symbolism in the whales. They are used extensively as the part of the country’s cuisine. Leeks have come back into the popular flavor in various countries and are very favored by the people. 

So do grow leeks from the scraps as this can ensure the maintenance and the usage of the healthy produce in the long run.

Also Read: Holes In Pepper Plant Leaves

Benefits of Growing Leeks from the Scraps 

There are various benefits associated with growing the leeks from the scraps. Some of the common benefits involved are 

They are great to recycle 

When you regrow leeks from the kitchen and other scraps, you are doing a bigger favor for mother nature. Mother nature feels very happy when you waste the resources very little and utilize the resources in the right and the correct manner.

We all know that the recycling is a great way. It is one of the best and the original ways of all time. It is the very original way in which the household can help in reversing the impacts of climatic changes.

A very little effort is to known to go a very long way. If you can save the lettuce base from the trash and regrow it then you can achieve wonders. The landfills hence will possess less wastage, and there will be more usefulness associated with the resources in hand. Take the condition where many households save their lettuce from being thrown into the garbage.

Saving Wealth

If you are going to grow your own fruits and vegetables at home and use them for making snacks, dinner, and the breakfast, then you are saving your wealth on a large scale. To keep your money and savings, and wealth high, try to grow various vegetables from the scraps. It is very easy to grow in the kitchen too. You can utilize extra bowls and the cups that are lying around the kitchen to start a new project. Hence in a similar way you can easily grow leeks. 

Organic produce

If you want to consume organic food, then this is the best option for you. Growing vegetables organically ensures you what you are eating well.

Forms a great hobby 

Growing various vegetables and fruits seems like a very boring thing as there is a long wait till the plant reaches its maturity but growing from scraps is a fun way to see your plants growing and achieving specific heights. You can click photos every day and try to compile them in collage format and hence rest assured that the product is very healthy and safe as well.

Also Read: Does Swiss Chard Grow Back After Cutting?

They are great in the kitchen

These look very great in your kitchen area. They are like edible displays in your kitchen area. These have a nice smell and also look very nice due to the color and the look they possess. If you want to add some style, then you can go for stylish containers and rest assured to have nice produce in your hand. It brings a natural feel to your decoration and hence attracts people’s attention as well. So its like nicely remolding your kitchen with nice things in the hand and to work upon.

It can be grown in any home

You can grow these species in any home and surroundings. For this, you don’t require a backyard, and even you don’t require soil as well. All you need is that part of produce that was otherwise meant to become a part of the trash can or even bin.

Growing them is quite easy 

Growing leeks is quite an easy task and doesn’t involve great efforts by the people. People can easily grow this produce in a limited period of time. All you we are saying you have to do is follow very simple and easy steps without any wastage done.

Conclusion 

Till now, you might have understood how you could grow leeks. These vegetables are an impressive option for consumers and frame a great part of your everyday diet. Leeks are an interesting part of your food and make your food very tasty and delicious as well.

When you consume leeks, you become healthy as they will be grown in an organic way without the necessity of any pesticides and fertilizers. Leeks can be grown very easily and are good for the people of every age group. 

Growing them at your home is a good option for the people who go for natural produce. We would surely recommend you to grow these species and stay happy forever. Growing them will make you feel happy and healthy in the long run.

You can very easily and efficiently grow them at your home without the assistance of a professional. So follow the various steps as stated above and grow delicious leeks at your home with the help of the scraps. We really hope that you will surely follow these steps very accurately and will grow many leeks at home and will surely feel elated by the progress you have made in a very short period of time.

Why Is My Cilantro Turning Yellow?

Cilantro turning yellow is a huge problem that people suffer when growing these species but don’t feel discouraged and grow Cilantros. Cilantro is used as a flavorsome addition to various varieties of soups, curries, salads, and various other dishes as well. It is also known as coriander.

In the United States, it is commonly and largely known as leaves, and coriander is known as seeds. The nutritional content of this is very much essential and also has various health benefits attached to it.  

Benefits of Cilantro

Cilantro provides anticancer effects and also adds flavors to a wide variety of various dishes. It motivates the health of the skin and also has properties to fight various diseases and infections. The use of Cilantro has various other benefits attached to it. So grow Cilantro but in the right way to avoid turning yellow.

Why Cilantro Turning Yellow?

Cilantro can also turn yellow when it is not getting enough sun, water, or nitrogen. Other causes could be overwatering and even pest control spraying. Various other causes associated with Cilantro are 

1. Insufficient Light And Heat can Turn Cilantro Yellow

Usually, this species is added to the list of the species of herbs. This is because these herbs don’t need much of the sun. These species don’t even do well in the dark areas also. This means that this can’t grow well in the shade as well. A dim-lit window is also a poor option for this species.

So the correct way to grow them is in full sun, but the temperature must be cool. The correct temperature range must be 50 and 85 degrees Fahrenheit. 

Fixing this problem in various simple steps

Try switching the Cilantro’s position once and try to keep it under broad sunshine. Try to increase the lighting if you are trying to grow Cilantro indoor.

Always try to prune the Cilantro to ensure that the leaves are towered in your salad instead of harvesting them.

Also Read: Cauliflower Leaves Turning Yellow

2 Under and overwatering of the Cilantro

When you overwater Cilantro, the leaves are known to turn yellowish in color. If you are really going for container gardening, then this is the common problem observed.

Due to overwatering, the soil gets deprived of oxygen. Thus the overall functionality is inhibited and also leads to chlorosis. Don’t try to determine the present moisture content of the soil by seeing the surface; dig deep to know more.

If you find out that it is wet, then you are overwatering if you keep on adding water to it. This is a bad practice and can affect the plant in the worst manner.

Some signs of overwatering 

  • Some leaves turn black.
  • The Cilantro doesn’t become less wilted after watering.
  • Leaves turn yellow and fall.
  • You notice mildew on your herbs.

Also Read: Holes In Pepper Plant Leaves

3. Dehydration

When you underwater Cilantro, it leads to chlorosis. If you really want to explore deep soil and also want them soft and in good shape, avoid underwatering them. Only under the full sun water the plants at least one time a week. Then try to observe its various growing conditions and see them grow well. Do see how it reacts to different water quantities and amounts and keep the level in great check as well as adjustment.

4 Yellowing of Cilantro due to nutrient deficiency 

For the growth of Cilantro, you need various nutrients. Therefore, you will have to note the particular amount of minerals and fertilizers they require. Don’t try to over fertilize; this could lead to permanent damage to the Cilantro.

The various nutrient deficiencies resulting in the yellowing of the Cilantro are 

Nitrogen deficiency

Older kinds of leaves rapidly turn yellow, and the newer shoots also turn in this way due to this deficiency.

Iron Deficiency 

Younger leaves are very much yellow in color and with various traces of green veins, while mature leaves are green in color due to this deficiency.

Magnesium Deficiency 

The lower kind of leaves become yellowed from both sides, and the veins remain green in color. This happens due to this deficiency in the plant.

Manganese Deficiency 

The presence of the yellow spots shows the Manganese Deficiency.

Hence one should look at these things if the plant is turning yellow in color. Fighting with these deficiencies helps to combat these deficiencies and make the plant grow healthy and well.

Also Read: Does Swiss Chard Grow Back After Cutting

5. Pests and various other diseases have the capability of turning Cilantro Yellow

Pests have the capability of causing yellowish patches and have the capability of turning the whole batch yellowish in color. Pests and other diseases can be a culprit and hence turn the Cilantro yellow.

Aphids

Aphids have the capability of turning the leaves yellowish in color. These insects use their mouth organs to suck the sap out of the leaves they popularly come in contact with. This process distorts the leaves and turns them yellowish in color. These creatures are well aware of the ways in which you can easily camouflage well. Therefore, there is a huge possibility of missing them at the first instance or even at first glance.

A sticky substance below the leaves shows the possibility of chlorosis. You may see small insects lingering on the plant parts.

Most people are a believer of the fact that Cilantro repels aphids from them. This is not true. The green color peach aphids attack Cilantro. This can be reduced by following various predatory measures. The common measures include lady beetles, lace wigs, and many more things.

6. Carrot Motley Dwarf Disease

This is a very toxic disease and turns the Cilantro yellow in color, or even orange and even red in color. It is caused by various combinations of different viruses and can be mistaken for nutritional deficiency as well. If you are doing everything correctly, and then also the plant is turning yellow, then the broad chances are the plant suffers from some nutrient kind of deficiency. Ensure the plants are weed-free and possess subsequent nutrition as well.

7. Leaf Spot

If your leaves look like they are soaked in water, but with different yellow spots, then there is something wrong going on. Transmission is possible during pollination. The planted seeds may carry the transmitted diseases. If this is the case, the Cilantro will also look yellow. 

To control the further spread of this disease:

  • Plant certified type of pathogen-free seeds.
  • Sanitize the various pots you’re going to reuse or avoid that altogether.
  • Remove the infected plants.
  • Sterilize potting type mixes when the seed is starting.

How to turn the leaves green again?

Reversing chlorosis is possible in the case where the following problem is there

  • Early lighting and temperature issues
  • Light underwatering
  • Nutrient deficiency

You are unlikely to turn the Cilantro green again because of the following reasons 

  • The leaves are old
  • Diseases stem from seeds.
  • You overwatered repeatedly and caused root rot.
  • Pests affected your crop adversely.

Rectifying these issues can help you stop the yellowing of the Cilantro without much effort.

Can you consume the Cilantro that turned yellow in color?

Better Health Channel (BHC) avoids the consumption of Cilantro that has turned yellow,. Eating a yellow, brown, witted Cilantro may cause you any damages. See the cause of the yellowing of the Cilantro first and then decide what to do next. 

Suppose by any chance any disease or aphids infected the Cilantro. In that case, it is better to throw them away as the plant may infect you as well and can result in very bad consequences in the long as well as the short run; however, if you figure out that the moisture stress, nutrient deficiency,temperature plus light imbalances have caused the yellowing of the Cilantro, then the Cilantro is very much safe from the disease. Still, it does not mean that you can consume it very quickly.

Can yellow Cilantro be bolted?

As long as you see the Cilantro not at all dying, you can easily bolt it very well. If the Cilantro lacked a portion of sunlight and you are willing to use the batch for the popular seed production. You can efficiently take it to the brighter areas so that you can easily go for bolting it very well.

Do check that there is no presence of any disease; then only you can ensure the growth of healthy Cilantro. So finding a good Cilantro to keep it disease-free is very much essential as well.

Conclusion

Cilantro is very good and has good nutritional values as well. These can be grown very easily without any issues and provides good nutritional values when they are not yellow in color. So avoid them becoming yellow in nature and then grow them without any issues. Growing a Cilantro needs extreme care and caution. People from time immemorial have used Cilantro. Growing them using different but right techniques will help you have healthy products that can be used as a salad or for any other eating purpose. I hope you to have healthy Cilantro and stay away from the yellow ones.

Holes in Peace Lily Leaves: Why and What Causes

The peace lily is a house plant belonging to the scientific genus family Spathiphyllum. The peace lily is a plant native to tropical regions like America and southeastern Asia.

It is a beautiful plant containing lush green leaves, a singular resplendent white leaf, and a budding stem. The white leaf hoods the stem and acts as a protective barrier.

Peace lilies are beautiful plants commonly called closet or houseplants. This is because they are easy to take care of and widely used for interior decoration in offices and houses. However, despite being low-maintenance, many ask why does my peace lily has holes in the leaves.

The two-toned look of a peace lily makes it subtle yet eye-catching by allowing monochrome looks using white and just a dash of color with deep green.

Peace lilies are well kept indoors and boost happy hormones in the body. This article will tell you all about taking care of peace lilies and the possible causes of problems in their health, like holes in peace lily leaves.

Peace Lily Care

Peace lilies make excellent houseplants for offices, rooms, and even desks; their various benefits are just the cherry on top.

While peace lilies are quite low maintenance, it is advisable to be aware of their requirements to take care of them properly.

Water needs

For novice plant owners, the most common mistake is made in watering; they are either overwater or underwater. Peace lilies are more tolerant of underwatering than overwatering and can go without water for long periods.

Water your plant once every one to two weeks. Pro tip- check the dampness of the soil before watering. If the soil is dry, water; if not, wait for a day or two more to allow the soil to dry out completely.

Peace lilies are very drought tolerant, so don’t be scared and water only when the soil is dry. Prevent overwatering in all cases.

Also Read: How Long Can a Peace Lily Go Without Water?

Fertilizer

These plans don’t need to be fertilized frequently, fertilized with a balanced fertilizer once or twice a year to keep the plant healthy.

During summers, fertilize once every six weeks to encourage growth as this is when the plant is active. Fertilize from spring to fall and never during winters as the plant is dormant then.

Light

Peace lilies are native to tropical areas like those in South-Eastern Asia. They enjoy warm weather and don’t do well in cold and drafty environments.

Keep your peace lily in a place that receives adequate, indirect sunlight/ artificial light. They do well in low light. Keep the peace lily in temperatures above 16 degrees Celsius.

Please keep it away from cold air and drafty windows as it is sensitive to cold.

Cleaning

Peace lily has lush, deep green leaves that add a burst of color to any room. Some might even go as far as to say that the green leaves are much more attractive than the white ones.

Keeping the leaves clean is crucial as it keeps away pests and insects and maintains their shine. Regularly use a damp cloth to wipe down the leaves gently.

Don’t use industrial cleaners as they can suffocate the leaves. If the leaves are too dirty, place them under running water to get rid of the dust.

Repotting

An owner knows when their plant needs repotting. It starts to droop, the roots grow out of drainage holes, and the plants start to look too big for their pot.

You can report your peace lily by shifting it to an enormous container or dividing it into two and using two small containers. For the first option, transfer the root ball and for the second, cut the root ball in the middle and shift one part to a new pot.

Also Read: Why Peace Lily Flower Turning Yellow?

Tips for ensuring a healthy peace lily-

  • Keep away from cold
  • Keep in low, indirect light
  • Repot when it grows too big
  • Don’t overwater
  • Check the soil before watering
  • Fertilize 2-3 times a year
  • Wipe down the leaves with a damp cloth regularly
  • Check regularly for any problems that might be arising like yellow leaves, holes in leaves, etc
  • Prevent zero blooms, fungus, dusty leaves, yellow leaves, and brown edges

Holes in Peace Lily Leaves

Peace lilies are beautiful plants known for their shiny leaves, a straight stem, and a singular resplendent white leaf hooding the stem. Unfortunately, the peace lily is more famous for its beauty than for its benefits.

However, despite being easy to take care of, peace lilies can become unhealthy and show signs of stress and problems like brown leaves, yellow leaves, or holes in leaves.

Holes in the eye-catching leaves of a peace lily are hurtful and point towards signs of stress.

What causes holes in peace lily leaves?

Let’s look at the causes of holes in the leaves of peace lilies.

Insects

Insects called liriomyza melanogaster, present in the soil, are the primary and most common cause of holes in the leaves of a peace lily.

These insects are known as leaf-mining flies; they tunnel through the leaves and cause damage to the plant. Liriomyza melanogaster is a type of pest that causes holes in the leaves.

It can be tough to spot these insects, but one can find small holes in the leaves caused by them on closer inspection. This is because they start as spot diseases and quickly escalate to big holes.

To prevent pests and save your plant, spray some insecticide like a neem oil spray to ward off pests. Alternatively use. Strong fungicide if the pest has spread.

Some natural insecticides are-

  • Soapy water
  • Neem oil spray
  • Garlic
  • Beer
  • Pepper spray
  • Herbal water spray
  • Alcohol spray
  • Pyrethrum spray

Also Read: What Causes Holes In Pepper Plant Leaves?

How Can You Prevent Holes in Peace Lily Leaves

Holes in peace lily leaves are caused by pests and insects that eat the leaves, weaken the plant and cause holes. Insects can be fatal for plants and must be dealt with swiftly. Here are ways to prevent pests-

Clean leaves

Dirt and microbes on the leaves are a magnet for pests, and so the first step in preventing pests is to keep them clean and devoid of dust.

Use a damp cloth to gently wipe down the leaves or place them under running water once a week.

Insecticides

Use insecticides once a month to deter insects and pest infestation. It is advisable to use natural insecticides as these are gentle on the plant. Pro tip- use neem oil.

Take proper care

Take proper care of the last by giving it adequate light, water, space, and fertilizer. An amalgamation of factors ensures the health of any plant.

Peace lilies will stay healthy and devoid of pests when proper steps are taken to ensure good health.

Also Read: Why Is My Fiddle Leaf Dropping Leaves?

Benefits of the peace lily

Most people own peace lilies for their beauty and high aesthetic value, and few are aware of the multiple health benefits they have. Let’s have a look-

  • They purify the air of harmful chemicals
  • They prevent mildew formation by absorbing excess moisture
  • They absorb acetone and ammonia vapors
  • Peace lilies avoid the formation of mold and spores
  • They promote a restful sleep
  • They aid in combating insomnia
  • They are not at all harmful to pets

Why Is My Fiddle Leaf Dropping Leaves?

Fiddle leaf fig plant, scientifically called Ficus Lyrata, is a flowering plant native to lowland tropical forests such as Western Africa.

Currently, a social media star, the fiddle leaf plant enjoys indirect but bright sunlight, average water, indoor surroundings, and clean air. In addition, the fiddle leaf is a low-maintenance plant that can so be grown indoors. 

Fiddle leaf plants can grow as tall as 30-32 inches in height and can be placed indoors, outdoors, next to the door, in the house, on a side desk, as a centerpiece, and more.

It has big, veiny, and lush green leaves with a deep brown stem that adds a pop of color wherever they are kept. You can place fiddle leaf fig plants in both homes and offices for a professional as well as a warm, homey look.

Why Are Fiddle Leaves Drooping?

Healthy fiddle leaf fig plants are tall, and their leaves bright, lush green. Unhealthy fiddle leaf plants have droopy leaves and discolored patches on them.

There can be a few causes of unhealthy leaves such as:

1. Underwatering

Parched soil is hazardous for houseplants, especially fiddle leaf, which flourishes in a humid environment. A potential cause for the drooping of the leaves of a fiddle plant can be underwatering.

Check the dampness of the soil to ensure if this is the case. Next, water your plant once to twice a week and moisten the top two layers of the ground. 

If your soil is too dry, give it a soak by putting your plant in a tub/sink, filling the basin with 4 inches of water, and allowing the soil to soak water for about 45 minutes. 

Fun fact- the most common cause of drooping leaves in a fiddle leaf plant is under watering and a lack of moisture.

2. Overwatering

If drooping leaves are accompanied by yellow discoloration, overwatering of fiddle leaves may be the problem. Overwatering a plant leads to water logging, which prevents the xylem from transporting water for photosynthesis, essentially killing the plant.

Water the plant once or twice a week and always after checking the dampness of the soil.

Also Read: Why Do My Money Plant Leaves Turn Yellow?

3. Insufficient light

Fiddle leaf plants need bright, indirect sunlight. Being native to Western Africa, fiddle leaf needs abundant sunlight or artificial light; it can die in the absence of it.

If your plant is suffering from drooping leaves due to insufficient light, change its placement and keep it in a place with a bright source of light. For example, if you are confused, place it on a windowsill.

4. Lack of humidity

Lack of moisture in the air or humidity can also cause dropping leaves. To combat a lack of humidity, regularly spurt water on the leaves of the plant.

Also, place a pebble tray below the plant. Alternatively, use a humidifier to raise humidity levels in the room they are kept in.

5. In need of fertilization

Your plant may also have droopy leaves because it needs to be fertilized. Fertilizes help keep pests away and boost the nitrogen cycle and ensure adequate levels of minerals in the soil.

During the summer and spring months, fertilize the soil once a month. Do not fertilize during cold months. 

Also Read: How to Revive Dying String of Pearls?

Benefits of a fiddle leaf fig plant

Plenty of people only care for a fiddle leaf plant because they are beautiful, colorful, and easy to maintain. However, fiddle leaf pants are a beneficial plant that carries instruments for change in your physical and mental length.

Here are the benefits of the fiddle leaf plant-

#1. Air purifier

Fiddle leaf fig plant cleans the air of the room they are put in. However, fiddle leaves can pricy the air of harmful chemicals such as ammonia, benzene, and formaldehyde. 

Fiddle leaf figs also improve the quality of the air by promoting healthy oxygen levels in the air. Ficus plants, the genus fiddle leaf, cleanse the air of chemicals and promote a healthy atmosphere. The bigger the fiddle leaf, the bigger a room it can purify.

#2. Boost physical health

The beauty of nature is a force in itself. Heart can heal, release and improve physical health. Many companies are using the power of plants to boost productivity in their employees. 

Fiddle leaf fig plants elevate mood, lower blood pressure, create a calming effect, and benefit the respiratory and nervous systems.

Having fiddle leaf plants in the office boosts productivity to improve the moods of people.

#3. Mental health benefits

Just like physical health, fiddle leaf plants also have Positive effects on mental health. In addition, these beautiful green plants are calming to look at and create a peaceful environment.

By increasing humidity levels and oxygen levels in the air and emanating calm, they promote a night of sound and restful sleep. So if you are an insomniac or have trouble sleeping, consider getting a fiddle leaf fig plant.

#4. Emotional bonds

Caring for a plant is similar to caring for a child, and people form bonds with their plants and start to care for them deeply. In numerous mental issues, apathy and loss of emotional connection can be a problem; caring for a plant can solve the issue.

#5. Concentration

It is believed that house plants like fiddle leaf figs boost concentration levels, focus, and as a consequence, productivity. 

A study done on elementary school students found that students were more attentive and full of concentration when taught in a class containing numerous house plants.

Also Read: Why are the Leaves Falling Off My Angel Wing Begonia?

Caring for a Fiddle Leaf 

Fiddle leaf fig plants are medium-to-large-sized lush, green plants having various benefits ranging from physical to emotional and mental. 

These plants are all the buzz on social media and are a trendy choice among house plants. However, they have been in trend for years, and their likability continues to grow.

Here is how you should take care of a fiddle leaf fig plant –

1. Placement

The fiddle leaf plant is native to western Africa and thrives in bright, indirect light. You can place this plant both indoors and outdoors, but you should ensure that enough sunlight or artificial light is available to it.

A good location is a prerequisite for a healthy and flourishing fiddle leaf plant. 

Choose a place away from air vents, drafts, and good ambient light. The plant enjoys a warm and humid environment. If you’re not very sure about the lighting situation, place the plant next to a window.

Whenever you water your plant, turn it around so that all the leaves receive equal sunlight. 

2. Watering

Like most house plants, overwatering and underwatering are very harmful to fiddle leaf fig plants. Fiddle leaf requires water once every week. Therefore, during scorching months you may water it twice a week.

As a safe measure, always check the dampness of the soil before watering a fiddle leaf fig plant. Fiddle leaves do well in evenly wet soil and short drying spells.

If your pot doesn’t allow for drainage, the fiddle leaf plant will die. To properly water a fiddle leaf, evenly pour water on the soil and place a container below the pot to catch extra water; allow the soil to dry for a few days before watering again.

3. Cleaning

Clean the leaves of your fiddle leaf fig plant once a week or once a month. When you first get a fiddle leaf, clean the spots on the leaves using a damp cloth.

Do not use coconut oil or other industrial cleaners as these can clog the leaves. Instead, use a damp cloth to wipe down the leaves gently. Regularly cleaning the eaves prevents pests, spider mites, etc.

4. Humidity

Fiddle leaf plants enjoy a warm, humid climate, and about 40% humidity is required. While most houses have an adequate humidity level, check the conditions in your home, and if too dry, mist spray your plant every once in a while.

5. Fertilizer

During the spring and summer months, fertilize your plant once a month with a nitrogen-phosphorus-potassium fertilizer. You can also go green and choose an organ fertilizer. 

Do not fertilize the plant during winter and autumn as the plant is dormant then.

6. Repotting

You know it’s time to repot your plant when the plant looks too big for its current pot, and the roots start to grow out of the drainage holes; this generally takes one to two years.

Choose a new pot that is two inches bigger than the last one, and to repot, first add a few stones at the bottom of the new pot. This allows for better drainage.

Next, add a good, moisture-control, drainage-allowing soil and put it in the new pot; now, move your plant through the root ball and top off with more soil—water as usual.

Unknown facts about fiddle leaf

Did you know that fiddle leaf plants are a social media sensation? Unfortunately, there are many facts about this plant that most people don’t know. Most buy a fiddle leaf for its beauty, ignorant of its various benefits.

  • Fiddle leaves can’t grow from a leaf
  • They are a social-media star
  • Fiddle leaves can be both small and large
  • They are beneficial to the mental, physical and emotional health
  • It is native to Western Africa
  • You can revive a dying fiddle leaf fig by cutting off the top trunk 
  • Its trunk can grow back
  • Fiddle leaf needs a lot of humidity

Why Do My Money Plant Leaves Turn Yellow?

With their rich green leaves and interwoven trunks, Money Trees (PachiraAquatica) are a pleasure to see. Many folks consider that the lovely plant offers good luck and prosperity, however, if the money plant leaves turning yellow, you could disagree. Fortunately, this post will assist you in repairing your tree and allowing it to grow once again.

Why are Leaves on My Money Tree Turning Yellow?

Money plants (PachiraAquatica) are endemic to South and Central America, where they may reach heights of 60 feet in the field! Several domestic Money Plants, on the other hand, are tiny decorative houseplants with delicate stems entwined together and rich green palmate foliage.

Though the Money Tree is often a low-maintenance and tolerant tree, its leaves becoming yellow is indeed a warning that things are wrong. When you truly care about your Money Tree, you must determine the source of the issue and take quick action to correct it.

Let’s take a look at each issue one by one and see how we can assist you to cure your tree:

Pests

Pest invasions are more likely in the Money Plant that is fragile or distressed. Spider mites as well as other sap-sucking insects can dehydrate your tree. Yellowing leaves and spines are the first signs of this issue. Scales, mealybugs, or spider mites are all common indoor pests.

These tiny bugs multiply and migrate all over the front sections into corners and crevices if not eliminated early enough. The parasites’ penetrating mouths deplete your plants and hasten to yellow, particularly if the Money Tree has been sickly due to inadequate sunlight, nutritional inadequacy, or insufficient moisture levels.

What Can You Do About It?

You must check your plants for symptoms of bugs frequently. If insects are discovered, the afflicted plant must be isolated as soon as possible. Washing the plant’s leaves to eliminate as many pests as feasible ought to be the preliminary stage. After that, you may try to remove the infection altogether by using another remedy to lower the population even more.

Soil pH Irregular

If you’re cultivating pot plants while using quality plant fertilizers daily, soil pH isn’t likely to be the source of your tree’s yellow foliage. However, if your foliage issue is limited to landscaping plants, pH value may be the answer.

Plants’ ability to acquire nutrition is influenced by the pH of the soil. Just as the soil pH rises or falls, so do the levels of nutrients. Soil pH in the moderate to mildly alkaline range, approximately 6.0 to 7.0, is ideal for most vegetation, even yard grass. Rhododendrons as well as blueberries, for example, demand soil with a pH of 4.5 to 6.0.

Certain nutrients will be less accessible to a species when soil pH drifts below or beyond its optimum range. Plants can’t pick up nutrition, even if they’re present — although if you apply fertilizer. Till pH problems are addressed, leaves become yellow.

A basic soil test may determine the pH of your topsoil as well as give other valuable knowledge. Many testing labs also make suggestions for pH-balancing soil fertilizers. As a result, nutrition is accessible again, and leaves resume their normal course.

Also Read: How to Use Coffee Grounds for Pothos?

Natural yellowing can be expected.

Is there fresh vegetation on your Money Plant? Such yellowing is normal if your tree has fresh foliage and the yellowing leaflets are mature, especially towards the base of the plant. Your tree loses its dead leaves to make room for new production.

Overwatering

Money plants (PachiraAquatica) thrive in moist environments and thrive provided their ground is maintained somewhat damp. Being overly careful with hydration is among the most prevalent causes of yellow foliage on a Money Plant.

Look for the withering of the plants and widespread yellow leaflets, especially on the bottom leaves even though the soil is damp. Once root rot has occurred due to overwatering, you might notice a decaying odor in the topsoil.

Overwatering is triggered by everything that keeps the soil moist for an extended period, not only by irrigating too regularly. Overwatering can culminate in an ill Money Plant with yellow foliage attributed to the below aspects:

  • Growing in a container that doesn’t have any drainage openings
  • Putting in an overly big container.
  • Too much watering before allowing for the upper 1-2 inches of topsoil to become dry
  • After feeding, not dumping the dispenser or cachepot.
  • Gardening in soil with inadequate drainage.
  • Failing to cut back on spraying during the wintertime or in cooler weather.

When your Money Tree is overwatered for an incredible duration, the extra moisture will destroy the root, causing it to perish.

What Can You Do About It?

When your Money Plant is fading and also has yellow foliage, even though the ground is damp, perform the following:

  • Stop spraying when the topmost couple inches of ground is fully dry.
  • Ensure your plant is really in the right container with the right soil.
  • Look for signs of rot disease. To check the roots, one will need to carefully remove the plant out from the container.
  • If root rot is evident, cut off all the damaged roots, rinse away the existing soil, and gently replant in a new container with new soil.

When your money plant’s soil dried out, that’s the main determinant that it requires to be watered. Feed your vegetation regularly rather than on a timetable, and inspect the plant as well as soil to see whether it needs to be watered.

Also Read: How to Get Rid of Bugs on Jade Plants?

Underwatering

Many potted plants exhibit common characteristics when they are overwatered or underwatered. Underwatering differs in that the topsoil would be dried, as well as the yellow, withered foliage will seem dry and crunchy. Because there is no water in the container, it will seem lightweight.

This might occur if the Money Plant’s water needs rise, like during extreme heat and when it is rapidly expanding. This can also occur if you neglect to water the tree if the container is extremely tiny, or when the tree becomes root bound.

What Can You Do About It?

Only one method to keep your Money Plant nourished and healthy is to increase the rate of feeding. Make an effort to maintain the soil hydrated in all situations. Take into account repotting the Money Plant to a little large container when the one that’s in is too tiny or has several roots coming out from the base.

Also Read: Overwatered Peace Lily: Signs & How to Revive Peace Lily

Soil with Poor Drainage

Inadequately draining soil is a typical source of root rot in Money Trees, which results in leaf reduction, yellow foliage, and, in extreme cases, extinction. Soil drainage would be reduced if you use the incorrect planting soil or maybe a container with insufficient drainage holes. A big pot will keep the soil moist for an extended period, enhancing the danger of root rot.

What Can You Do About It?

If you would like your Money Tree to remain strong and grow you’ll need well-draining ground. If you’re utilizing a pre-made potting mixture, apply additional drainage supplements to the topsoil, like perlite, coarse sand, even pumice. Nevertheless, you may simply manufacture your custom potting mixture to suit your species’ needs.

When watering your Money Tree plants, make sure the water drains swiftly via the container instead of collecting on the surface of the soil. Ensure there are enough drainage outlets in the container, and allow it to drain completely after feeding.

Fertilizer

Some people incline to fertilize their houseplants excessively. Money trees, on the other hand, require only a tiny portion to survive. During the hotter months of the year, everything you have to do is apply a healthy, all-purpose fertilizer. monthly, administer this solution gently.

Putting your income to plant a truckload of fertilizer will not cause the plant to develop faster. Rather, it might result in leaf burning, yellowing, light-colored foliage, or perhaps even the loss of your tree under the worst situation. Whenever it concerns money trees and fertilizer, it’s wise to offer far less rather excessively much.

What Are the Consequences of Yellowing Foliage on Money Plants?

  • Root rot may occur if you overwater your plants or just don’t enable them to drain properly after irrigation.
  • The initial indication of root rot is fading leaves. Root rot is a disease that, when not treated promptly, will destroy your plants.
  • If you place your plant in the bright sun, it will scorch. Putting it in extremely dark areas can impede its development and eventually lead it to perish. Money plants need indirect, strong sunlight, but may tolerate low illumination levels as provided it is not darkish.

Conclusion

Perhaps, this post has given you some food for thought regarding why your Money Plant possesses yellow foliage. It is critical to explore all alternatives to solve the correct issue. It’s usually best to start with the greatest prevalent issues, like overwatering and sunlight issues. Then evaluate every one of the remaining concerns.

Remember that often several circumstances are to blame, therefore it might be time to start making a few changes to enhance circumstances for your vegetation.

Cauliflower Leaves Turning Yellow

Cauliflower is a popular vegetable that belongs to the Brassicaceae group that notably contains cabbage, broccoli, Brussels sprouts, kale, and other related plants.

Brassicaceae, which contains mustard, is a commercially significant group.

Cauliflower cultivation is unquestionably tough due to the plant’s strict climate requirements.

Low temperatures during the vegetative stage, wet soil without standing water, and insect pest-free growth conditions are all key needs for cauliflower to provide the desired output.

Many farmers also experience difficulties with cauliflower production, such as cauliflower leaves turning yellow in certain situations. It can happen for a variety of causes.

In this post, we’ll go through all of the possible causes and their treatments.

Also Read: How to Grow Chinese Cabbage from Cuttings?

Cauliflower Production Requirements

Cauliflower is a chilly season plant that best thrives in nature, well-dug soil with a pH value around 6.5 or higher. A huge portion of organic material in the ground helps keep humidity.

To avoid ‘buttoning,’ the crop requires cold conditions, which means that numerous tiny heads grow rather than one huge one.

Cauliflowers are less cold-hardy compared to their cousins and should be sown after the final frost since the plant might be damaged in sub-freezing conditions.

This is typically cultivated in colder regions as fall produce and in the fall just crops matured will withstand cold.

It, therefore, generates a relatively humid and chilly environment. The optimal typical monthly temperature is between 15 and 20°C.

Warmer temperature & extended day duration is needed for the early types. Therefore, in the winter months or autumn-winter people like to grow it.

The crop placement largely affects the ultimate growth of the head of Cauliflower and thus the crops should be 46 cm away, allowing around 75 cm among rows.

Upkeep and care of Cauliflower have to create significant delicate heads consistently over the growing period.

The crops also need enough nitrogen, which must be supplied as a fertilizer side-dressing midway during the growing period. 

Cauliflower heads may be discolored by sunshine, therefore when they grow 2.5 to 5.0 cm in diameter, the crop needs to be blanched, which is a technique that keeps its head white.

This is accomplished by collecting the tallest outermost leaflets at the top and binding them securely using twine.

Loosen the knot regularly to monitor the growth of its head, look for bugs, and let its head dry out following rainfall.

There are self-blanching forms that produce leaves that protect the head spontaneously. 90 to 120 days following sowing the cauliflower plant is prepared for harvesting

Cauliflower which is completely developed and appears white must be harvested and marketed as soon as possible.

If the gathering is postponed, the hue of the leaves will turn yellow, and their richness and beauty will be lost. As a result, it’s critical to harvest the Cauliflower when it’s fully mature.

Also Read: How to Grow Pointed Gourds at Home?

Why Are My Cauliflower Leaves Turning Yellow?

If a plant’s chlorophyll components are lost, the foliage becomes yellow. The leaves could also become yellow as a result of insect infestations, infectious diseases, or environmental stressors.

The cauliflower foliage can become yellow for quite a variety of factors The following contains a list of them.

  • Natural Growth
  • Underwatering
  • Overwatering
  • Nutrient Deficiencies
  • Diseases and Pests
  • Stress

Natural Growth

First, the most obvious cause of fading leaves is the plant’s normal development processes. Its developing energy is focused toward earlier, more prolific development as it grows.

After doing their function of bringing the plant to maturity, the elder leaves begin to fade away.

This fading is quite natural, and it will impact all crops of a similar type at the right period while at an equal pace.

If, on the other hand, the wilting affects the entire crop, with certain individuals suffering worse than another it’s typically an indication of stress.

Also Read: Does Swiss Chard Grow Back After Cutting?

Underwatering

If your crop is stressed by not getting enough hydration, the colour of the foliage will fade.

Plants are failing to collect enough moisture from the ground and transmit it to the stems and leaves owing to a shortage of moisture in the soil.

As a consequence, the plants will have to use less moisture to perform photosynthesis. As a result, undesirable chlorophyll components that aren’t engaged in photosynthesis are discarded.

The leaves grow drier, crunchier, and yellow in hue. As a result, you must be cautious and consistent while feeding the cauliflowers.

Keep checking the ground (at least once per day), and if it appears to be dry, provide watering. Never overwhelm the crop plant roots with water; simply moisten the ground.

Also Read: Holes In Pepper Plant Leaves

Overwatering

Excessive moisture is a major issue in nearly every crop.

When the roots are submerged in water over an extended length of time, the tissues will decay owing to a shortage of appropriate ventilation.

When the roots begin to decay, they are unable to provide sufficient moisture to the crop and the greens begin to lose their chlorophyll pigment thus becoming yellow.

When you leave your ground damp all of the time, this is most likely the cause of your cauliflower foliage becoming yellow.

One can take the below steps to avoid an overwatering situation.

  • When growing cauliflower, use a ground that drains well.
  • Since cauliflower prefers somewhat damp soil yet not to have its roots soaked in water, employ little water regularly and for a short period.
  • Incorporate as much natural material into the ground as possible, since it will aid in enhancing the soil’s physiological health and drainage.
  • Mulches may be used to properly utilise water while cultivating cauliflower outdoors.

Nutrient Deficiencies

Low amounts of nitrogen, iron, magnesium and potassium, among other typical nutritional shortages in your ground, may turn plants yellow.

When plants acquire brown patches around their margins, and also yellowing or overall loss of hue, it’s a sure indicator that nutrition is a problem.

If you suspect your ground is deficient in essential elements, a simple testing kit helps validate your fears.

You may then use an appropriate fertilizer to correct the deficit and focus on natural soil development to avoid future issues.

Epsom salt (magnesium sulphate) can be added to the ground to increase the magnesium concentration and encourage the production of chlorophyll pigments.

Most such crop plants require potassium as nutrition. To avoid a potassium deficiency, you may purchase and use potassium fertiliser from the store. It will put an end to the problem.

Stress

Cauliflower is a cool-season crop sensitive to withering in extreme heat. The crop does quite well in daylight temperatures around 65 and 80 F. (18-26 degrees Celsius).

The plants usually wake up during the evenings or if the weather cools down. In the lack of rainfall, offer 1 to 12 inches (2.5 to 3.8 cm) of water each week and not allow the ground to dehydrate entirely.

Overwatering, on the other hand, might lead cauliflower to fade due to damp, waterlogged soil. On warm days, a coating of bark particles or any other mulch helps keep the earth cold and damp.

Diseases and Pests

Crops that are weakening due to pests and disease may typically begin to turn yellow. Look for apparent evidence of aphids, moths, or any other parasites, and also fungus or mildew stains.

Some of the pests and diseases are mentioned below –

Clubroot

Clubroot is a dangerous fungal infection that damages brassica plants like broccoli, cabbage, and cauliflower. Yellowing or weak leaves, as well as fading in summer weather, are the first signs of clubroot.

Early indications can be hard to identify if you see wilting cauliflower. The crop develops deformed, the club-shaped populace at the root system as the condition develops.

The infection, which resides in the ground and spreads swiftly towards other crops, must be eliminated as early as feasible

Verticillium wilt

Cauliflower is frequently affected by this fungal infection, particularly in humid, coastal regions. It usually affects crops in late summertime and early fall as they approach maturation.

Verticillium wilt typically occurs in the lower leaflets, causing them to wilt and become yellow. Starting afresh with healthier, disease-resistant crops is the safest alternative.

Because the fungus resides in the ground, transplants should be placed in a region of the yard that is rid of the infection.

Fusarium wilt

Lower leaflets are the first to become yellow accompanied by the whole plant. Leaves that have been impacted wilt, dry down, and then become fragile. It’s also possible that they’ll collapse from the branch.

To keep the infection under check, you must eliminate the diseased crops from the area. To limit disease transmission from one crop to the next, eliminate leafhoppers.

Maintain weed-free ground. Fungicides can also be used.

Conclusion

After going over all of the possible reasons why your cauliflower plants may turn yellowish we may say that the most important factors to consider are irrigation and disease pests infestation.

Water stress is a major cause of yellow leaves in several instances. Individuals frequently overwater or submerge their plants, causing them to show symptoms of infection.

As a result, it’s a good idea to keep a close eye on the plant’s moisture requirements and feed properly.

In addition, you must prevent disease bugs far from your valued crops.

How to Grow Onion Microgreens?

In the pandemic and lockdown, we all are staying indoors and have inculcated a habit of growing plants every day, and those plants when bloom look so good. Thus microgreen is one of the plants we can grow at the farm and house. We need to understand what a microgreen is and more details.

A microgreen is a seedling of any vegetable or herb. Microgreens are very healthy to eat as they remove many health issues.

There are many microgreens available such as Broccoli microgreen: Broccoli microgreens’ anti-inflammatory features will aid in the removal of toxins from the body. Broccoli microgreens are high in vitamin A, C, E, and K, as well as protein and calcium, as well as iron, magnesium, and phosphorus. To get the most out of this versatile green, add a handful of broccoli microgreens to your soup, smoothie, or sandwich. Broccoli microgreens seeds grow best in a soil-based medium and can be harvested after 8 to 10 days.

Radish microgreens: Radishes are a good way to start with microgreens. They germinate quickly (1 to 2 days) and grow swiftly in both warm and chilly environments. They’re usually ready to harvest in 5 to 10 days. Radish microgreens are strong in vitamin C, but they also have a wide range of vitamins and minerals. They also contain a significant quantity of protein. Radish microgreens do not require pre-soaking and prefer to be grown hydroponically, though they will grow in soil as well.

Growing Onion Microgreens at Home

One of the main being Onion microgreen Onion belongs to the family of Amaryllidaceae. Onion microgreens are simple to cultivate, but they take a long time to grow, especially if this is your first time. It will take between 12 and 21 days for these fresh greens to be ready to harvest. Onion microgreens contain Vitamins A, B, C and E, calcium, iron, zinc, phosphorus, magnesium, potassium and amino acids.

  • Flavor:    Savory, onion taste; garlic aftertaste
  • Soak:    Optional
  • Rinse/Drain:    No
  • Germination:    3-4 days
  • Ideal Harvest:    12 days

What do you need to grow onion microgreens?

  • Onion seeds of any variety
  • Container: at least two shallow containers, such as these, that can be poked with a hole.
  • Medium for growth: Coconut coir or Espoma seed starting mix
  • Light: The Agrobrite T5 grow light or natural sunlight 
  • Spray bottle
  • Shears for the kitchen

Though we talk about growing onion microgreens but do we know that they benefit us also in many ways:

  1. Microgreens help in boosting your immunity as the content of vitamins is high and also microgreens are nutritious and can be eaten raw.
  2. It also minimizes the risk of diseases such as heart disease, anemia, low cholesterol level and also controls our blood pressure level
  3. Researchers have also found that microgreens are one reason for not having constipation.
  4. For all those people who wear spectacles for eyes they should eat because it also improves and controls your eyesight number.

It’s not always necessary for you to buy microgreens from outside, if you are willing to grow onion microgreen at home you can follow these instructions:

Microgreens are simple to grow since they don’t require a lot of equipment or time.

They may be cultivated indoors or outdoors all year.

Also Read: How to Get Rid of Mold on Microgreens?

Materials required:

  • Seeds of good quality
  • An excellent growth medium, such as potting soil or homemade compost in a container. You may also use a single-use growth pad made particularly for producing microgreens.
  • Proper lighting — preferably 12–16 hours per day of sunshine or UV illumination

A method to grow at home:

  • Fill your container with soil, being careful not to over-compact it, and softly water it.
  • Spread the seed of your choice as evenly as possible on top of the soil.
  • Using a light mist of water, lightly spray the seeds and cover your container with a plastic lid.
  • Check your tray regularly and spray the seeds with water as needed to keep them wet.
  • Remove the plastic top after few days when seeds have sprouted to expose them to light.
  • While your microgreens grow and develop color, water once a day.
  • Your microgreens should be ready to harvest after 7–10 days.
  • Things to keep in mind while growing microgreens that you should choose seeds that have not been treated with any chemicals.
  • To guarantee that the microgreens develop successfully, use excellent quality, chemical-free soil.
  • Don’t overwater your microgreens, and make sure your container has drainage holes.
  • Climate is one thing to be kept in mind because some microgreens can grow in some temperatures and some cannot

How Actually Onion Microgreens are Grown?

#1. Soaking:

The seeds of onion are very small and generally, people don’t soak them before planting but a couple of hours soaked in water may help them germinate faster and the output will also be good.

#2. Planting

To begin, put several drainage holes in a growth tray and fill it nearly to the top with dirt. Wet the dirt with the spray bottle and pack it down. We’re all set to start sowing seeds!

Distribute your microgreens seeds evenly throughout the soil surface, including the tray’s corners (you may want to use a shaker bottle). The seeds should be in close proximity to one another. You must, however, guarantee that they are not contacting one other.

Onion seeds, when grown too close together, produce the ideal environment for fungal development in the soil. Instead of covering the seeds with dirt, leave them exposed. Give your onion seeds a nice spritz of water after planting to help them germinate, and then lay the second tray directly on top of them (right side up).

While pushing the onion seeds into the earth, this produces darkness for them to grow in. To guarantee that no light reaches the seeds, you can add up to 5 pounds of weight to the cover. When the onion microgreens begin to develop after germination, they will collectively push up the cover and weight.

#3. Growing

Keep your seeds in the dark for at least 3-4 days after they’ve been planted. During this period, they don’t require water. Remove the seed cover once the seeds have grown into seedlings and are yellow in colour. The sprouts may appear squashed at first, but in the light, they will rapidly rise (and turn green).

Directly beneath the grow light, place your onion microgreens. Because the shoots grow towards the light, we choose artificial light for indoor microgreen growth. The microgreens will develop unevenly if the trays are merely put on a windowsill. You’ll also be able to manage how much light the trays receive each day with a grow lamp (we recommend 8-12 hours).

#4. Harvesting

Onion microgreens have a longer harvest shelf life than most. You’ll be able to harvest in stages rather than all at once (though you can certainly do just one big harvest). However, keep in mind that the flavour of the microgreens will alter as they grow, so don’t wait too long.

As the onion microgreens grow, the tips of the microgreens may dry off. Harvest your onion microgreens when they reach 4 inches in height and begin to lean over (they’ll resemble unmowed grass). Clip the onion microgreens in bunches at least 12 inches above the soil surface with clean kitchen shears (or something similar).

Instead of growing from the top of the stem, onions grow from the bottom. This implies we’ll be able to get another crop out of the trays. Simply continue to care for the microgreens until they regenerate and may be picked once again.

#5. Storing

After harvesting the onion microgreens, don’t wash them until you’re ready to utilize them. As previously stated, the seed husks can be left on or removed from the onions. Whichever green you select, you’ll get a great onion taste with no effort (they won’t even make you weep when you cut them!).

Keep your microgreens, onion, or otherwise, in the fridge in a sealed container. They should last for up to a week if you put a paper towel in the bag to absorb any excess moisture.

This is your journey of growing onion microgreens.

How to Revive Dying String of Pearls?

String of pearls is a succulent plant that can quickly be grown indoors. String of pearls is named such due to its unique design of flowing out of the containers in tiny little green beads that resemble pearls.

String of pearls is a beautiful lush green plant that attracts the attention of everyone present in a room. It can be kept on the ground, windowsill, or hung in baskets. 

String of pearls is also known as a rosary string of beads due to its appearance. A stunning houseplant, a string of pearls is small, attractive, and carries a faint scent of cinnamon.

How to Revive Dying String of Pearls Plant?

A string of pearls plants, if healthy, appears as a succulent, green plant with tiny beads resembling pearls or peas. On the other hand, it will look off-kilter and dull if your plant is unhealthy or dying.

The beads of the Dying plant are not round and are misshapen, the color is a dull green, and the buds are asymmetrical, unlike the strings of a healthy plant.

It is easy to recognize whether a string of pearls plant is healthy or not by simply looking at it. A dying plant looks excessively different, dull, misshapen, and brown.

Also Read: Why are the Leaves Falling Off My Angel Wing Begonia?

Causes of a Dying String of Pearls Plant

Many reasons can cause a string of pearls plants to die, such as water problems, pests, too much sunlight, and many more. Let’s have a look at the various causes.

Pot is too big or too deep

If your pot is too big, the plant will stay wet for longer and eventually cause rotting. For example, string of pearls has narrow stems which are susceptible to rot.

Another reason for a dying plant could be that it is placed too deep in the pot. When it is set too deep, the plant receives too much soil. String of pearls plant doesn’t require too much mud, and if given, it will stay wet for more extended and cause rotting.

Also Read: How to Get Rid of Bugs on Jade Plants?

Overwatering or underwatering

The most common reason for any plant to die is watering issues. Both underwatering and overwatering restrict a plant’s proper access to water.

Over-watering water logs the plant, and the xylem is unable to absorb water for photosynthesis. Underwatering doesn’t give the roots enough water to manufacture food for themselves. 

During hot summer months, water these succulents once every week, and during colder months, cut down on watering by giving it water once every 10-14 days.

Strings of pearls plant is a little succulent plant that doesn’t require too much water, make sure that you don’t overwater it. If the plant looks shriveled, you might be underwatering it, so increase the water intake.

Also Read: Why Peace Lily Flower Turning Yellow, Brown or Black?

Too much or too little sunlight

String of pearls plants do not thrive in too much sunlight; it prefers light, filtered light. Therefore, during hot summer months, keep your plant away from harsh sunlight as it could lead to shriveling and eventual death.

Like humans, these delicate plants can get sunburned and wilt under the intense heat of the sun. 

While the string of pearls plant does not like too much sun, they also don’t thrive in too little light. Therefore, if kept indoors, one must choose a spot that gets enough sunlight or artificial light. 

Make sure to choose a good location for your plant- it should be too bright or too dull; moderation is appreciated.

Insects or pests 

Bugs, insects, and pests can also cause the death of your plant. Growth of mold, white spotting on the leaves, and the presence of honeydew; all point to insects or pests on your plant.

You should use natural insecticides or pesticides as soon as you spot something fishy. The internet is filled with recommendations for natural insecticides/pesticides, research, and well and timely add them to save your plant.

Wrong potting mix

Every plant has its specific soil needs; in the case of a string of pearls plant, well-draining soil must thrive. Therefore, make sure you use suitable soil for this thin-rooted plant.

If the soil is not well-drained, it will retain too much water and essentially accelerate its rotting process.

Also Read: How Much Sunlight Does Peace Lily Need?

How to Save a Dying String of Pearls Plant?

The first step in saving your plant is to recognize whether it needs saving or not. Next, look at your plant and check for dull, off-kilter buds, wet soil, shriveling, etc., to look for signs of dying.

If any of the symptoms mentioned above are present in your plant, it is most likely dying, and you must quickly do something to save it.

Knowing the cause 

The next important step is to gauge the reason behind the bad health of your string of pearls plant. Once again, look at the plant for tell-tale signs of why it is causing them to die.

Watering issues

Water problems are the most common reason behind the bad health of a dying string of pearls plant. Therefore, before taking any recourse towards the healing of your plant, check for water issues in your plant. 

If watering issues, both under watering and over watering, are causing the death of your plant, it can be salvaged. An overwatered plant’s soil is wet, damp, and sluggish.

An under-watered plant’s soil is dry, non-damp, and the buds appear to be fading. Check the dampness of the ground to gauge the cause correctly.

  • Replace your plant in an area with bright sunlight which falls on it indirectly so that it doesn’t receive too high a temperature
  • Ensure that the plant isn’t placed too near to the source of light/heat
  • Please place it in the vicinity of an air source like a fan to evaporate the excessive moisture.
  • The soil must be well-drained. Make sure the pot has drain holes, and if not, make them. Good drainage is a must.
  • Create a watering schedule. Water the plant once every week during summers and once 10-14 days during winters.
  • If you feel that the plant isn’t absorbing water properly, place the pot in a water basin for 15 minutes to properly moisten the soil.

Essentially the course of action you must take to save your dying plant would depend on the reason behind its bad health. Therefore, one must gauge the precise cause and then work towards rectifying it.

Conclusion 

String of pearls is an indoor, succulent plant that resembles pearls due to their resemblance to decadent pearls. They are beautiful in any surrounding and quickly draw everyone’s attention due to their unique design.

There are various causes behind a string of pearls plant death, including underwatering, overwatering, too much sun, too light sun, pot issues, pests, etc.

To save your dying plant, you must first gauge the proper reason behind its lousy health. Once the cause is found out, you can. Take the relative actions and save your plant. 

All the best!