
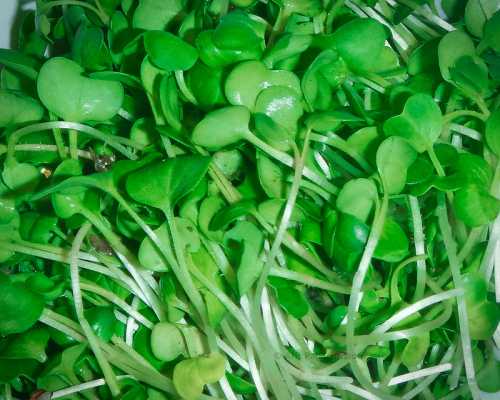
Radish microgreens are one of the most nutritious, healthy and tasty microgreens. They are a very popular microgreen plant that can be quickly grown and enjoyed at home.
Radish microgreens are grown from the same seed that produces the radish bulb or the red, conventional radishes we are used to. Microgreens have a slightly different method of growth.
For nutritionists, microgreens are loved for the plethora of micronutrients and other essential vitamins that they provide; chefs like them for the crunchy texture and spicy flavour they add to a dish, and plant enthusiasts love them for they are easy to grow.
Radish microgreens are easy to grow and take care of, making them a good candidate for first-time planters. Their seeds are easy to sow, raise and harvest. I’m here to tell you how to grow radish microgreens.
Also Read: Mold on Microgreens: How to Prevent them?
Benefits of Radish Microgreens
For our health, radish microgreens are a boon. They carry lots of essential nutrients in adequate quantities. Radish microgreens belong to the Brassicaceae family within microgreens.
Radish microgreens seeds sprout to grow microgreens that are tasty, healthy and nutritious.
For health enthusiasts, the vitamin value within these microgreens is the highlight, so let’s first have a look at its nutritional value-
#1 Vitamin B6 and Folate
Radish microgreens contain vitamin B6 and folate, which helps improve the cardiovascular system by breaking down homocysteine which deposits fats in the blood vessels.
The abundance of fat in the blood vessels can cause heart issues and brain haemorrhages.
#2 Cancer deterrent
Radish microgreens are an excellent cancer deterrent food because of the high levels of glucosinolate present in them.
Glucosinolate is high in antioxidants and wards off bacterial, viral and fungal infections.
#3 Good for weight loss
Due to the low-calorie value and high fiber content, radish microgreens are an excellent choice for weight loss. Radish microgreens are high in vitamin C that burns fat, and have a fulfilling effect on the stomach.
Add these in a salad or a sandwich and increase your portion size without substantially raising the calorie intake.
#4 Good for the skin
Radish microgreens also have sound effects on the skin. High vitamin C content in these microgreens brightens our skin, dulled by stress, age, pollution, sun, and more.
#5 Good for diabetics
A research study showed that radish microgreens increase glucose uptake of cells by 25-44%. This increase in glucose uptake prevents high sugar levels and helps in controlling sugar.
Also Read: How to Grow Pointed Gourds at Home?
Radish Microgreens V/S Radish Bulb
Both the microgreens and the bulb are grown from the same radish seeds. The nutritional values of the two are also almost the same; they differ only in terms of texture, flavour and variety.
While the bulb is chewy and big, the microgreens are tiny, crunchy, and have a spicy, peppery- taste. The microgreens present a new way to add nutrients with a varied taste and texture.
Unlike traditional radish, microgreens can be used in sales, sandwiches, and toast without the overpowering taste of radish.
How to Harvest Radish Microgreens?
Growing radish microgreens is a simple and easy process; thus, you can adeptly harvest radish microgreens irrespective of your experience in growing plants.
Radish microgreens are grown from the same seeds that produce the red radish bulb. Here are the steps you should take to grow radish microgreens within ten days.
Step 1
Choose a planting tray. You can use a plastic or glass potting tray or even Tupperware. Then, add a premium toting mix to the tray. Once decided, make holes at the bottom of the potting tray to allow water to be drawn up from below.
Make the soil even and compact both at the bottom and top of the potting tray.
Step 2
Using a spraying bottle to wet the soil. Allow the water to be soaked, and repeat the process. If the ground gets uneven at places, use your hands to press it down gently and even it up.
Step 3
The Next step is to sow the seeds. For radishes, one needs to plant about ten seeds per square inch; thus, for a 38 in² planting tree, one would require about 4.5 g of the seed. You can take the help of online calculators to know the number of seeds you should sow.
Using something like a shaker to sow the seeds will help in their even distribution, and thus healthier growth as each would have space to grow.
Step 4
Sprinkle the seeds in circles around the planting tray and try to spray them as evenly as possible. Once done, use your fingers to spread them away gently.
The seeds don’t need to be spaced perfectly; once the seeds start to grow, empty areas would be filled up independently.
Step 5
Use the spray bottle to water the seeds. Do not use too much water and ensure that the seeds don’t fly away. Water will help the seeds in settling down in the tray.
Step 6
Cover the tray. Covering the microgreen seeds to prevent light from falling on them is essential to growing microgreens. It is necessary to weigh down and blackout the seeds to ensure that they thrive.
Step 7
Leave the seeds for 2-3 days. The seeds will germinate and grow on their own; the cover on top of them will help retain moisture for this period.
Step 8
On the second or third day (preferably the third), remove the lid and check on the seeds. If the germination rate looks good and the roots are growing, you can allow them to receive light and increase.
However, if the germination rate doesn’t look good and the seedlings are tiny and are not adequately grown, check if the soil is dry, water it and cover it again for some time.
Step 9
Once the seeds germinate, it is time for them to receive light. At this point, it is best to let them receive as much light as possible, be it sunlight or artificial light in the form of LED, tube light and more.
If the soil looks dry, spray some water to wet the upper layer. Do not water the seeds anymore after this point on.
Step 10
Harvest the microgreens. After 8-10 days, the radish microgreens will be ready to harvest. When their length reaches 2.5 to 3 inches, you can harvest them.
To harvest them, tip the tray at a 45-degree angle and use a sharp knife or scissor to cut them off right above the soil surface.
Make sure that the soil surface isn’t disturbed. If some get split, just remove it from the microgreens by gently wiping them off. Cut off the amount you need at that time and let the others grow in the sun.
Also Read: How to Grow Chinese Cabbage from Cuttings?
How to Grow Radish Microgreens Hydroponically?
Growing crops hydroponically means that plants are grown without soil, using the mineral nutrient solution as a substitute. The pH level of water plays a vital role in this subset of horticulture.
Hydroponic farming uses something like a growing pad enriched with all the essential nutrients that are otherwise found in soil.
Here’s how to grow radish microgreens hydroponically
Step 1
Balance the pH of the water you will use to water the seeds. The best pH is 6; however, anywhere between 5.5 to 6.5 would do.
Step 2
Prep the trays by pouring two cups of pH balanced water into them. Ensure that the growing pad is saturated in water and move the water around gently to spread it evenly.
Step 3
Spread out the seeds on the saturated growing pad. Sprinkle them evenly or use a shaker. Since radish seeds are larger seeds, use about a quarter of a cup of seeds.
Step 4
Once seeds are spread, wet the growing pad with water and cover. Remember, a blackout is essential for roots to grow properly. Mist the pad every 12 hours.
Step 5
Uncover the tray after 4-5 days when germination is visible. Let it sit under the sun or bright artificial light.
Step 6
Check up on the seeds daily for a week, mist water when needed and provide ample light.
Step 7
Harvest the greens and enjoy!
Both the traditional method of using soil and the hydroponic method of using a growing pad grow lush, beautiful and tasty radish microgreens. Follow our steps and grow these nutritious greens now.