Are Worm Castings Good for Tomatoes?

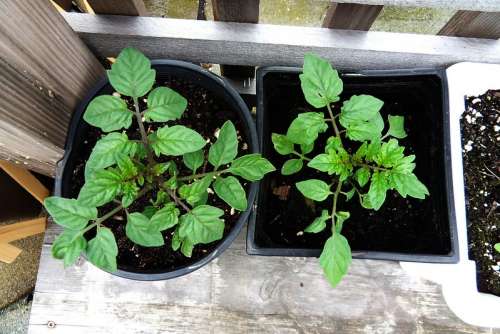
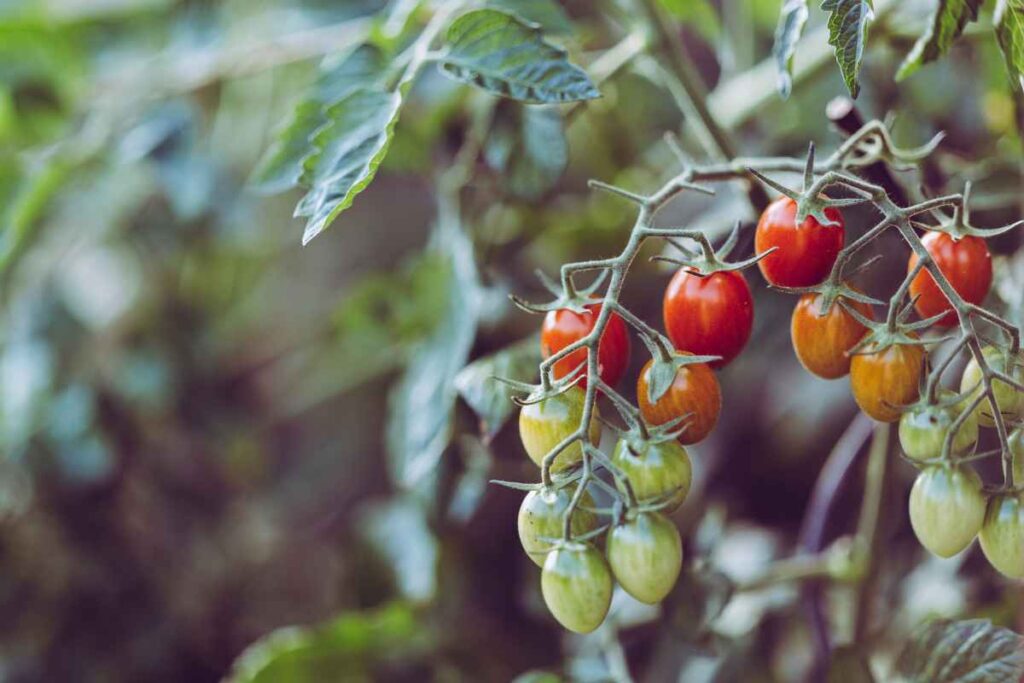
Are you a tomato lover looking for a natural and effective way to fertilize your plants? If so, you might have heard of worm castings – a nutrient-rich organic fertilizer that is gaining popularity among gardeners. But are worm castings good for tomatoes?

Yes, worm castings are really good for tomato plants. Worm castings are a natural and sustainable fertilizer made from the waste produced by earthworms. 

As earthworms consume organic matter, they break it down and release it in a form that is easily absorbed by plants. 

This process makes a nutrient-rich substance that is packed with vital minerals and microorganisms that help plants thrive well.

Nutrients in worm castings

Worm castings are natural essential nutrients that are crucial for plant growth and development. They contain high levels of nitrogen, phosphorus, and potassium referred to as the NPK ratio. In worm casting, the NPK is 5.5.3. These macronutrients are responsible for various functions in plants, such as leaf and stem growth, root development, and flower and fruit production.

Another key component of worm castings is the presence of beneficial microorganisms. These microorganisms help to break down organic matter and release nutrients in a form that is easily absorbed by plants. They also help to suppress harmful pathogens and pests, while promoting overall plant health.

By using worm castings as a natural fertilizer for your tomato plants, you can provide them with a rich source of nutrients that will help them thrive. The nutrients in worm castings are released slowly over time, providing a steady supply of nutrition to plants without the risk of over-fertilization.

Also Read: Is Wood Ash Good for Tomatoes?

Benefits of using worm castings for tomatoes

Worm castings are like a superfood for your soil and plants. They contain organic matter and beneficial microorganisms that can help improve the health and structure of your soil. 

That is essential for your plant because healthy soil means healthy roots and healthy roots mean healthy and productive tomato plants.

When you use worm castings as a natural fertilizer, you are also providing your tomato plants with a steady supply of nutrients. 

Unlike synthetic fertilizers that can be harmful to the environment and cause nutrient imbalances in plants, worm castings release nutrients slowly over time. 

This means that your plants have access to all the essential nutrients they need to grow strong, healthy, and productive.

Moreover, worm castings can also help protect your tomato plants from harmful pathogens and pests. The beneficial microorganisms present in worm castings can help to keep harmful bacteria and fungi away. 

Finally, using worm castings is a sustainable and eco-friendly option for fertilizing your tomato plants. Synthetic fertilizers can be harmful to the environment, but worm castings are all-natural and can help your plant grow well.

How to Use Worm Castings for Tomatoes?

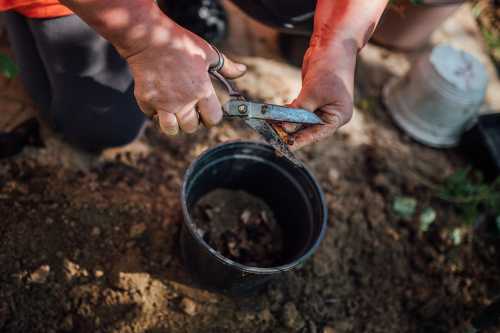
The first step is to make sure you have high-quality worm castings. You can buy them from a garden centre or online, or you can make your own by composting them with worms. Either way, make sure you are using fresh, well-composted worm castings for the best results.

The first way to use worm casting is to mix the castings into your soil before planting. This will help improve soil health and provide a natural source of nutrients for your tomato plants.

Another way to use worm castings for tomatoes is to create a worm-casting tea. This is a liquid fertilizer that can be applied to your tomato plants throughout the growing season.

To make worm-casting tea, simply steep a small amount of worm castings (about 1-2 cups) in a gallon of water for 24-48 hours. Once the tea is ready, strain out any solids and apply the liquid to the soil around your tomato plants. This will provide your plants with a quick boost of nutrients and help improve soil health.

You can also use worm castings as a top dressing for your tomato plants. Simply sprinkle a small amount of castings around the base of each plant. That will help release nutrients slowly over time and improve soil structure.

Finally, you can use worm castings to create a compost tea. This is similar to worm-casting tea, but you’ll also add other compostable materials to the mix. Compost tea can help provide your tomato plants with a range of nutrients and beneficial microorganisms, helping them grow strong and healthy.

Comparison with other fertilizers

First, let’s look at synthetic fertilizers. These are fertilizers that are chemically produced, and they can provide a quick boost of nutrients to your plants. 

However, synthetic fertilizers can also have some downsides. They can be harsh on your tomato plants and cause nutrient imbalances if you do not use them correctly.

Also, synthetic fertilizers do not contain organic matter or beneficial microorganisms, which are important for soil health and plant growth.

On the other hand, organic fertilizers are made from natural materials such as compost or manure. Like worm castings, they can help improve soil health and provide a slow release of nutrients to your tomato plants. 

However, not all organic fertilizers are created equal. Others, like compost, may not provide the complete range of nutrients that your tomato plants need to grow strong and healthy.

Worm castings are a great option for organic and natural fertilization. They contain a wide range of nutrients that your tomato plants need, including nitrogen, phosphorus, and potassium. 

Moreover, worm castings are easy to use and apply. You can mix them into the soil, create a tea or top dressing, or add them to your compost pile. And, because they are all-natural, you can feel good about using them in your garden without harming the environment.

How to make your own worm castings

Here’s how you can make your own worm castings – 

Step 1: Get a worm bin. 

You can purchase a worm bin or make your own using a container with a lid. Make sure the bin is big enough to hold your kitchen scraps and worms.

Step 2: Add bedding. 

Worms need bedding to live in, and shredded newspaper or cardboard works great. Wet the bedding and fluff it up to create an airy environment for your worms.

Step 3: Add your worms. 

You can purchase red wiggler worms from a garden shop or online. Add them to your bin and cover them with bedding.

Step 4: Feed your worms. 

Your worms will eat kitchen scraps like fruit and vegetable peels, coffee grounds, and eggshells. Avoid adding meat or dairy products as they can attract pests and smell bad.

Step 5: Harvest your worm castings. 

Your worms will turn your kitchen scraps into nutrient-rich worm castings over time. You can harvest them by separating them from the bedding. Store your worm castings in a dry, cool place until you’re ready to use them.

Conclusion

Using worm castings for your tomato plants can be a great way to provide them with the nutrients they need to grow strong and healthy. Worm castings are rich in nutrients, easy to use, and help improve soil health. Plus, they’re an all-natural and environmentally friendly option.

Whether you’re a beginner or an experienced gardener, using worm castings can be a great addition to your gardening routine. You can purchase them online or at a gardening store, or even make your own using a worm bin. 

Is Wood Ash Good for Tomatoes?

Yes, wood ash is safe to use on tomatoes. Tomatoes are by far the most commonly grown vegetable in gardening. Tomatoes are grown for their taste and to enjoy gardening. Some even participate in competitions and take pride in a bountiful harvest.

Is wood ash good for tomato plants?

Wood Ashes are a good option for the tomato plant since they promote fertility. Wood ash is high in potassium, often known as potash, which is an important mineral for plants. Ash may be seen as a leftover of burned material, and as the ash looks useless.

In reality, plants can benefit from using ash as they like potassium, which can be found in wood ashes. You have the option of composting it first or spreading it around the bottom of the tomato plant. Therefore, the ideal way to feed wood ashes to tomatoes is to make ‘tea’ for the plants.

Wood ash is a relatively strong tomato fertilizer, significantly increasing growth of the tomato plant and tomato output compared to untreated plants and nearly able to keep up with traditional fertilizer.

The most essential thing to remember about this is that ‘wood-ash’ must be handled carefully.

Never use hot wood ash in the plant since it is hazardous to your fragile plants and might spark a fire. As a result, always set aside to cool appropriately before using it. And, of course, while working with wood ash, you should always use some form of protection.

Also Read: How to Use Banana Peels for Cucumber Plants?

Uses of Wood Ash in Your Tomato Garden

You can easily use wood ashes to enrich plant-soil if you have a fireplace or woodstove! Wood ash is rich in nutrients and phosphorus, making it ideal for use in the vegetable garden. But it’s also crucial to know the helpful uses of wood ash.

Fertilizers

Wood ash has a variety of nutrients that the tomatoes will indeed be ready to extract. The amounts of these nutrients can fluctuate depending on whether you burn hardwood or softwood. Some claim that hardwood contains more minerals than softwood.

Whatever you use, it will most likely be high in nutrients and minerals such as potassium, magnesium, and calcium.

Calcium is not just used to maintain your tomatoes healthy, but it also eliminates blossom end rot.

Potassium is considerably more important. This vitamin boosts yield, which is always an advantage. Potassium is more important than calcium in the overall well-being of the tomato. Low potassium levels in your soil cause Blotchy ripening of tomatoes and an increased risk of yellow patches.

Magnesium is another essential mineral for maintaining tomato plant leaves robust and green so they can continue to absorb sunlight. Yellowed, curled leaves are generally an indication that your soil is deficient in magnesium.

Adding wood ash to your tomatoes improves your chances of having healthy tomato plants. It helps to enhance the size and quantity of the plant.

A study states that, adding wood ash for tomato plant will help to increase the yield, fruit size and overall health of the plant.

Also Read: How Often to Water Green Onions?

Compost Heap with Wood Ash

Since wood ash is alkaline, it may aid in reducing the acidity of a compost heap. This optimizes the environment of composting worms and produces compost that is ideal for mulching around veggies.

Add a single layer of wood ash to the compost heap, once in a week and should be used only every six inches.

Always add cooled and dry ash into the heap, along with all the other essential ingredients.

For active or heated compost heaps, once a month is advised in summer or spring. But the ash and debris to cold or infrequently used compost piles.

Wood Ash for Soil pH

Tomatoes are some of the plants which need nutrients frequently to grow properly. And they are also the plants that are sensitive about their soil requirements. Not only that, but pH is a soil condition equally as significant as nutrient richness.

Tomatoes prefer acidic soil with a pH of less than 7. Too alkaline or acidic soil has a harmful impact on nutrient levels. If you see that the tomato appears Blotchy, check the pH of the soil. If it’s less than 6, your soil has become too acidic for the tomatoes to excel.

Most veggies need a pH range of 6.5 to 7.0. If the pH of your soil is less than 6.5, forks or rake wood ash to help boost it. To determine the pH of your soil, use an affordable test kit.

In terms of acid neutralization, wood ash is roughly half as efficient as lime. As a rule of thumb, spread about two ounces of ash per square yard. Wear gloves to protect your hands and do this on a calm winter day.

Root vegetables, such as cabbage and Brussels sprouts, grow in acidic soils. Apply wood ash before seeding in the winter or in actively developing plants.

Because wood ash is strong in potassium, which promotes blooming and fruiting, it’s perfect for usage around most fruit trees and fruiting veggies like tomatoes.

Take precautions when applying wood ash near plants that demand acidic soil, such as blueberries. It should not come into contact with seedlings or be used on potato beds since alkaline soil promotes potato scab.

To turn the soil sufficiently acidic for most other crops, you’d need to use a lot of wood ash, but it really is worth re-testing the soil’s pH every two years to ensure it doesn’t go beyond 7.5.

Repellent for Pests

If bugs and a few other insects bother you, you’re in luck. Wood ash is quite effective in repelling these nasty bugs. Snails, slugs, or a few soft-bodied insects, such as aphids, are repelled by the salt in the ash.

Unfortunately, the repellent characteristic of wood ash is rendered obsolete once wet. Later in the day, sprinkle your dry, cold wood ash all around the base of your plants. To avoid any undesirable harm, avoid getting the ashes on the stems and leaves of the tomato plant. However, the repellent characteristic of wood ash is rendered useless when wet.

Mulching

You may want to keep your soils wet, particularly during dry seasons. The most efficient method is mulching because it allows for the gentle release of nutrients into the soil and the avoidance of moisture evaporation surrounding the plants.

You can safely use wood ash to cover your garden plants and fruit trees. However, avoid applying ash on plants that thrive in acidic soil, such as raspberries and blueberries.

Inhibit weed growth

Wood ashes can also be used to inhibit weed plant growth. Wood ashes have been found to be effective in promoting plant development.

Still, they can be used to eradicate one of the plant’s biggest enemies: weeds, which take the nutrients and minerals which you spread in the garden in the form of fertilizers, and because of this the tomato plant will be unable to take the proper minerals and nutrients causing the tomato plant to become blotchy. It has been found that excessive wood ash elevates the pH of the soil, making it even more alkaline.

However, if you use too much wood ash to kill weeds, you may end up with a barren garden; hence, use wood ash with precaution. To use wood ash to kill weeds, spread a thick layer of ash to the sections of the garden where you want to inhibit weed growth, but just don’t mix it in.It is a highly effective method of using wood ash. However, just a small amount should be used.

How to Prepare the Soil for Tomato Plants?

Dig compost or manure thoroughly into the beds of soil to prepare the garden for tomatoes. When replenishing soil in the spring, apply old or composted manure.

Do this in a three-foot-diameter-by-two-foot-deep area, keeping in mind that roots will spread out and down.

How do you add nutrients to the soil before planting tomatoes?

Compost and green manure are helpful to add nutrients for tomatoes and many other plants. Compost improves soil fertility and adds basic nutrients. All year round, composted manure offers nutrients and the manure that has been composted also helps plants in getting nutrients throughout the growing season.

Tips for Using Wood Ash for Tomatoes

Safety concerns

Since wood ashes are alkaline and have a high pH value, you should use protective eyewear, gloves, and a face shield. Avoid spreading them in the wind as well.

Using only wood ash

Always make sure to not use ash from the combustion of rubber, cardboard, coals, or painted or colored wood. These materials may contain hazardous compounds.

Do not use wood ash during seeding

Try not to use wood ash during the seeding process as wood ash contains too many salts, affecting the growth of plants.

Appropriate application

The maximum recommended application is 3 pounds per 100 square feet of the soil surface in a single season.

Homemade fertilizer for tomatoes

Five pounds of ashes should be placed in a breathable fabric or jute bag, tied securely, and soaked in 200-litre water.

Allow it to settle for four days before pouring a cupful over the tomato plants. Use this once a week until they begin to blossom.

Storing Wood Ash

To minimize nutrient loss, wood ashes that are not immediately applied to your plants should be kept in a dry place. Ashes placed outside lose most of their potassium in a year due to rain leaching.

Ripen on the vine

Tomatoes can ripen if harvested after they begin to turn pink. They can taste nearly as nice if taken early and placed inside to mature as if they had ripened on the vine. However, the temperature is essential. Tomatoes taste best if harvested early and matured at room temp when outside night temperatures drop below 60o F in late summer and autumn. They do not have to be placed on a window ledge.

Proper site

Tomatoes need a lot of sunlight. Thus they need to be in direct sunlight for at least 6 to 8 hours of direct sunshine. You may plant them in partial shade, but the yields and taste will not be as good as other tomatoes.

Conclusion

Can I use wood ash for tomato plants? Yes, potassium or potash present in wood ash will benefit tomato crop to increase the yield and size of tomatoes.

How to Use Banana Peels for Cucumber Plants?

Peels of bananas are excellent for the plants you have, at least this is according to the internet. You can put some of them in the soil at the bottom when you plant roses. They can be added to water and allowed to sit for several days to make a tea made from banana peels, an excellent fertilizer for indoor plants like cucumbers.

Dry them to an opaque leather, then crush them into the banana skin powder, which is fantastic for gardening. I’ve even come across a website that has fertilizer spray from these.

The consumption of banana peels is popular and has been reported to have numerous health benefits and may even improve the appearance of teeth.

Let’s look at the real-world benefits of fruit peels for plants. Are they more beneficial than an additional source of organic matter? 

Banana Peels for Plants – The Claims

This blog began after watching a YouTube video claiming banana peels had an NPK range of between 0-25 and 42.

If you come across claims like this, it’s imperative to give them an initial sniff test for real. Does it sound reasonable? Does it appear plausible? If not, make a run for the hills, as other advice is questionable.

A banana peel is a part of the plant. A plant requires protein for its function. All living creatures require it. Protein is nitrogen-containing. The zero number for nitrogen is completely absurd. There is no living thing, and any plant material has a nitrogen content of zero.

All living things contain water, and they are a great water source. Humans are mostly water, like plants. If a banana is composed of 80% water, how could the potassium content be at 42 percent? This is about 80 percent.

If you didn’t even know the 80% moisture level, The above NPK number suggests that 67% or 1/3 of the banana peel is potash and phosphate. Does this make any sense? NO!

It’s not the only website that claims that the potassium level was 42. That is absurd.

Also Read: How Often to Water Green Onions?

The Question to Ask

Organic matter of all kinds is beneficial for soils and plants. They all serve as the plant with carbon and nutrients as organic matter is decomposed.

The key question is: are banana peels healthier than other organic matter. Are they able to provide unique beneficial chemical compounds? If so, then they could be Superfood for plants.

Vague Claims for Banana Peels

Do a little Googling, and you’ll find various claims that state that banana peels are of “high” nutritional value. There are even claims that peels have more nutritional value than fruit. It sounds plausible, but you might have observed that there aren’t any numbers in these assertions.

What does “high” mean? What is the highest value relative to other organic things? They are just clever words that attempt to make you believe in fiction without any numbers. 

Dry or Wet Weight?

When numbers are given, there’s an issue in the data. Does this come from dry or wet weight? If someone claims that banana peel contains 42 percent potassium, is it an average wet or dry peel? This is an important point because most of a banana’s peel’s contents are water.

Chemists circumvent this issue by declaring chemical content in dry weights. However, many sources use the numbers and, if they attempt to find them and then report them as wet weights, that overstates the value by an enormous amount.

Are Bananas High in Potassium?

Actually, not really. Bananas are higher in potassium than other foods like meat and grains. However, all vegetables and fruits contain more potassium, “there is nothing unique about bananas. Potatoes, tomatoes and beets are also rich in potassium and are often higher in potassium than the average banana.”

One cup of chocolate milk has the same quantity of potassium as the banana.

Magical Properties of Banana Peels

There are also a few vague claims about the other substances in banana peels, which may benefit plants. However, I could find none of them which could be examined.

There is a myriad of assertions for the health of our bodies, which include things like antioxidants. However, an examination of the facts at the research shows that the evidence isn’t in place for the advantages of these substances, at least not yet.

Banana peels are another source of organic matter from plants.

Banana Peel Tea

Some suggest steeping the banana’s peels into the water by using hot water or simply letting them rest for some time in the sunlight. You might be interested to know about sunlight need for your cucumber plant.

There is only a small amount of decomposition throughout this process. This implies that the bulk of the nutrients are kept inside the peels.

Potassium is absorbed from organic matter faster because it isn’t chemically bound. Banana peels have higher levels of potassium. So tea may add potassium, but it’s not much else.

Beware of scams made by the tea-related assertions for plants.

Banana Peels for Roses

It’s a popular tip. Put some banana peels into the hole before planting roses. Some choose to cut them into tiny pieces.

Why only roses? Wouldn’t it be the best advice for any plant if this were good advice? Perhaps it’s because people love bananas and roses? Or is it garlic?

The banana peels rot, and they transform into black-white mush. Is it hard to imagine this as a good idea for young roots?

Look at the NPK. It’s extremely high in potassium concerning nitrogen and phosphate. This isn’t a great combination for plants. To make up for this, some people use eggshells! We’re aware that eggshells won’t break down in most soils. How can including calcium help balance the issue?

The idea was probably born out of the belief that bananas contain an extremely high potassium level and the widespread belief that potassium can stimulate roots, which isn’t the case. Based on this false information, is it logical that the peels of bananas are good for roots and roses on flowers?

This is an absurd idea.

Bury Them Around Plants

If you do not include them in the planter, dig your roses’ soil, add the peels, and fill them in with soil. The roots grow on the top couple of inches of soil. Digging around the roots of the shrubs is not a wise idea.

Also Read: How to: Growing Leeks from Scraps?

Few Important Cucumber Plant Caring Tips

With numerous advantages, why not test this for yourself? Here are the steps you’ll need to start in cultivating cucumbers vertically.

Choosing the Container:

The first step is to choose the proper container. The container should support the vines of the plant and the support beams or trellises. So, choose one that is deep enough. A container that is 12-14 inches deep can be used.

Plant Support:

It’s time to pick the appropriate foundation for this plant. It is possible to purchase fencing made of wire mesh, trellis, or even garden nets. Be sure the support is between 5 and 6 feet high, and it is about 6 inches over the soil. This will allow you to have enough room to grow comfortably and to weed the plants as needed.

Get Planting:

It’s now time to start planting! Plant the garden about eight inches deep, and then place it over with healthy compost. After that, adjust the trellis and support once more and if needed. After that, you can place the cucumber seeds approximately 1 inch deep in the soil. Allow each row 10-12 inches to spread out. Then, sprinkle the seeds with mulch.

Helping plants expand:

When the plant starts to sprout, you’ll need to aid it by growing around the support beam. Assist the tendrils in curving around the beam of support gently. If you believe that the vines may require more support, you could tie their support to it until they’re used to the idea of growing that way. Make sure your knots don’t get too tight, and there’s enough space for plants to develop.

Watering Cucumbers:

Also, ensure that you water the plant often to keep the soil damp. If you reside in an extremely dry area, you should take extra care to make sure that the plant doesn’t die. Keep adding mulch as the plant grows but be careful not to over-fertilize.

What Should You Do With Banana Peels?

The banana peels could contain a psychoactive substance, and inhaling them can cause a “high” or a feeling of relaxation. It could be an old myth connected to the song of the same name from 1966, “Mellow Yellow” by Donovan.

Some consume them as an edible dessert or smoothie drink, which is fine. Vegan food blogger’s recipe calls for the banana peel to make a ‘pulled pork substitute.’ I do not think so!

Banana peels are another kind of organic matter made from plants.

Incorporate them into the compost pile or scatter them on the ground to be decomposed. They can improve the quality of the soil and the plants; however, they’re not superfoods.

Do not get enticed by all the bizarre ideas available on the internet. If you enjoyed this article, please share this post with your friends.

How Much Sunlight Does Snake Plant Need?

It is a flowering plant called Dracaena trifasciata; people usually call this plant using the nickname the snake plant. The native place for snake plants is in tropical West Africa from east of Nigeria. People can also doubt how much sunlight does a snake plant need?

If you’re a plant owner and looking for basic details to grow your plant in good condition, this article is for you. The key success of a plant is knowing the nutrition water cycle of a plant. But have you ever heard about a plant that can tolerate many drawbacks that many plants do not have?

If the answer is no and if you’re looking for a plant that can survive for a long time, then the snake plant can help. This plant can survive with a very small amount of water, and the most common type of snake plant is the golden-edged green snake plant which stands straight and grows long.

This variant is the most common type of snake plant seen in restaurants, function halls, receptions, and more places that need some decoration. Some variants also have short and triangular leaves, but the tall variant is more popular than both plants.

How Much Sunlight Does A Snake Plant Need?

In general, this plant can tolerate all the lighting conditions, and it can even thrive well in darkness. When we speak about direct sunlight, it can grow well even in this condition, but people have to look for the signs of burning because most plants can burn in excessive sunlight.

However, this plant is thick, extreme heat and light from direct sunlight can make them burn, and it will also destroy the whole plant.

If you purchase a plant, then place this plant in direct sunlight and watch the signs of the plant to know the exact details.

Usually, if your plant is allergic to direct sunlight, people can see some changes; basically, it will change to pale yellow, brown, or some strange colors. This sign shows that you have to move your plant to indirect sunlight to maintain it in good condition.

Also Read: How Much Sunlight Does Peace Lily Need?

If the snake plant is already burnt and if you find some leaves in a damaged condition, there is no need to worry because the plant is hard, and it can make the plants achieve growth in some time.

Just add some extra nutrients to make your plant regain its energy and make the leaves grow back.

These plants are indestructible and can grow well in moderate conditions, and these plants can even thrive well in very bad conditions.

People who leave their plant for a long time can prefer to purchase this plant. Place the plant in perfect lighting conditions after thorough research because it is a must to make your plant achieve good growth.

Can A Snake Plant Survive Without Sunlight?

Snake plants need a minimum of five hours a day to be kept in indirect sunlight, so by doing this, the mild light will help them generate new food for themselves.

As snake plants are very thick, they can survive even in very low lighting conditions. It can be hung on walls, placed on a desk near a window, or it can also be placed in places where there is low light.

Some plants will not get sufficient growth if placed in indirect sunlight, but these plants are born hard and can survive in any lighting conditions.

Without getting even a small amount of sunlight, none of the plants in this universe can survive, because the sunlight provides them the required energy and helps them regenerate damaged leaves, produce food, and it also helps plants in photosynthesis.

Check this article: How to Revive a Dying Pothos Plant?

So, even snake plants need a small amount of sunlight for survival.

In this plant, the origin of the mother plant decides the amount of light that is needed to grow the plant so people can just have a look at this plant after leaving them in sunlight for some time so if your plant leaves stretch in that condition, then you can move the plant near the sunlight to make them grow more.

Don’t just place your plant before confirming the growth because some plants may be allergic to direct sunlight, and because of this, leaves may burn.

Without sunlight, a snake plant can survive for a very short time, and after some time, this plant will require some light to grow, so in short, no, the plant can grow without sunlight.

Because of its easy-going nature, this plant can be placed in almost all the rooms where there will be very low light but never place them in the dark because it may kill your plant completely.

These plants can be placed ten feet away from windows, especially from west or south facing windows, so people can do this for sunlight, which can help snake plants grow well.

Another important point is that every plant may need sunlight but not excessive light, so people who prefer to have a plant can place them in indirect sunlight for achieving some light, and it can also avoid the danger of burning leaves.

These variants are best for purifying air, so people who prefer to place a plant for getting some fresh air then snake plants can help. Usually, people prefer to place this plant in places they use the most to make it fresh and add some beauty.

Fitting this plant into the right place requires some patience to keep the plant in one area and wait for some time to review the improvements. After this, people can easily decide where to keep the plant to achieve maximum growth depending upon the results.

If you want to place your snake plant in a dark room, then you can rotate the place regularly. If people cannot rotate the plant, they can switch on artificial light for a few hours, but this method is not proven yet, so people can prefer placing them in sunlight for a few hours. If you change your place regularly, it will eventually provide some sunlight to enhance growth.

Also Read: Can I Put My Dracaena Outside?

To water your plant, it is necessary to test the soil before watering it.

Just place a paper or a stick into the soil, and if it is moist, it will stick, and if it is dry, then the soil will not stick, so if the soil is moist, just leave them for a couple of days and water them after it becomes dry.

People can also remember the fact that this plant can thrive well without water for many days. This plant is from humid and dry areas, so people may doubt the moisture content.

As it is a stiff plant, overwatering cannot affect this plant, but making the plant misty can affect the growth and may even damage its roots. But the fact is that overwatering can make your plant misty, and it can also be a reason for the death of your snake plant.

Check your soil before watering it. Snake plants can be grown well with compact soils, allowing excessive air and water to flow into the soil.

Soil is the main factor for maintaining the plant in good condition, so to make your plant grow well, change it every year and fill them with nutrients.

Another similar plant variant, which is very strong, is the mother-in-law tongue plant. This variant is also a less maintenance plant, and because of this reason, many people prefer to purchase and grow this variant.

This plant originates from west Africa. Because of the resemblance, people tend to confuse it with snake plants; both look similar, so we have listed some basic details about the mother-in-law tongue variant.

Also Read: Coffee Grounds for Pothos: How to Use?

How Much Sun Does A Mother In Law Tongue Need?

Mother-in-law variant can thrive well in good lighting conditions, and it can also tolerate high sunlight. It can also be placed in outdoor conditions, which will let them achieve maximum sunlight.

Never leave this plant in the dark because the growth achieved is directly connected to the sunlight, and if the lighting conditions are not good, then you will be in a situation of losing your plant. The average temperature for this plant is 16 degrees to 27 degrees celsius, which prefers to grow in hot and warm temperatures.

Final words:

We have seen some common tips for growing a snake plant in good condition, so for growing a snake plant and mother-in-law tongue plant, sunlight is the must, and people can place them in moderate lighting conditions.

Every plant has some uniqueness, and people can follow that to achieve maximum growth. Both the variants look similar, and some points will be the same for the growth and development of the plant, so people can follow the same for achieving great appearance and growth for both the variants.

Plant owners must remember one thing before watering the plant, excessive water or moisture content in soil can make your plant decay and it will make the roots weak. So water your plants at the right time with the perfect quantity to maintain them in good condition.

Peperomia Leaves Turning Black or Brown

If you have a backyard or are fond of creating a house garden, then you must have definitely heard of the peperomia plant. Chances are, you might be thinking of growing these plants by yourself, or even better, you have already started with the process.

As appealing as it sounds, growing beautiful peperomia leaves require much more assistance than it requires growing any other plant. Over time, you might also be presented with the problem of peperomia leaves turning black or peperomia leaves turning brown.

But don’t worry, we have got you covered! In the following article we discuss everything about peperomia leaves, how to grow and take proper care of them, while putting special emphasis on the lush green leaves turning black or brown. Without any further ado, let’s get started!

Why Are My Peperomia Leaves Turning Black or Brown?

Overwatering or Underwatering

Overwatering or underwatering can lead to the leaves of the Peperomia plant to turn black or brown. It is important to know the appropriate water requirements of your plant before you start watering them. Scroll through to read the solution.

Drainage problem

Too wet soil causes problems to the growth conditions of peperomia plants, thereby having an immediate effect on the colour of their leaves. Root rot is one of the main causes of poor drainage systems.

Also Read: Why are Dracaena Leaves Turning Yellow and Brown?

Fertilization

Over fertilization and using a lot of additives is another common factor that contributes to peperomia leaves turning balck or brown. It may come as a surprise to some people that fertilizing more than the required amount can do more harm than any good, but it is true and we have a solution ready for this.

Humidity and Temperature

If you see your peperomia plant leaves turning black or brown all of a sudden, one cause can be sudden changes in the temperature and humidity levels. Peperomia plants are natives of the tropic region, therefore they expect conditions like light, humidity, and temperature to be replicated wherever they are kept. If they are exposed to winters or a cold weather, they turn brownish or black entirely.

Inappropriate lighting conditions

Bright and indirect light is often the only thing that Peperomia leaves need to survive. They can do well if they receive bright sunlight at all times of the day. However, it is important to note that direct sunlight can have a drastic effect on the health of these plants. They can cause leaf burns, the earliest signs of which re brown leaf edges.

Also Read: Why Prayer Plant Leaves Turning Yellow?

Wrong Potting mixture

The Peperomia plants are very specific about the type of potting mixture they prefer. They cannot do well if they are kept in unhealthy and unclean soil for long. It tends to clog the soil pores, making it hard for excess water to drain. This in turn can cause discolouration of leaves, often visible to us as black or brown peperomia leaves.

Pests and Diseases

Peperomia plants are beautiful and super attractive. As a result, the leaves become vulnerable to pests and other infections. When pests feed on the leaves, they suck the juice, rendering these leaves black or brown. Aphids, thrips, whiteflies, and scale bugs are some of the common pests present on peperomia leaves.

Perpetuating black spots

Witnessing black spots on your peperomia leaves can both be a cause and a consequence of your leaves turning brown or black. Usually, black spots are caused by underlying diseases like Cercospora leaf spot, Phyllosticta leaf spot, or Rhizoctonia leaf spot and can eventually result in the entire leaf to turn black.

Also Read: Why Chinese Money Plant (Pilea) Losing Leaves?

How to Prevent Peperomia Leaves Turning Black or Brown?

The aforementioned causes can be treated if identification is done at the right time. With the right intervention strategies your Peperomia plants can be recovered. Here are all of them:

Accurate watering conditions

Dug your finger into the soil, if the first few inches are dry, water them thoroughly, but if the soil sticks to your finger, keep away from watering for a few weeks atleast.

Providing the right drainage conditions

To improve the drainage conditions of your plant, start by creating pot holes in the container and adding peat moss to your split. This will ensure that the excess water drains off. While it is important for your soil to become moist, it is also important that it supports drainage. 

What is the right Fertilization Quantity

First things first, do not take out or buy new fertilizer sprays until and unless you are close to the growth season. Next, to avoid the strong effects of fertilizer sprays, you can dilute them with water and see how your plant responds to water soluble fertilizers. Give your plant some time and witness its response before jumping to conclusions.

Fixing the humidity and temperature

18 to 25 degrees celsius is the ideal temperature to place your Peperomia plants. Neither too hot, nor too cold. The good news is, if you realise your mistake and immediately shift them to warmer places, they can revive and stay healthy ever after. To solve the issue of humidity, you can install a humidifier to keep high humidity levels around your plant.

Also Read: Why Are My Fern Leaves Turning Brown?

Giving the right light

The most desirable option for peperomia plants to receive the ideal lighting conditions is if they are kept at a place that gets neither direct nor too low sunlight. You can find such a place indoors, perhaps near a window. If a window sounds right to you, make sure to place the plant in any direction except South.

Correcting the soil type

You can get the right potting mixture by applying a handful of ways. The first and most simple is to add peat moss to your potting mixture to encourage good drainage facility.

Another method is to repot your plant into a pot that has a healthy bed of potting mixture and promotes growth of the plant. Do not keep the old soil for long, instead keep replacing it with brand new soil every now and then to keep the free and away from pathogens.

Getting rid of the pests

Treating your plant is one thing, cutting them off and getting rid of them is another. In the process of removing pests, you have to combine both these approaches and create one efficient strategy.

If the insects are prevalent on your plant leaves, dip cotton swab in alcohol and gently rub it over the spots. Insecticidal sprays can also be used if the pests have formed a cluster or are hard to remove.

Read this article: Why is My Croton Dropping Leaves?

Treating black spots

It is very easy to identify lack spots on green leaves, and for this reason, it is also very important that you take immediate action after identifying these spots or they may cause havoc on your plant.

To get rid of these spots, it is important to get your hands on products containing chlorothalonil, myclobutanil, or thiophanate-methyl. Next, you have to spray or apply them with cotton on the affected areas. If the spots don’t go away in a couple of days, prune them and destroy them to keep the infection from spreading further.

Peperomia Plant Care Tips

Once you have recovered your peperomia plant leaves back to their normal colour, it is important to take care of them to enable normal functioning. Here are some tips on how you can do so. Moreover, these tips can also help you to keep your peperomia plant safe and healthy in standard time. Let us see what they are:

  • Never put your peperomia plant under direct sunlight. Exposing them to direct sunlight causes the leaves to burn, making them brown at the edges, eventually making the effect similar to the entire leaf.
  • While direct sunlight is not the right option, an alternative can be to keep them under indirect but bright sunlight. Immediately shifting them to damp and darker conditions can make it difficult for them to adjust and sustain in the longer run. It is important to make the change slowly, one thing at a time. You can start by shifting them indoors but not completely devoiding them of natural light.
  • The potting mixture that one chooses for growing peperomia should supplement its nutritional needs and should ensure a proper drainage facility. Regular spotting is also encouraged to complement the drainage needs of the potting mixture.
  • Additionally, one can either buy a commercially available orchid potting mixture or mix a handful of vermiculite or peat moss to normal soil.
  • Give special attention to the size and material of the container in which you are placing your plant. A container or pot that is too big or too small in size can interfere with the growth of your peperomia plant. Often with a pot that is reduced in size stunts the growth of the roots and thereby the plant.
  • In addition, if you transplant your houseplants, stop doing that as the peperomia plants do not like it at all, and might even backfire by giving less or no growth.
  • Peperomia plants, just like any other plant, require a sufficient amount of water to grow, but the amount needs to be identified by you prior to waiting for them. Overwatering peperomia plants can be hazardous for them, causing root rot, and even their death. Keep a gap of a week or two before watering your plants thoroughly, or touch the surface of the soil to get a clearer picture.
  • Do not expose them to extremely windy or cold temperatures in one go. It is not appreciated in the case of peperomia plants. They are natives of the tropic region and always seek out humid and warm conditions to not only survive, but thrive.
  • If the leaves of your peperomia plants start turning yellow, it is an early indication that they are not placed in the right temperature or humid conditions.
  • When you are spraying your peperomia plants with a fungicide, make sure to keep the nozzle of the tank very close to the ground. It ensures that the fungicide spray passes through the soil easily and cures the problem of root rot.

Remember that this method only works if root rot is caused by the presence of a fungus. In cases of overwatering, fungicide will not be of any use.

Conclusion

Given all the causes, solutions, and additional tips, it is very obvious that the Peperomia leaves are one of the easiest houseplants to grow. They do not present with special problems, and even if they do, it is rare and can be treated immediately. The care and solution tips are very similar to those of your regular houseplants, so you don’t really have to go an extra mile to make things work with Peperomia plants.

If you are still worried about the black and brown colour of the Peperomia leaves, you can either try the solutions one by one, or in an integrated manner to know what suits your plant the best. Remember, do not initiate experiments on your plant and remain patient for the results. Happy gardening!

How Often Should You Water a Spider Plant?

Spider plants are one of the most looked after plants when it comes to choosing flexible and forgiving houseplants. They add aesthetics and unique greenery to your living room or your backyard and do not demand much in return.

However, if you are a newbie or do not know much about spider plants, certain doubts may arise time and again. “How often do you water a spider plant” is one of the many doubts faced by people growing spider plants in their premises.

If you are one such person, we have got your back! In the following article, we would discuss everything about watering spider plants, keeping them indoors, taking care of them in day to day situations, and much more! Without further ado, let us begin.

How Often to Water Spider Plant Indoors: Do’s & Don’ts

If you have decided to plant spider plants in your house, all by yourself, and you do not have a green thumb, do not worry. The watering requirements of spider plants are different from other houseplants, but at the same time, they give you plenty of room to get back on the right track, that is, if you witness the problem within the right time, of course!

Before we begin to answer the often part of the question, it is important for all our readers to know that one should never water their houseplants according to a fixed schedule. That being said, Spider plants are no exception.

Watering spider plants by keeping a fixed schedule can only contribute to its deteriorating rate. In fact, the plant might backfire in the form of a visible root rot, plant decay, or soggy soil, making it difficult for the plant to survive in such harsh conditions.

Also Read: How Often to Water the Chinese Evergreen (Aglaonema)?

To begin with, there is no single answer to how often you should water your spider plant. It can only be calculated by doing a finger test. A finger test involves the person inserting the finger into the bed of soil or potting mixture in which the plant is kept. Post this, if the finger has no soil stuck to it, that means the soil is arid and requires water.

However, for regular houseplants, only the initial 25% of the layer is measured, but for spider plants, one should consider the top 50% of the soil before reaching any conclusion. On the other hand, if your finger has visible soil stuck to it that feels wet, do not water your plant for at least another week.

If you want to skip the finger test, you can opt for the once in a week method. As the name suggests, this method involves you watering spider plants once each week.

Remember, this is still not a fixed schedule and since spider plants are thirsty, overwatering is not an issue with them. But, this should not be followed with other houseplants.

If you mess with the watering patterns of your spider plant, you are directly messing up with its nutrient intake, which can be a serious health issue for the plant.

Overwatering Spider Plants

While the plant is thirsty and forgives you in case of overwatering, this can only be done once. If you keep overwatering your spider plant, you might end up killing it, or at the very least, pushing it to that direction. The good news is, the plant lets you know if it has been overwatered.

Some spider plant symptoms are visible when the plant is overwatered. They include changing the colour of the leaves to brown and dying leaves one after the other. You can ensure a proper drainage system in and around your plant to help avoid the situation of root rotting and soggy soil.

Including peat moss in the potting mixture, choosing a good drainage soil, making holes in the plant container, keeping an extra container for collecting water are some of these good draining practices. Additionally, if you let the soil dry at its own pace, you can see the plant recover in a few weeks time.

Also Read: How Often to Water the String of Pearls?

Underwatering Spider Plants

Keeping your spider plant deprived of water can cause more damage than overwatering would ever do.

This is because the spider plants have a thirsty nature and water is what they require for surviving. Fading colour of leaves or whitening of leaves are the symptoms that tell you that the plant is essentially deprived of water.

If you cannot make out whether or not the plant is underwatered, you can check the leaves closely and see if they are folding across their length. If they do, water the plant generously and wait for 3-4 days for the leaves to recover.

Spider Plant Care Tips

Besides watering them right, one should also pay attention to taking general care of their spider plants at all times, to ensure that their healthy nature sustains for long. Here are some of the tips that not many people know:

Spider plants would usually survive in low light, but they thrive only in bright indirect light conditions. Exposing them to direct light can burn their leaves, making them brown at the edges, and impacting their overall growth negatively. If you are placing your spider plants indoors, it is ideal that you put them near a window that is not facing south.

Unlike other plants, and as mentioned above, spider plants require lesser quantities of water to reach their optimum growth standard. While other plants should be watered when the top 25% soil is arid, spider plants require us to wait till the top 50% of soil gets dry. This is important to remember as too much water can make the roots rot and the soil soggy, unsupportive of new growth.

Misting spider plants regularly is an important consideration due to the humidity levels spider plants need. While they generally do well in no humidity conditions, and should be ideally kept that way, exposing them to little humid environments every now and then proves to be an essential and lesser known ingredient for their growth. Additionally, if the tip of your leaves start turning brown, it directs to the fact that the surrounding air is extremely dry, and the plant cannot tolerate it. Making use of a dehumidifier or a humidifier and regulating their levels is also recommended to control humidity.

There is no standard temperature range to keep spider plants. The temperatures they prefer keep changing according to the part of the day in which they survive. But again, this is very similar to usual temperature levels of day and night. During the day and late afternoons, spider plants prefer to thrive in temperatures ranging from 60 to 80 degrees fahrenheit, while it drops down to 55 degrees fahrenheit at night. One might not have to make special arrangements to meet the temperature requirements of spider plants.

If you are keeping your spider plants inside, feed them properly with an ideal liquid fertilizer that is water soluble and not too strong on the plants. When we mention ‘properly’, we refer to feeding them only once during spring or summer season. Avoid fertilizing your pants in winters, when the plant is at a dormant stage and not ready to grow further. On the other hand, if you place your spider plants outdoors, you can double the dose of fertilizer that you provide to your plants.

Also Read: Why Prayer Plant Leaves Turning Yellow?

Spider plants, unlike their name, are not something to be afraid of. They are non-toxic to the use of pets or humans, so you can remain satisfied with your dogs or cats roaming around them freely.

If you want to grow a new spider plant of your own, you can do that by trimming off the spiderettes which are new and small growths in the plant. If propagated according to a specific procedure, you can nurture new spider plants from these little offshoots in a small time.

If you see a new little growth on the leaves of the spider plant, detach it from the mother plant, place it in a glass of water (not upto the brim) and witness the plant growing. The earliest signs of growth should be visible in the first 2 weeks when the roots start growing.

Wait till 4 weeks for the roots to sprout. If they don’t try looking for loopholes in your method of propagation. If they sprout roots, replace the glass of water with a thin bed of soil, and let it thrive.

Conclusion

If you take care of the aforementioned tips and water your spider plants rightly, you will be rewarded by little spider plant sprouts in your backyard in no time. As forgiving as the nature of this plant is, it tends to get a bit difficult to take proper care of it sometimes. But, with a little care and maintenance, they are sure to bounce back to normalcy in no time.

How Often to Water the Chinese Evergreen (Aglaonema)?

If you’re a fan of houseplants and have various plants or looking for a plant to enrich some colors in your house, then this article is for you.

Usually, people with some plants may doubt the watering cycle, so we have made this article for you to clear their doubts. The evergreen is a houseplant from tropical Indonesia; the botanical name of this plant is Aglaonema which tends to grow under large plants and trees to have excessive shade.

This variant belongs to the family of Araceae and has a nickname which is Chinese evergreen. This plant can tolerate any indoor condition, and it’s not suitable for outdoor conditions. People who planted this variant for the first time may doubt how often to water the Chinese evergreen?.

In this write-up I’ll explain all the details about watering a Chinese evergreen plant; other than this; plant lovers can also know the factors to consider when choosing the water cycle and quantity of the water fed to your Chinese evergreen plant.

Most commonly, this plant is used to place in tabletops in receptions or in office space too. For instance, people can notice many Chinese evergreen plants in many public places like malls, airports, shops, reception areas in corporate offices, and some people can also see these plants where there is a need for decoration.

These plants fit perfectly in public places because it requires very little maintenance and can be watered two weeks once in winter seasons. But if the weather condition is very hot, people can water this plant once a week or once in nine days.

How Often to Water the Chinese Evergreen?

The amount of water depends on the quantity of water that your plants intake. Plants first prefer to thrive than growing, so, during the growth period, plants will take a lot of water and thrive a very small amount of water will be used by the plants.

In short, winter is the best season for plants to achieve good growth, and in summer, they prefer to survive, but for some plants, the cycle may differ, and they will need a lot of water in the summer season even for survival and growth.

Chinese evergreen is a type of plant which requires some light to grow well. If it is placed in dark places, the plant will not grow in a healthy condition, and make sure that this plant is not placed in direct sunlight because direct sunlight is harmful to leaves as it may destroy the whole plant by making them burn.

Sometimes mild sunlight will also damage the parts of leaves. The placements of this plant should be so that it can receive mild sunlight with moderate heat. Maintaining this plant with moisture in the summer seasons is necessary because of excessive heat and lighting.

Also Read: How Often to Water the String of Pearls?

Summer seasons are not the enemies of the evergreen plants, but during summer, people should take extra care to maintain this plant in good condition.

On the other hand, Chinese evergreens can never tolerate excessive watering as it may lead to the decay of plants after a certain limit. So it is necessary to monitor the quantity of water before allowing the water to flow into the pot. After refilling the sufficient water, it is important to allow the excess water to drain through the drainage holes.

In the winter season, people can prefer watering it for 1-2 weeks, and it is the perfect time to feed your plant with excessive plants. As the plant grows, it will need some excessive water which allows them to grow well.

Just keep track of the moisture of the plant to water it with the correct quantity. Feeding your plant with excessive water will make your root rot which means the plant can no longer live with good health; sometimes, your plant may also dry. So feed your plant with the correct amount of water to extend its life.

In general, the watering cycle is never fixed because it always depends on many factors, and people should determine the quantity of water by considering those factors. These plants prefer to live at 60 degrees F.

They can even survive in lower temperatures; because of this, this plant is said to be an indoor plant as the temperature outside may be high, and because of this reason, Chinese evergreen can also die.

Also Read: Do Dracaena Like Coffee Grounds?

Maintaining your Chinese Evergreen in good condition:

Repotting:

This process is a mandatory step that has to be followed by every plant owner to maintain it in good condition. Plant owners can do it every two years once to be fresh and even get some new air while doing the process.

Moreover, there are many possibilities for the soil to develop some bacteria, viruses, and pests that may also live in the pot; if you place the plant in a pot for more than two years, make sure to change the plant’s pot every day two years.

Another important factor is that your pot may have some tiny damages in which small and micro pests can enter and destroy the plant. Repotting can also destroy the plant’s roots, so it is necessary to take excessive care while shifting your plant to another pot.

However, there will be slight damage when you shift, so shifting your plant’s pot in the spring season can help them gain energy and restore their damaged roots.

Adding nutrition to your plants can also help them to regain energy and restore their roots. So if people plan to add some nutritions, they can prefer adding it monthly once in the summer season and spring when you report.

Other than the summer season, if people prefer to add some nutrition, they can do it 45 days once because overnutrition can also damage the plant.

The size of the pot is also a necessary thing which has to be for watering it with the correct amount of water. This air-purifying plant can be placed in a moderately sized pot, and people can prefer to hang this on the top to gain some fresh air and make the room more beautiful.

This plant is not pet-friendly, so it is necessary to hang them on walls to keep your pet out of these plants. These plants can purify the air, but it’s not good to intake, so keep your pets and children away from this plant. The juicy extracts can also irritate your skin and create some skin allergies.

Also Read: How Much Water Does Dracaena Need?

Watering cycle:

Factors to be considered:

  • Temperature
  • Size of the pot and soil.

Temperature:

Temperature is one of the important factors that decide the water cycle of your indoor plant.

However, the temperature will not change as much as it is indoors, and people can expect temperature changes during the climatic change.

In hot temperatures, your plant may become dry, and it will also make your plant take a lot of water, so in extremely hot temperatures, your house will also be hot, and it makes your plant a bit hot too, so pour a lot of water in summer seasons. The Winter season can help them maintain their moisture levels so people can water less in winter. Roots with excessive moisture will decay your plant never overload your plant.

Pot Size and soil:

The size of the pot also decides the quantity of water. A pot with a bigger size can absorb some water and retain the moisture content for a long time than a small pot.

So to make your plant grow well, people can place them in big pots. Small pots can retain moisture content for a short time. Due to this, people prefer to place these plants in big pots.

Also Read: Best Potting Soil for Peace Lily Plant

Soil contributes the most to the growth of a plant, so in a plant, the contribution of soil for achieving good growth is more than 50%, so people who prefer to grow a Chinese evergreen plant can place them in bark-based orchid mix sand to achieve maximum growth.

This nitrogen-rich soil can make your plant grow well. While packing the sand, it is necessary to place your plant with soil to allow the water to flow completely, and it will also allow airflow.

Humidity and moisture can be checked while watering the plant using your hands or a meter before watering the plant.

Pro tip:

If you’re planning for a vacation, then place your Chinese evergreen with other indoor plants to make them use little water, and this will also help your evergreen maintain its humidity for a long time.

Check this article: Can Pothos Live Outside?

Bottom line

Plants are just like humans, which need attention and care to live a healthy life. Watering it in regular intervals, repotting, adding nutrients, and eradicating pests from your plants can help to maintain the plant in good condition.

Other than this, just spend some time with your plant daily to know the condition and find out pest attacks. By following the points mentioned above, people can have a healthy evergreen plant for years.

How Often to Water the String of Pearls?

Curio rowleyanus belongs to the daisy family of Asteraceae and it is the scientific name of a string of pearls. It is a flowering plant that can be found in southwest Africa. This variant grows under the shades of other plants to avoid direct sunlight. The string of pearls or string of beads is common to plant that grows well in darkness.

It is a common house plant variant that can be hanged in sealing or even in other places according to the preference of the nester. People always wonder how to water plants even people have doubts about how often to water string of pearls plant. If you are looking for a guide on watering a string of pearl plants, then this article is for you. People can get to know the exact details on how to water a plant.

This variant is a beautiful house plant that can be grown in both indoor and outdoor conditions. If you’re looking for a beautiful house plant to add some colors to your house, then a string of pearls can help. It is a hanging plant that grows well in a dry and warm environment, so the water levels must just fulfill the needs of roots and soil. Excessive water can be dangerous for the String of pearls.

Maintaining this plant is very easy because it can grow well even without water for 2 to 3 weeks which means it can thrive well even in warm places and even in zone 99. If you plan to grow a string of pearl plants in areas with a very low temperature, it is advised to grow this plant in a container to maintain the warmth to thrive well.

If people plan to grow their string of pearls outdoors, they can prefer growing it in partial sunlight to enjoy the warmth and have some light. The nature of these plants is in the way that they have to be maintained in shades to avoid direct sunlight. If this plant absorbs direct sunlight for an extended period, it will become dry and lose its original color and texture.

Indirect morning sunlight is better for this plant to gain some energy and grow well. The rounded edges of these plants form a connection, and this connection provides a very good feel for the growers, and it also adds some beauty to the room.

Also Read: How Often Water Green Onions?

How Often Do You Water a String of Pearls?

Actually, speaking string of pearls never wants us to pour a lot of water on it because they hate overloading, and many people do not know this fact. IN simple words, this plant can be watered when the soil is completely dry, and people can use their fingers or a stick just to feel the moisture content of the soil. It is necessary to check and water it because it is an important fact that must be considered while watering your string of pearls.

These pearls may require a small amount of water to fullfil their needs. The period for watering your plant may vary based on various factors, and one among those factors is that the place. A string of pearls should never be placed in excessive sunlight because it may remove the moisture and destroy the pearls’ look.

The water poured into this plant must be dried naturally, and if people allow their plant to stay in the sunlight for a long time, it may quickly lose water molecules. This is abnormal to string of pearls, and because of this, the cycle may change, resulting in improper growth of this plant. So people can follow the dryness method and water the plants once in two weeks which is sufficient for this variant.

Another interesting fact is that this plant drinks a lot of water at once to fulfill its needs, but while watering, don’t just allow the water to flow continuously; just pour it slowly and allow your pearls to drink it slowly, so that it will be a healthy habit to make your plant grow in a healthy way.

Also Read: Can Pothos Live Outside?

How to Water String of Pearls?

As mentioned earlier, watering your string of pearls can be decided based on some factors, so depending upon the factors, the water cycle and the quantity of water may vary, So read this article completely to know the exact quantity and time period for watering your String of pearls plant.

Also Read: How Much Water Does Dracaena Need?

Factors to decide the procedure of watering to your string of pearls:

Pot size:

The soil is the main thing that retains the moisture content to maintain your plant fresh. So higher the quantity of soil, the higher the moisture content. So if you have a big pot, they will have a lot of storage space, which allows a lot of soil to accommodate it. So this will allow your soil to absorbs the moisture content if watered once in 2 weeks. So large pot owners can water their string of pearls two weeks once, which is more than enough. On the other hand, people who have a small pot need to water it weekly once, which means the capacity of soil is low. When capacity decreases, the retention of moisture content will also decrease, and people will be in a situation of watering it every week.

Location:

Generally, the lighting conditions, temperature, airflow will be high in outdoor conditions than indoor, and everyone can feel the difference just by going out. Because of this fact, people who place their plant outside will have to keep an eye on the plant every day because the temperature may vary every day, and if the temperature is high, people should understand and pour a bit of water higher than normal.

If the temperature is moderate, they can consider the airflow and just look at the plant’s soil to verify the moisture content; if the plant is bone dry, then people can water accordingly. On the other hand, if people prefer to place their plant indoors, there will not be any problem in maintaining the plant because people can water it periodically. It will be sufficient for the plant to thrive until the next cycle.

Also Read: Can I Put My Dracaena Outside?

Season:

The growth of a String of pearls may vary according to the season; it is actually a cold plant and grows rapidly during cold seasons and winter seasons. The spring and fall seasons are best suited for the growth of the String of pearls plant. It grows actively, and the growth can actually be seen on some days, so it grows during winter and takes rest during the summer and hot weather conditions.

Actually, the string of pearls aims at survival than growing in hot weather conditions. So during the winter seasons, this plant grows a lot, and in order to support the growth, it consumes an enormous amount of water. So during winter, people should allow the pearls to drink a lot of water whereas, in summer, people can place their plant in a shaded spot and pour the necessary water to depending on the moisture content to fullfil the needs of that particular plant.

Generally, people can follow some basic steps to have a healthy plant. The soak and dry method will work out during normal days, which means people can look at the plant in regular intervals to guess the moisture content.

Moreover, they can even have a glance at the soil to know the exact moisture content. This will help growers to water the plant on the basis of the soak and dry method. Ensure that water drains through the drainage holes and that the saucer is emptied before you complete the process.

If measuring the moisture content becomes tough, people can prefer using a moisture meter purchased online or in traditional shops. This meter will help people find the right moisture content by allowing people to notice the meter value. You just need to insert the meter into the soil, and it will show the exact value.

People can decide from three values because it has a wet, moist, and dry stage, and while watering string of pearls, people can insert and wait for the meter to reach the dry state, which is the ideal water time for this variant. Other than this plant, people can also use this meter for various plants they grow in homes or commercial places. But for maintaining a plant, it is better to have an eye on it in regular intervals.

Also Read: Why Prayer Plant Leaves Turning Yellow?

Bottom Line:

In this article, we have seen a brief about maintaining a string of pearls plant in various weather conditions and also the watering cycle for the same variant. Anyone wishing to purchase a String of pearl plant can use this guide to maintain pearls in good condition. Owners should remember that these plants are really sensitive and cannot tolerate high temperatures from direct sunlight, moisture, and high airflow. So this plant can be placed indoors for obtaining better results. I hope this article is useful! Thank you for reading.

How Often to Water Green Onions?

Are you curious as to know how often water green onions? You would be in the right place if you answered yes. You can quickly grow green onions in any place. You can grow green onions in any location, whether a large yard or a small deck. You can increase your green onions to enjoy onion’s intense, fresh flavor in your soups, casseroles, and salads.

How often should my green onions be watered?

Keep the soil moist. Too much moisture can lead to illness and insect infestations. To ensure a continuous harvest, you can plant more scallions every three weeks.

Also Read: How to: Growing Leeks from Scraps?

1. Select the type of onion you want to grow

The green shoots, also known as scallions or green onions, that grow up just before the onion bulb forms are called green onions. These are immature onions. You can find hearty scallion seeds, such as A. Welsh onions. Or, you can choose your favorite white, yellow, or red onion to grow.

You can choose to plant red, white, or onion “sets” instead of starting green onions from seeds. These are mini bulbs with bare roots that have been bound with twine or rubber band. A few can be used as scallions, and the rest will mature into onions bulbs.

2. Prepare a planting area

Pick a place in your garden or yard that receives full sun and has good drainage. To enrich the soil’s nutrients, you can till the dirt to 12 inches. It will help green onions to grow strong and healthy and produce more shoots throughout the growing season.

Before you start to till the soil, make sure that rocks, sticks, and weeds have been removed.

If you have a little area to work with, you can use a garden rake to till the soil. Rent or buy a soil tiller if you need to cover a larger size.

You can make a pot with potting soil rich in the compost if you only want to grow a few green onion plants.

3. Plant the seeds/sets

You can plant your seeds or sets as soon as the soil has become workable. It is approximately four weeks before the last frost. Seeds should be sown thickly, about 1/2 inch deep, in rows 1 foot (3.33 m) apart. Sets can be planted root-side down, 2 inches, 1 inch deep in rows spaced 1 foot (0.3m) apart. You should water the garden bed well.

The soil should be between 65 and 86 degrees Fahrenheit (18.33 degrees Celsius to 30 degrees Celsius) for onion seeds to germinate. The time it takes for onions seeds to germinate can take up to one month.

You can start seeds indoors if you live in a cold area with a late season. The seeds should be planted in starter pots of peat seed. Keep them well-watered. The seeds should be kept in a sunny, warm place during the germination process. Once the ground soil is dry enough to work with, you can transplant the seedlings into a garden or larger pot.

Also Read: Why Is My Cilantro Turning Yellow?

4. If necessary, thin the plants

Once the first green shoots start to poke up, you can decide whether to thin them or give them more space. The best strategy to grow green onions is in bunches. However, mature plants should be spaced at least 2 to 3 inches apart for the best results. If necessary, take a look at the garden and remove any weaker seedlings.

5. Mulch the seedlings

You can cover the soil around seedlings with grass clippings, pine straw, or even fine pieces of bark. It will keep weeds at bay and the soil moist.

You can skip this step if you grow your green onions in pots. Grasses won’t be an issue, and you can easily manage the moisture.

6. Make sure they are well hydrated

All season long, green onions require well-drained soil. The onion plants need to be provided with approximately 1 inch of water each week. The soil should not be too dry for optimal plant growth. However, it should remain moist. You should water your garden bed every couple of days or whenever it starts to look dry and dusty.

You can also test the soil conditions to see if the onions require watering. Place your finger in the soil, right up to the second knuckle. You can water the ground if it feels dry. If the soil seems dry enough, you can water it again after a few days. You may not need water if your area has been wet recently.

Also Read: Cauliflower Leaves Turning Yellow

7. When the green onions have reached maturity, harvest them

The green shoots will reach 6-8 inches in length after three to four weeks. You can harvest them by pulling the whole plant out of the ground. The bulb will not have formed yet. Both the green and white parts of onion are delicious.

You can let the plants mature and become storage onions by simply allowing them to remain in the ground. When the bottom of the plants begins to form a bulb, it will be ready for harvesting in the fall.

You can only use the green parts of the onions and not the white ones near the roots. To do this, you can take the help of a pair of scissors. You should leave about an inch of growth. You can harvest the onions again when they reach 6-8 inches in length. As the plants mature, they will be stronger-tasting.

Also Read: Holes In Pepper Plant Leaves

How to take care of green onions?

Sow onion seeds as soon as the soil can be worked in spring. Onion seeds can germinate at any soil temperature between 65 degrees F to 86 degrees F.

Cover the seed with 1/4″ of soil, and then let it dry. You can begin seeds indoors six to eight weeks before planting. You can place them in your garden approximately 1-1 1/2 inches apart. Press the sets into the soil around 2 inches apart to plant onions.

Full sun is best for onions. They need a pH of 6.0 to 7.5, well-drained soil, and plenty of premium compost. Utilize a balanced fertilizer throughout the growing season.

After your green onions are established and sprouted, it is easy to keep them healthy.

Green onions need approximately one inch of water each week. Soaker hoses are helpful for irrigation if green onions have been grown in rows or raised beds. To conserve soil moisture and deduct grass growth, mulching around plants is a brilliant idea.

The soil should not be soggy, but it should be moist. The finger test is a great way to determine if your green onions require watering.

Just stick your finger into the soil to the point where the green onion plan is. You do not need to water if the soil is moist. You can water the soil if it feels dry.

You can repeat the finger test up to once per week, depending on how much rain you have received.

You can also grow green onions in any container. Containers can dry quickly in scorching summer temperatures, so it is essential to water them at least three times per day if there is not enough rainfall.

Too much soil drying can lead to the bulbs becoming dry.

Ensure that the container has drainage holes. Containers should not be filled with soggy soil.

It may take some practice to get the watering amount right, but it is not difficult.

When green onions are tender and young, they are the best to pick. When the bulb’s tops are 6-8 inches tall and the bulb has begun to swell, it is time to dig or pull them.

Use dried bulbs by waiting until the green tops are brown and withered before you stop watering. Most green onions can be harvested in 70-90 days.

If you are cutting or preparing green onions, be sure to leave about 1 inch above the root. This section can be replanted in the soil. The root section should be placed about 1 inch deep in the soil root side down.

Within a few weeks, the root section will re-sprout green tops. You can repeat this process multiple times with the same root portion.

Also Read: Does Swiss Chard Grow Back After Cutting

Conclusion

You’ll have fresh green onions available for garnishes and recipes whenever you need them. To sum it all, stick your finger in the ground close to the plants. If you don’t feel any moisture, it’s time for water. We recommend watering your plants with 1 inch of water every week for 12 weeks, depending on how much rainfall they have received.

Keep the soil moist. Too much moisture can lead to illness and insect infestations. To ensure a continuous harvest, you can plant more scallions every three weeks.

Can Pothos Live Outside?

Among the most prominent houseplants is the Pothos. For its attractiveness and ease of upkeep. Pothos, on the other hand, can Pothos live outside? We’ll clear this up and show you where and how to plant Pothos outside in this post. But, to pique your interest, we’ll ask a simple question: can Pothos thrive outside? Pothos can thrive out in a location with strong yet indirect sunshine and a temperature of at least 50 degrees Fahrenheit.

Can I Put Pothos Plants Outside?

If you worked in or have visited a business office block, you’ve probably noticed Pothos adorning the walls, filing cabinets, and other surfaces. Pothos, commonly known as Devil’s Ivy, tolerates fluorescent illumination exceptionally well, perfecting these settings.

Pothos is a tropical forest plant. It is a vine that grows in the forest canopy zone, under the shadow of towering trees. Pothos foliage can grow to be three feet large in the wild. It may also grow to be 30 feet long. Pothos achieves its maximum potential at this point.

The tropical woods have a humid environment. Therefore, Pothos will not produce large leaves or blooms if grown as a houseplant. However, growing them outdoors increases their chances of reaching their full potential. Particularly if the weather is hot and humid, we’ll go over how to expand your Pothos outside in the sections below.

Also Read: Do Pothos Need Drainage

About Pothos Plant

Many of us, or those who don’t have a nice garden, prefer easy-to-care-for home plants. We’re in fortune, as it turns out. The pothos plant is beautiful and resilient, giving it the title of “easiest houseplant to cultivate.” Pothos are indigenous to the Solomon Islands’ understory woods, although they can adjust to a broad range outside their traditional tropical environment.

A pothos vine will not just add colour and richness to your room, but it also ranks highly in terms of plants that contribute to cleanse the air. They also raise humidity levels and substitute co2 from the atmosphere with oxygen. However, while the blossoms are very easy to cultivate, they have been fussy when it comes to weather and sunshine, so proceed with caution when initially getting started.

Varieties of Pothos Plant

Marble Queen Pothos, Golden Pothos, Neon Pothos, Jade Pothos, N’Joy Pothos, Jessenia Pothos, Glacier Pothos, Blue Pothos, plus Silver or Satin Pothos are the most well-known. Although the Silver Pothos belongs to a separate species, it is sometimes lumped in with everyone else due to the similar name Pothos. Various Pothos plants are grown in multiple areas of the country, primarily in Florida, California, Texas, and Hawaii; therefore, you may not always be successful in finding all of them.

Also Read: Coffee Grounds for Pothos: How to Use?

What Is The Best Way To Raise Pothos Outdoors?

Temperature

Temperatures of 65-75°F (18-24°C) are ideal for pothos plants. As a result, if the weather is at a minimum of 65°F, you should grow Pothos outdoors. Unfortunately, your pothos plant would expire if the temperature drops below 50°F, so you’ll have to bring it indoors for the winter. Pothos also enjoys being in the presence of humidity.

Sunlight

Pothos plants can tolerate either direct or indirect sunshine. Because of its adaptability for lesser brightness, it is regarded as a shade plant in tropical areas. On the other hand, Pothos will require at least somewhat direct sunlight to grow in colder regions. Climbing towards the sunlight is one of their favourite pastimes!

Also Read: Why Do My Money Plant Leaves Turn Yellow?

Watering requirements

Moisture, but not dampness, should be maintained in the soil. So when you put your Pothos outdoors, you’ll probably have to offer it additional water.

Pests

Pothos plants are pest-resistant; however, you might have to treat them with insecticide if spider mites are present. Spider mites prefer soils and are more prone to strike your Pothos when warm and breezy outside.

Soil

Pothos plants prefer moist but just not soggy soil. As a result, a well-draining potting mix is recommended. As a kind of partner planting, you may even put your Pothos alongside your other plant.

Fertilization

Pothos plants do not require a lot of fertilizer outdoors. We prefer to feed the plants with an all-purpose fertilizer every 3 to 4 weeks during the summer. Because the crop will fall dormant over the wintertime, there is no necessity to fertilize it. Therefore, throughout the wintertime, you would most inevitably bring your pothos plant indoors.

If you want to fertilize your plant, we suggest using an all-purpose mix that contains phosphorus, potassium, magnesium, and calcium because those are nutrients that may rapidly build up in the ground.

Also Read: How to Revive a Dying Pothos Plant?

Can Pothos live outside in Summer?

Pothos is commonly cultivated as a houseplant, but in USDA climate zones 10 and 11, it may also be grown as a rare outside plant. These can be utilized in pots and boundaries in other regions throughout the summertime. With the first frost, plants will die away. However, you can immediately move them inside or take cuttings.

Putting your houseplants outdoors in the summertime will enhance their life and beauty. Several house plants flourish in the open; however, fragile tropical plants like moth orchids or African violets should be kept indoors.

Plant Care for Pothos They flourish in nutrient-rich soil, although they may also survive in nutrient-poor soil. Since they can endure soft lighting, pothos plants are a fantastic complement to your restroom or office. Pothos tolerate a broad range of light settings, although they do not thrive in direct sunshine.

Can Pothos survive winter?

Growing plants in the wintertime might be the most difficult season of the year. The brightness is usually at their weakest; the hours are already brief; operating the heater removes the moisture levels (which plants need); and, if your Christmas schedule is busy just like everyone else, houseplants are simple to forget.

Fortunately, even in the dead of winter, the correct houseplants are simple to cultivate and decor with. The essential point to remember is that you must match the crops to the surroundings, just the same as your clothing (for instance, you would not wear a crop top outside in a snowstorm or a jacket on a hot summer afternoon).

Temperatures around 55° and 80°F (12.8°-26.7°C) are ideal for pothos plants. Unfortunately, a pothos plant ceases blooming, and the foliage appears black when the temperature drops below 45°F (7.2°C). Pothos winter maintenance involves watering less frequently, deferring fertilizing and cutting, and maybe relocating to a brighter location.

Because Pothos are prone to root rot, it’s best to preserve them dry instead of moist. Water a bit less frequently during the winter months. Fertilize your plants last autumn or winter, regardless of what you are using, since now is the time to leave them undisturbed. Therefore, salts pile up and can damage the roots if you over-fertilize (use extra than the suggested proportion or do this too frequently). Brown marks appear on the foliage as a result of this.

What types of pests are drawn to Pothos?

The most frequent reasons for Pothos issues are simple to resolve, making it an excellent choice for the novice gardener. While mealybugs and scale may make a home in the foliage, this plant seems to have no severe pest or disease issues. To destroy the bugs, apply a cotton ball soaked in alcohol. Infections may be avoided by inspecting the plant once a week. Even so, you may clean the mealybugs or use a horticulture oil spray to kill pests.

Is Pothos poisonous?

Pothos can induce nausea and irritability in pets and kids. However, it is seldom lethal. Nevertheless, Pothos plants, especially the distinctive dangling vines, should be kept out of range of youngsters by caregivers and pet caretakers.

What makes Pothos so dangerous?

Pothos stalks and foliage carry calcium oxalate crystals that are toxic to cats, dogs, even kids. Such crystals may irritate the skin, mouth, as well as throat by penetrating the soft tissue. Although pothos leaves and stems are seldom lethal if eaten, it’s important to maintain your plants out of range of your animals and youngsters.

Pothos poisoning symptoms

In most cases, pothos toxicity in pets and kids will mainly cause pain and maybe vomiting. However, check for the following signs if you believe a kid or cat has eaten a pothos.

In Children you can observe the following symptoms:

  • Mouth soreness or burning
  • Speech and swallowing difficulties
  • Diarrhoea
  • Nausea and Vomiting

In Pets one can notice the following symptoms:

  • Salivating
  • Mouth pawing
  • Appetite decreases
  • Puking
  • The discomfort of the eyes, mouth, and lips

Conclusion

To summarize, you may keep your pothos plant around as long as it is placed in a location where it will enjoy abundant sunshine. In the summer, fertilize your Pothos once 3 to 4 weeks, then bring it indoors for the wintertime (or when the weather dips below 50°F). This post entry on how to care for a pothos plant outdoors is now complete! We hope you liked reading this and discovered some useful information that will assist you in caring for your houseplant in a good and prosperous manner.