Swiss chard is a strong, beautiful plant that embraces scorching summertime and harsh winters. It’s also prized for its crackling, vitamin-rich greens, and asparagus-like spines. Does swiss chard grow back after cutting? The answer simply is yes. You may eat organic Swiss chard from the crop for up to 2 hours if you cut the greens properly.
Understand how to produce Swiss chard, often known as “chard,” a plant with vivid, multicolored stems. This nutritious vegetable thrives in both chilly and warm climates, and its mellow flavor adds nourishment and color to salads, spaghetti, pizzas, quesadillas, sandwiches, and other dishes. Here’s how to cultivate Swiss chard within your yard and collect it!
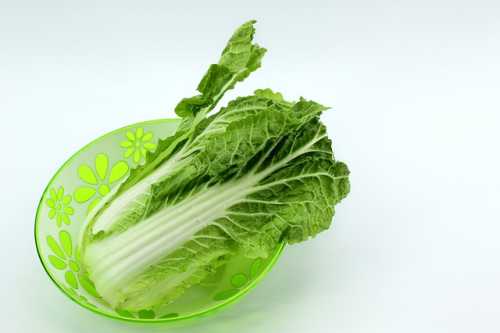
Also Read: How to Grow Chinese Cabbage from Cuttings?
Discussing Swiss chard
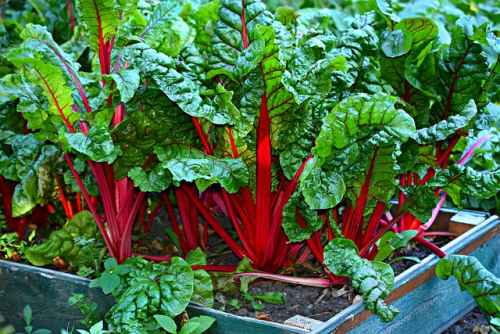
The stems as well as greens of Swiss chard, a species of the beet group, can be consumed cooked or uncooked. Leaf beet, silverbeet, seakale beet, as well as spinach beet are all synonyms for chard. Swiss chard is available in a variety of colors, including pink, orange, yellow, red, as well as white, and is most recognized because of its brilliant and colorful stems.
Chard is usually cultivated like a cool-season plant since it thrives fast and efficiently in the milder springtime and autumn weather, but it can also tolerate higher temperatures. Although chard’s development slows mostly in summertime, its superior thermal endurance makes this a wonderful salad vegetable to produce whenever the weather overheats for the rest.
Chard is a healthy food that contains a lot of vitamins A, C, plus K. Which doesn’t have the unpleasant flavor of many other veggies, and this is an excellent alternative for spinach as well as kale if you don’t like those superfoods.
In addition to its many benefits as a gardening veggie, chard is indeed a wonderful tasty decorative crop to incorporate into your landscape! Its array of colors is stunning! You may also use chard alone or combined with blossoms in a jar or arrangement. Why should blossoms be the only ones having a good time?
Also Read: How to Grow Pointed Gourds at Home?
Step to Grow Swiss Chard
Sow the Seeds
Even though Swiss chard may flourish in inferior soil it flourishes when a bit of blood meal gets mixed into the ground. Initially in the spring once soil levels somewhere between 50 and 65 degrees, sow seeds. Make shallow sets that are 18″ apart. Throughout the rows, space the plants 2″ apart and top with 1/2″ of dirt. Make sure it is well-watered.
Seedlings should be thinned out.
In around a week, Swiss chard would then start to grow. Thin their seedlings to one planting per 9″ to 12″ when they are approximately 2″ tall. Seedlings can be removed by snipping these off at the ground level using scissors.
Cultivate Swiss Chard
Provide Swiss chard a lift with blood meal within that middle of the growing season. To protect the blood meal against wiping away mostly in rain, bury it with dirt. To keep the leaves from turning bitter, make sure they have enough water. A thick layer of compost will assist to keep moisture in the soil.
Set transplants whenever the temperature is still hot to ensure optimum development. Plant your chard 12 to 18 ” away, however in a well-fertilized garden bed, you might well be fortunate to get them as near as 10 inches off from each other. The petals may seem weak after transplant, but they will quickly recover! Chard is simple to cultivate from seed. Seed germination could be sped up with a quick pre-soak.
Also Read: How to Grow Radish Microgreens?
Pruning
Pruning your Swiss chard will only be necessary if it attempts to bolt to seeds. Keep only a couple of stalks and slice the remainder of its plant straight to 1 inch above the ground surface at that moment. Because as the plant fixes its effort on developing new ones, the old leaves assist it to undergo photosynthesis.
It doesn’t always inhibit bolting, however, and this can slow things down, allowing the plant to live longer. However, much pruning is done based on harvesting operations or to eliminate defective leaves. Typically, the outermost leaflets and stalks get picked first, allowing the interior stalks to function as photosynthesizers.
Propagation
Swiss chard grows from seeds, and all other techniques are unable to be successful. Seeds could be started inside or sown straight onto beds. Select high-quality seeds from a reputable provider. When the last winter period has expired, the seedlings should emerge within 1 to 2 weeks and might even be planted outdoors. It is best to acclimatize the saplings to the outdoors for a few hours each day before transferring them into the soil or a pot.
Also Read: How to Prevent: Mold on Microgreens?
Harvesting the Swiss Chard
Swiss chard is completely grown around 3 months after sowing. Chard is a “cut-and-come-again” plant, this indicates that once the exterior leaves are plucked, the interior leaves will restore them. Resist chopping into the center developing bud while harvesting leaflets, since this may lead the plant to cease generating.
When will the Chards be suitable to harvest?
Chard could be collected while the greens are immature and delicate, just under 4 inches (10 cm) in length, or beyond maturity. Once you’ve started harvesting Swiss chard, it may be harvested indefinitely until winter.
Swiss chard greens can be snipped while they are quite tiny for a refreshing touch to a mixed salad. Bigger chard leaves could be chopped and utilized for stir-fry recipes. Chard will generate excessive greens as much as it is pruned. Stalks or ribs could also be prepared and consumed in the same way as asparagus is.
Chard will thrive in areas where warm weather conditions are constantly in the 80sF (26°+C) and also can survive cold temperatures of 30sF (-0°C). When chard bolts then start to blossom in hot conditions, remove the blooms stalk quickly and the crop will generate additional leaves.
Cultivate chard beneath a plastic tube or in a chilly structure in cooler locations. Chard may be kept from chilling in a cold box by wrapping plants using straw/hay. Chard that has been overwintered can provide you with a springtime crop.
What is the best way to harvest chard?
For the greatest quality, cut Swiss chard very near to lunchtime if feasible. Use gardening scissors or perhaps a serrated kitchen knife to cut the Chards. Chop chard leaf after leaf—cut the exterior leaf first to enable the interior leaflets to expand higher and cut the entire plant 1 inch (2.5 cm) well above ground. In any case, the plant will continue to grow new leaves.
Soil frequently adheres to the bent stalks of chard. To wash them, fill a bowl halfway using lukewarm water then swirl them gently, and remove the leaves & place them inside a strainer to dry; continue if soil persists Before storage, allow the greens to dry completely or brush them thoroughly with a napkin or paper towel. When eating raw or cooked leaves, remove any midrib from bigger leaves. Big leaves are usually finest boiled down and diced like spinach or utilized in stews and soups, salads, or pasta.
How should chard be stored?
Swiss chard should be stored at 32°-40°F (0°-5°C) with 95 % humidity levels. Refrigerate the greens in a zippered plastic container in the veggie crisper area. Refrigerated chard can stay for around 10 days. When chard is kept too chilly or too extended, it develops brown patches mostly on the midrib as well as the leaves shrivel up yellow.