
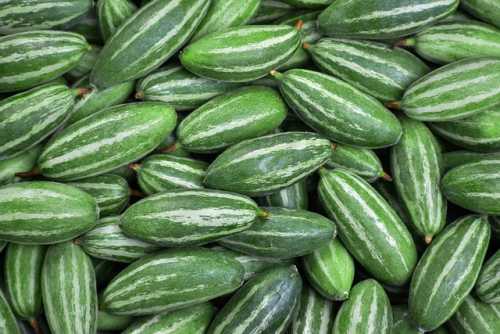
The pointed gourd, like cucumbers and squash, is a vine. It’s high in minerals, as well as vitamins and this is commonly found in stews, soups, curries, even desserts. This vine is often recognized for its potential to decrease sugar levels as well as overall cholesterol levels among humans. If all of the information has piqued your interest, take a peek at Growing Pointed Gourd at Home for more information.
One of the healthful veggies that may be simply produced in the yard is the pointed gourd. Its seed propagation procedure is the simplest and most critical stage in growing Pointed Gourd. We use already-grown seedlings to assist young plants in their development so that they can grow quickly. Its natal location has given it the name Parwal. This plant is a member of the Cucurbitaceae family of gourds. It also has a similar appearance to the veggie ivy gourd, however, it is larger.
How to Grow Pointed Gourd (Parwal)?
Cultivation
The optimal development of the pointed gourd needs a somewhat warmer and humid atmosphere. The plant remains dormant throughout the wintertime and is vulnerable to waterlogging, necessitating the use of well-drained sandy loam ground
Just at the stage of sowing, you should have a 9:1 female to male plant proportion. Because the pointed gourd is a dioecious species, just one species for each plant is chosen. As a result, if all of the seedlings in one’s yard are of the same type, your overall harvest will be nil. As a strategy, maintaining the sex ratio is critical for achieving optimum results.
Also Read: How to Grow Chinese Cabbage from Cuttings?
Soil Conditions
Light soils are required for growing pointed gourds. It would be unable to develop in dense soils. Soils ideal for cultivating Pointed gourds include loamy and clay soils, which are light. Furthermore, the PH level of the soil must be in the spectrum of 6.0 to 6.5.
Climate Conditions
A pointed gourd thrives in tropical and temperate climates where it could get enough sunshine. The development of pointed gourds is well adapted to both humid as well as hot conditions. Throughout that period, the temperature should be around 30-35 degrees Celsius. Regularly, the preferred site must get 5-6 hours of bright sunlight.
During the wintertime, the vining plant goes dormant. As a result, you must grow and collect pointed gourds well before the temperature drops. If you want to harvest the produce that year, then you must plant after the risk of a cold has passed.
Watering
Water each 3-5 days throughout the early stages of development. Raise the frequency to every other day after the plant begins to bloom and produce. Make sure the ground is equally wet yet not soggy.
Support
The pointed gourd is a vine that has to be supported to develop and grow. Construct a trellis or set up a pole or structure on the growing spot. Whenever the vines make the peak of the trellis frame, prune or gently pinch them. This should encourage the plant to concentrate its efforts on producing more blooms and fruits.
Natural Fertilizers
- Before growing a pointed gourd, put cow dung fertilizer into the ground.
- Conversely, you can apply the 10-10-10 adjusted liquid fertilizer periodically.
- Using an all-purpose fertilizer at the transplantation phase gives the plants an extra push.
- If the crop exhibits indications of weakening, you can fertilize it once again. One maybe two occasions a year, apply a side coating of well-rotted old manure to the plant.
Also Read: Mold on Microgreens: How to Prevent & Get Rid of Them
Diseases and Pests
- Blister beetles or even Red bitter beetles seem to be some of the very widespread pests that attack pointed gourd plants. Water could be sprayed on the vegetation to control the former. In between periods of February and April, the red bitter beetle attacks the vegetation.
- Root-knot Nematode, Mosaic, Fruit Rot, or Downy Mildew seem to be the most common diseases that afflict pointed gourd plantations.
Step-By-Step Guide
Cuttings, seeds, as well as root suckers all can be used to grow pointed gourds. You may implement the instructions outlined following while working with seeds:
- To increase the likelihood of propagation, soak those seeds overnight upon obtaining those from a mature pointed gourd fruit or perhaps a farmers market.
- After that, you must immediately spread these seeds in the yard.
- Once the new plants develop 5-6 leaves, the poor ones will need to be trimmed out.
- After 2-3 weeks following sowing, budding seedlings are ready for transplantation.
If you’re propagating from cutting, you’ll need 5-6 inches of vine cutting to get started. Tuberous roots will need to be pulled out in the springtime to propagate the crop from root suckers. These will need to be split and replanted. People with the limited room can cultivate pointed gourds using pots simply implementing the methods outlined below:
- First and foremost, you’ll require a 16-20 inch pot containing enough drainage openings When the plant has grown to its full size, you may transfer it over to a wider pot
- Potting must be done using well-draining sandy plus loamy soil which has been appropriately blended with old compost or manure
- You must put the plant somewhere that gets enough sunshine.
- While this soil must be maintained wet, you should avoid allowing it to get soggy.
- A string or trellis could be used to hold the vine and allow it to make the most of the available vertical space.
How to Propagate a Pointed Gourd?
Root suckers or plant cuttings can be used to grow the pointed gourd. Seed propagation might be an option, however, the odds of germination are significantly decreased. When developing the vine, keep a minimum spacing of 1.5-2 meters between every pointed gourd vine. Let’s have a glance at how to plant the pointed gourd presently:
- Tuberous roots must be dug from the ground in the springtime for root growth. They’ll need to be put straight into the ground and irrigated daily. Keep a male-to-female seed proportion of 1:9 to improve the probability of blossoming.
- When cutting vines, you must first remove a 1-2 foot vine from one plant that is at most 1-2 years of age. There should be 8-10 nodes within that cutting. After that, you must infest all of the vine’s leaves but 2-3. The cutting would need to be put in a container with a 30 percent coding fertilizer and 70 percent soil combination. In between periods of February, and March you’ll need to moisten the pot then transfer this into the yard bed.
What is the best way to harvest a pointed gourd?
In most cases, after planting new vines and transferring these around February, the vine begins producing around 120-140 days that continue until September. These are available to harvest 15-18 days following pollination. From July to October, all fruits should be ripe.
Between these dates, harvesting ought to have taken place. Since fully matured fruits are unfit for consumption. Before plants hit maximum maturity, they must be harvested. As a result, the veggie Pointed gourd must be picked before it matures into fruits.
Also Read this: Can you grow zucchini from scraps?
Process of Yielding
Development management, nutritional management, fertilizer management, as well as water management all have a role in the yield of the pointed gourd. The yield is estimated to reach 15 to 20 tonnes per acre.
Maintenance Tips for Pointed Gourd Plants
The primary measures to follow during harvesting are nutritional care, fertilizer management, as well as water productivity. This should ensure that the crop grows well.
Post-Harvest Care
After harvest, cleanse the pointed gourd veggies. Before using them, make sure they’re clean.
Conclusion:
In terms of nutritional veggies, pointed gourd might be an excellent choice in home gardening. Parwal is a famous Indian vegetable that is cultivated virtually everywhere. It may very well benefit everyone in the house if it has been adequately grown. Several different types of pointed gourds generate a lot of fruit.