How Much Water Does Dracaena Need?

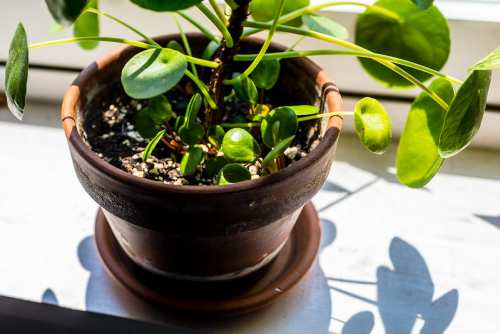
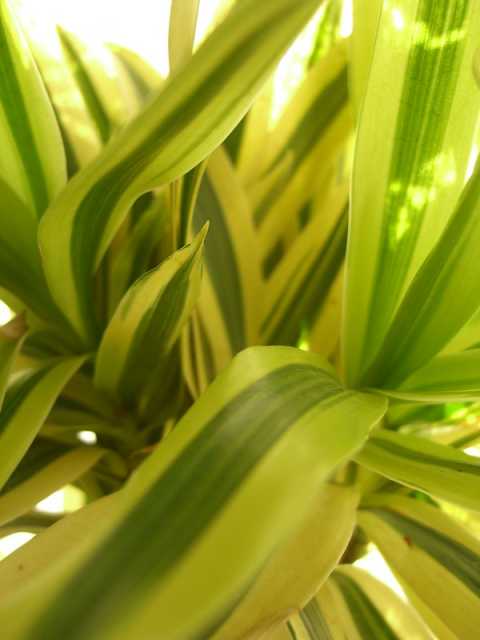
Dracaena is a popular houseplant used for ornamental purposes. This plant is well suited for subtropical climates and is suits both indoor and outdoor growing conditions. Their glossy leaf adds beauty to our homes. Dracaena belongs to the asparagus family and comprises about 40 species. These plants grow up to three feet indoors, and it looks like a  bushy tree. The outdoor plants can grow up to eight feet.

The most common type of dracaena plant is the yellow-edged Variegata named ‘Song of India’.Interestingly, the dracaena plant possesses a secondary thickening meristem, allowing it to grow wide, thick, succulent roots.

These plants not only add beautiful colour patterns to your room but also improve air quality. To allow your dracaena to exchange air frequently, it is necessary to wipe both the sides of your plant in regular intervals to enhance the colour and texture of your plant. Dracaena plants tolerate a wide variety of growing conditions.

Dracaena plants are very easy to grow indoors when you pay attention to a couple of details. It requires well-drained soil. The soil should be dry between waterings.

Too much dryness and sogginess can be fatal for the plant. The former will result in drying of leaves, and the latter may result in dampness, root rot and fungus formation. For keeping the plant healthy, fertilizing once or twice a year is essential for promoting growth.

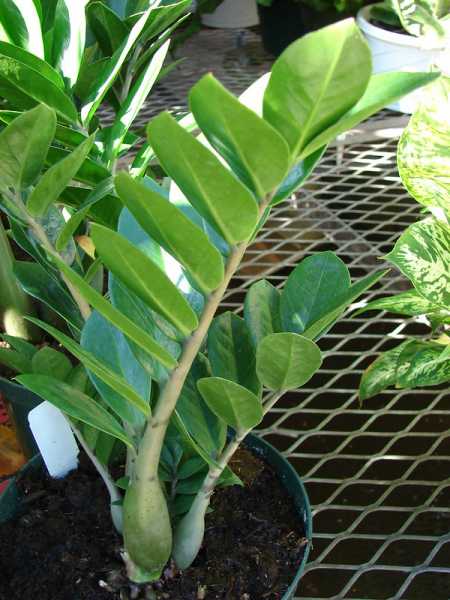
This variant is from southeast Africa and is a low-maintenance plant with dark glossy leaves in some variants. Avoiding direct sunlight will ensure proper growth for dracaena. Rotating your plant periodically will ensure even growth on all sides. Also, dusting the leaves regularly can be helpful for effective photosynthesis. Finally, we need to have an eye on the undersides of the pots to avoid pests.

Also Read: Can I Put My Dracaena Outside?

How Much Water Does Dracaena Need?

When we speak in general, this plant needs very less water compared to other variants. Dracaena is generally a drought plant that can withstand dryness, so it usually does not grow soggy; it is better to water the plant 10-14 days once.

 This means the soil for this plant can absorb very little water to fulfil the plant’s need for up to two weeks. So if you prefer to water this plant, then check the plant’s soil, and if there is a need in watering the plant, then go ahead and water the plant to leave it for the next two weeks.

Watering dracaena needs some patience because while watering it, you should ensure to use only tepid water to make your leaf fresh. Ensure that the water trickles through the drainage holes and then empty the drainage saucer completely after an hour because flooding your dracaena may lead to change the colour of the leaves, and sometimes it may make your plant dead.

Even the pot should never be filled with water; just allow some droplets of water into the soil and then let the soil absorb it. But never leave your plant to bone dry because this can also kill your plant. Other than flooding it with water, people can leave some droplets of water in the first week and then follow the same every week.

A little water is always better for dracaena but never leave your soil with excessive water. While watering your plant, it is better to clean them with some droplets of water to make them feel fresh.

Most people prefer to place their dracaena in self-watering containers because they have no idea of maintaining a plant. If people find it difficult to maintain the plant, they can start placing it in a self-watering container. This can be a stress reliever for many people because this container can water the plant for many days if refilled once.

Also Read: Why are Dracaena Leaves Turning Yellow and Brown?

  • In order to place your plant in a self-watering container, it is necessary to ensure that the plant has grown to some extent. Only then it can come up and absorbs some water. Usually, it takes about four to five weeks for the plant to attain this state, so people need to wait until it reaches the ideal height.
  • After four weeks, roots must have grown, and it is now good to drink water by itself, so now people can see a red mark in a self-watering container and have to fill water till the red mark in the container. So make sure that your plant has reached the level to absorb water itself, or people can prefer to top watering the plant for another few days and then shift it into the container.
  • After placing your Dracaena in self-watering containers, never top water the leaf because it will make your leaf strong and let leaves let lose their texture and colour, so to avoid this, people can just refill the water and leave it for some days.
  • The refilling cycle time may differ because the sizes and the capacity of the container may vary, and people need to check it from the manufacturer before refiling it.
  • If you find the reservoir half-empty, then never refill it or refill the container before it empties all the water because refilling it daily will never give time for the leaf to take a breath. Just like you and me, plants also require some rest and breathing time, so to make them breathe, it is required to leave the plant ideal for some time after the container is empty. Then make sure to refill the container after some time to maintain your plant in good condition.

Also Read: Best Potting Soil for Peace Lily Plant

Bottom line

Remember, each plant is a unique living being and have different needs. You may have different varieties of plants, but they should be maintained accordingly to ensure proper growth. For example, one plant may need a lot of water, and plants like dracaena can be maintained well by watering it once a week.

So pay attention to the watering needs of your dracaena for maintaining your dracaena in a better way; by doing this, people can also have a healthy relationship with their plants. I hope this article is informative! Thank you for reading this article.

Do Dracaena Like Coffee Grounds?

Plants generally generate a relaxing mood within the four walls of the house and enhance the overall ambience. Dracaena plants, on the other hand, are not like green plants. Therefore, the beautiful Dracaena trees are considered the most attractive flora.

These Dracaena trees are highly attractive and add elegance to the comfy style with their thin and lovely foliage. Furthermore, these species are low-maintenance and may grow in nearly any environment. Nevertheless, for the best development, a bright background is required.

The Dracaena tree doesn’t withstand direct sunshine and likes to grow in a slightly remote region. Therefore, the luscious green leaves would display their maximum potential with careful care. The foliage of this lovely plant is crisscrossed with pinkish to flaming red lines, adding to the tree’s beauty.

Why Use Coffee Grounds To Fertilize Indoor Plants?

Coffee grounds are typical kitchen refuse items that are packed with nutrients but are usually discarded. They’re easy to come by, free, and high in nitrogen, which is among the most critical nutrients for plant development. Coffee grounds are often a fantastic method to decrease kitchen wastage by using them on houseplants.

Humans have used coffee grounds in the yards with good reliability for decades; then, it’s only logical that they’d try using them to fertilize house plants. As we’ll see, this is absolutely something that you should think about.

To stack coffee grounds in soil, follow these steps: a third of leaves, a third of fresh grass cuttings, and a third of coffee grounds. If nothing else, the coffee grounds’ texture will deter snails. When you’ve gathered all of your coffee grinds, put them on top of the soil. Never use coffee that contains milk or some other ingredient to nourish or fertilize plants.

Also Read: Why are Dracaena Leaves Turning Yellow and Brown?

Do Dracaena Like Coffee Grounds?

A natural fertilizer promotes healthy development and encourages the production of more leafy green and lush leaves. Dracaena trees require a variety of fertilizers as well. A nutrient deficit may be addressed by using fertilizer units regularly. The essential nutrients that these trees need are potassium, nitrogen, plus phosphorus.

These vegetation don’t grow as well as they should or have an overabundance of brown leaves if they don’t get these nutrients. This deficit can be detected by a pale leaf hue or white specks. Plain coffee grounds could be used as organic fertilizers; you can keep them for many days and occasionally blend in with the potting mix. You can even use coffee grinds as a liquid fertilizer by mixing them into irrigation water.

Also Read: Can I Put My Dracaena Outside?

About Dracaena Plant

There are more than 40 produced kinds of Dracaena, which originated in African woods. “Corn plants” (dracaena fragrans) and “Dracaena trees “are two common names for prevalent variations. Although Dracaena braunii is not connected to actual bamboo, a shorter variety is planted in water and marketed as lucky bamboo.

Where to Plant?

Dracaena generally thrive in low to medium sunlight, but strong, indirect sunlight produces the greatest results. Too much or too little moisture and too much or too little sunlight can have leaf browning. If poor moisture is an issue, spraying the plant’s foliage or placing it in a shallow dish loaded with stones and water will assist. Let’s look into detail about the things you have to take care of while planting the Dracaena.

Also Read: Why Chinese Money Plant (Pilea) Losing Leaves | Falling Off?

Sunlight

This Dracaena tree is solely designed for your personal four walls. Therefore such dimensions are not achievable in our latitudes. The Dracaena tree can be left outside during the summer season if it is protected on the patio. Extreme sunlight, on the other hand, is not advised. A Dracaena tree, with proper care, may develop large and luscious in front of us and is often a pleasure to the eye, be it in the workplace, guest bedroom, or entryway area.

Naturally, the larger the tree becomes, the further it will need to be repotted. Dracaena roots require room and the new ground regularly. The time range for this endeavour is critical and essential if it is reviewed each year or per two years.

The correct spot for Dracaena

Nevertheless, the problem may be with the place that is either too dim or too bright. When the Dracaena tree’s foliage turns brown, the weather is excessively dry. On the other hand, whenever the Dracaena plant receives insufficient light, it produces barren, high shoots. Therefore, it’s best to chop them off and drip wax over the cut edges of the plant. Then, the nodes could be utilized to produce new, magnificent Dracaena plants as an outgrowth.

Put the shoots in a cup of water on the ledge and let them there until they grow tiny roots. You may now transplant the roots and shoots in the new soil mix. Tenerife is home to the world’s greatest and biggest Dracaena tree. According to reports, this is approximately 600 years old and has a diameter of nearly 6 metres. This luxuriant tree is a natural miracle that is more than simply attractive.

Watering Needs of Dracaena

Most houseplants demand more water, unlike Dracaena. Leave them moist by spraying the foliage with water and softly sprinkling (but not waterlogged) the ground, which should also have adequate drainage. Before pouring, make sure the topsoil is completely dry. It’s important not to overwater your plants because this might lead to root rot.

Excessive moisture or inadequate drainage may cause drooping or yellow foliage, but don’t be alarmed if the lower leaves start to turn yellowish and fall. It’s natural for dracaenas to lose their leaves to make way for new leaves, just like most plants.

Because these houseplants are vulnerable to fluoride, which is present in water from the tap, it’s critical to use filtered water while providing for them. Fluoride poisoning is indicated by dark brown foliage and dead patches with yellow margins.

Are They Toxic?

If consumed, it is harmful to dogs and cats. Dilated pupils in cats are common, and both dogs and cats may exhibit signs including puking, excessive saliva, as well as a reduced appetite. As a pet parent, it’s critical to choose your plants carefully, which requires knowledge about toxic species for your four-legged companions.

Can I Put My Dracaena Outside?

Are you interested in planting amazing house plants in your backyard? Do you want to add Dracaena to your collection? Well, then there is nothing to have second thoughts about. Dracaenas are one of the most beautiful, exclusive, and easy to grow houseplants that are available in the history of botany.

However, when one decides to put up a dracaena in their backyard, a number of questions and doubts follow. The most common of them being “can i put my dracena outside”. This is a common question that arises because of the controversial nature of the plant. Nevertheless, if you are also finding answers about this, we have got you covered. The following article talks about putting dracena plants outside and how to give them maximum care.

Also Read: Why are Dracaena Leaves Turning Yellow and Brown?

Can You Put Dracena Outside?

The fact is not hidden that Dracaenas make a better houseplant than an outdoor plant. Hence, many people are skeptical about placing them outdoors. But, if you are bent on placing them out of your house, here is a little something that you should know before doing so.

  • The primary factor that determines whether or not you should plant them out is where you live. People living in zones like 11,10, and even 9 can go for it without thinking. It might as well be better for your plants to do.
    However, if you are looking for ways to kill your Dracena plant, which I’m sure you’re not, then cool temperatures or the one with frost are ideal. Note that the above mentioned zones are USDA zones. Although Zone 9 has been listed as a supportive environment for growing Dracaena houseplants, this might not always be the case. You need to look out for and protect the plant from unnecessary cold or frosty climate changes.
  • Be mindful of not placing the Dracaena plant under direct sunlight. Sure they perform their best in tropical climates, but exposure to direct sunlight can be a little too risky.
  • Shower your dracaena plants with ample mist and water. Dracena plants enjoy getting hydrated at every hour of the day (metaphorically!). However, as is common for most other plants, it is important that you do not allow stagnant water in your plants. It can cause problems like root rot or soggy soil, which is not an ideal condition to keep Dracaena plants. To ensure proper drainage of excess water from your plant container, use a potting mixture with good drainage qualities, and make little holes in your container to facilitate water drainage.
  • Fertilizers are a must have if you want to place your Dracaena plants outdoors. Fertilizers ensure that your plant gets adequate nutrition and supplements to complement their growth. Further, they also support your plant growth, especially in the summer season. Keep your basic fertilizer stocked up in the growing season to ensure maximum safety of your plants outdoors.
  • Before choosing the Dracena plant variety, be sure to learn everything about the kind you choose. It is highly important to know that not all Dracena plant varieties thrive in similar conditions. It is important to consult your local gardener, botanist, or a reliable internet source before taking any actions.
  • Another important consideration is to make proper room for the plant to achieve its maximum height. Most of the time, the height and overall size of the Dracaena plant cannot be predicted well in advance. This is due to numerous reasons, but you can gather information about your plant’s height in advance and can make arrangements accordingly.
  • Initiate a survey of your backyard or outside area. Locate the warmest area of your property. Look for the amount of rainfall and sunlight there. You can also conduct a simple hand-shadow test to know the sunlight that the area receives. Now, plant your Dracaena plant at the spot. Ideally, your plant should thrive at this place.

Also Read: Can You Put a Peace Lily Outside?

Dracaena Plant Care Tips

Here are some additional tips about what you can do to keep your Dracaena plants fresh, active, and strong for a long time. To get good results, follow the exact time and measuring instructions (if mentioned):

  • Do not, under any condition, let your plant get exposed to excessive cold or winter temperature. Dracaena plants tend to succumb under such environments which makes it impossible for them to carry out their basic living functions. You don’t want that to happen to your plant at all. It is advised to either repot them to a warmer place or to protect them with ample shade and artificial light to counter the frosty effect.
  • Your potting mixture should have stones and other porous mixtures to keep the water flowing in case of overwatering. Additionally, since the soil absorbs extra moisture and water content, it helps to keep the plant mist for a long time. Do not let the soil or plant sit in water. Insert your finger till the top layer of the soil to identify whether or not you need to water your plant.
  • Contrary to popular belief, using compost or bark as potting soil components can attract fungus gnats on your Dracaena plants. This can be a problem if your plants are planted sideways as it can spread easily and damage the yield.
  • Dracaena leaves have sap that makes pests like Scale, aphids, thrips and mealybugs  hungry. Therefore, you can observe these pests occasionally lingering around the plant. While they do not cause much damage, they can definitely spoil the leaf structure of the plant. It is important to use alcohol cotton dabs and neem oil to prevent their visits.
  • If you want to prune your Dracaena plant, it is important to do so in the seasons of summer and spring. These are the growth seasons for the plant and provide the best time for these plants to be cut. Use extremely sharp objects for the same.

Also Read: Why Prayer Plant Leaves Turning Yellow?

Conclusion

Now that you know it is possible to keep your dracaena house plant outdoors under certain conditions, you can go ahead and do the same. However, do remember to look out for some additional plant care tips to get the best out of your Dracaena plants. Happy gardening!

Why are Dracaena Leaves Turning Yellow and Brown?

Dracaena is popularly a genus consisting of 120 species of succulent shrubs as well as various other trees. However, Dracaena leaves turning yellow and brown is a major issue that most gardeners face these days.

You will have to take care of the plant very well by following various steps to prevent this. This species widely comes from native Africa and can be commonly found in multiple regions. It can be widely classified into two types of growth, namely treelike dracaenas rhizomatous dracaenas. Both these types are very different in character, and the difference is easily recognizable. 

Reasons for the plant leaves turning brown as well as yellow and also the various possible solutions 

There are several reasons due to which the plant leaves turn yellow as well as brown. Some common reasons attached to it are 

  • Dracaenas are known to like Moist soil (not wet), Monthly level of fertilizing from the early spring through the mid-autumn season, Bright indirect light, Consistent, and moderate humidity. If anything is missing in this component, then the plant is known to react very much adversely.
  • Older leaves- Older leaves are known to turn into yellow shade. This is the natural nature of the plant. They turn yellow and are known to fall off due to this common reason. The easy solution to this is to trim them away, or you can even pull them out and save the rest of the plant or even tree. The fresh new leaves will surely replace the old ones. 
  • The dry air is known to damage the leaves on a dracaena plant. The leaves will turn brown because of the presence of dry air in the atmosphere. The leaf tips turn yellow and brown in the shade. Hence the loss of the leaves is bound to happen in this circumstance. 
  • To solve this problem, you can widely put the plant on the pebble tray that is filled with water. Then set the plant on the pebbles. Be very much careful not to let the water touch the bottom of the surface. As the water evaporates, the humidity level rises that is known to surround the plant. 
  • You can largely mist the plant on an everyday basis. A humidifier set up in the room also works very well. 
  • The plant hates a sudden change in the temperature. When the plant is very much exposed to the cold drafts, Dracaena is known to like a very warm climate ranging from the 70° to 80° degrees Fahrenheit at all times. In the autumn as well as the spring season, the temperature is known to drop significantly. So your plant is known to be happy near an open window during the summertime or even during the summer season. 
  • The soggy, cold, as well as the potting mix, causes the leaves as well as the plant to die very soon than expected. The chilly temperature, along with the overwatering, tends to make the plant have bacterial and fungal growth in it. These conditions are known to result in various brown as well as yellow coloured leaves. If the plant is going through an infection, then it is sure that you will notice damp as well as mushy areas on the leaves.
    In many cases, it is very much expected that blisters may develop. These are the common signs of the malady commonly and largely known as leaf spot. You can very well address this issue by largely pruning away various damaged parts of the plant. For this, you will have to repot the plant in fresh soil, and this is the only hope you are left with. Be sure that the container contains quite a lot of holes. 
  • Move your plant to an area with sufficient lighting, an improved level of the ventilation system, a high temperature, and avoid the potting medium becoming very dry or even soaking wet. 
  • The overwatering of the plant can cause the danger of the  Dracaena leaves turning yellow and brown. Overwatering is known to cause fungal infections. Hence the plant becomes yellow as well as droopy in nature. These are various common signs of root rot, as well as the stem becoming rot in nature. The fungus that affects the plant is the Fusarium leaf spot. This fungus is known to like the similar circumstances that Dracaena likes. It is known to thrive in moist as well as warm settings. 
  • To prevent the fungus from spreading, avoid getting your leaves wet. Water the leaves of this plant from the below region rather than pouring the water over it. 
  • Use a preventative fungicide from time to time.
  • In case you find the Dracaena being infected with Fusarium leaf spot, then you can do the following things. Remove the plant from its pot; trim away all affected leaves, stems and roots. Treat the entire plant with a fungicide. Keep the plant well isolated in a warm, well-ventilated area and also Water sparingly. Isolate the plant and live carefreely. 
  • The underwatering of the plant is able to cause crispy leaves. Look for the leaves and see if they appear very drench or if they appear dry in nature. Let the soil dry almost completely in nature. The plant likes the soil to be moist at all times. 
  • The poor water type the quality causes the leaves to turn into brown or even yellow in colour. 
  • It is very best to make utilization of the tap water. Let it very much sit in the open air for one or even two days. This will let the chemicals dissipate.
  • Dracaena is very much sensitive to fluoride. So if fluoride is build up in the soil, it will then begin to poison your plant. If this happens, try to flush the soil with the help of clear water. Allow the excessive of the water to get drained. Another option present is to repot the plant. Water with distilled or even the rainwater. 
  • Another reason for the plant turning yellow is the pest infestation system. These are more likely to harbour pests and also attract various pests. 

Also Read: Why Prayer Plant Leaves Turning Yellow?

How to Save the Dracaena from Pest Attacks?

  • Prune away damaged leaves and stems.
  • Examine plants very thoroughly and very often. 
  • Deal with any resurgence of pests as needed.
  • Treat with insecticidal soap, also treat with a Neem oil solution or a weak permethrin solution.
  • Please give it a very forceful shower to also knock off as many of the pests as possible. 

Negative Impact of the Salt Buildup

Dracaena leaves turning yellow and brown is a big thing and hence impacts the plant in a very severe way. The buildup of the salt causes the plant to get deteriorated. So choose a balanced level of the fertilizer and rest assured to get the things done very well.

If you think that the fertilizer salts have a common buildup in the soil, then try to flush the salt with a good amount of fresh or even drinking water. Allow the excess water to run out of the holes of the drain. Try to pour the water through the soil content and also allow the excess water to rain out of the holes of the gutter.

Also Read: Best Potting Soil for Peace Lily Plant

How to Take Care of the Dracaena?

This plant must be taken care of very well. However, it requires very little water than most of the various indoor plant species. Always allow the topsoil to dry out before watering them more.

Do not try to overwater the plant as it may cause the root to rot. Make sure that the Dracaena is kept away from the cooling and even heating materials. Try to improve the humidity with the help of a commercial humidifier, and you can even place the plant on a tray of pebbles. Finally, do see if the plant is toxic to cats, dogs or any other animal. 

Also Read: Why Chinese Money Plant (Pilea) Losing Leaves | Falling Off?

Conclusion 

Dracaena leaves turning yellow and brown must be taken care of very well. So follow these steps and grow a healthy plant. A healthy plant is good for your garden as well as it is very much good for the space surrounding you. So do plant a Dracaena near your house and live in the lap of luxury very well.

Planting this plant at your home can make you feel privileged and is a vast affordable option for you. This is a great plant species that is grown very well with the help of the guidelines that we have stated to you beforehand. Dracaena is a very common plant that is able to give or make the air fresh as well as a very healthy one. 

So follow these steps to take care of your plant very well and also try to live a healthy as well as a very happy life. Planting this plant will make you feel at ease and will make you love your garden very well. In a nut shell, bring positivity to your house and make your house a home.

Why Prayer Plant Leaves Turning Yellow?

Prayer plants are a common name for those who are fond of growing houseplants themselves. They are beautiful to look at, give healthy and positive vibes, and are definitely easier to maintain than most other houseplants. However, there may be times when we face issues with growing our prayer plants.

Prayer plant leaves turning yellow is the most customary of them. In the following article, we will look at all the probable reasons that contribute to yellowing of your prayer plant leaves, with some additional plant care tips to help you grow a yield that would last for years.

Prayer Plant Leaves Turning Yellow

Overwatering

One of the most common causes of prayer plant leaves turning yellow is excess watering or lack of a proper drainage system. Watering them adequately can be a hassle for many since the exact watering proportions are never known to anyone.

If you tend to water it when it is not asked for, you might be exposing it to risks of root rot and yellow leaves, something that is very harmful for the health of the plant in the long run. If you do not understand the appropriate quantity of water that your prayer plant needs, you can go the other way round to ensure that excess water is drained out properly.

You can switch to potting mixtures that give abundant drainage qualities or make holes in the pot for excess water to drain out. This helps in water clogging conditions too.

Low Humidity

Hailing from their native place, it is natural for prayer plants to expect humidity in their surroundings. This is because they seek out places that have high humid content since it sets the perfect pace for them to replicate their native conditions.

If your surroundings have insufficient humidity for a prayer plant to thrive, you should install a humidifier or create conditions that support natural humidity. If you prefer to keep them indoors, or see them becoming extra sensitive during winter months, then you would have to pay extra attention to meet their humidity requirements.

Lack of humidity can cause them to dry out at the edges, and can even deplete the water level of these plants. This can lead to discoloration of the leaves of the prayer plants. Yellowing of leaves due to low humidity can also be curbed by installing a humidity tray beneath your prayer plant.

Also Read: Best Potting Soil for Peace Lily Plant

Extremely cool temperature

Prayer plants are a fan of warm environments and cool temperatures can take their color, moisture, and other healthy materials away from them. Exposing your prayer plants to cool temperatures is one of the many reasons why the plant suddenly starts to turn yellow and discolor.

To avoid your plants from placing in cool conditions, always keep them covered or in front of a natural warm and light source so that you can immediately shift their environments in the face of an emergency.

Always keep a thermometer handy to measure the temperatures of the surroundings in which your plant is kept. Any temperature range below 55 degrees Fahrenheit is fatal to the health of the plant since they cannot tolerate the kind of frost.

It is recommended to place your plants in temperature not dropping below 60 degrees Fahrenheit for ensuring maximum efficiency of the prayer plant.

Nutrient deficiency

Plants need certain essential nutrients to survive and thrive in the long run. Iron is one such essential nutrient, deficiency of which can lead to your prayer plant leaves turning yellow. One of the easiest methods to spot if the reason is iron deficiency is to investigate if the plant is newly grown or has been there for a long time.

Yellowing of newly grown plant leaves is often a definite sign of iron deficiency. Either the iron composition of the plant is naturally low, or the deficiency has stemmed from the unusually high pH of soil. A high pH soil can be corrected by mixing the potting mixture with other soil material. However, if you want to increase the natural composition of iron in your prayer plants, using iron rich fertilizers will definitely show results.

Disease

Pest infestation or plant diseases caused by the infestation and perpetuation of pests is another reason that causes your beautiful prayer plant leaves to discolor and turn yellow. Spider mites and helminthosporium leaf spots are the most common causes of prayer plant diseases. Fungal diseases are the most common type of diseases that are found in prayer plants.

If the yellowing on your prayer plant leaves appears in the form of small spots instead of patches, the reason is fungal diseases. While it is difficult to prevent the spread of fungal diseases from one plant to other houseplants, an application of neem oil and other fungicides can be tried to get maximum results.

Also Read: Why Chinese Money Plant (Pilea) Losing Leaves | Falling Off?

Poor light and water quality

Not only the quantity of water matters, but the quality of water that is used to yield your plant is also important for it to thrive. Bad quality of water rinses the plant of its good nutrients making it essentially brown and crispy at the edges. While the edges become lifeless and brown, the texture of the leaf also deteriorates and they start turning yellow.

On the other hand, emphasis should also be placed on the light that the plant is getting. Exposing your prayer plant to too much direct sunlight will scorch the plant, and would deplete it of its colour, thus making it yellow. Do not let your prayer plant leaves burn under direct sunlight for long hours of time. This is one of the reasons for yellowing of the plant leaves.

Cucumber Mosaic Virus

The cucumber mosaic virus turns out to be a very specific causal factor of yellow patches that are visible on the leaves of prayer plants. One way to know that the yellowing of leaves has been due to the presence of the fatal cucumber mosaic virus, is to spot out the yellow patches.

If you can see the yellow patches near green healthy areas, the virus might be at work there. Once it gets in contact with other leaves, it destroys their ability to completely grow and nourish. This is because the virus is contagious. One way to get rid of this virus on the plant is to thoroughly wash the entire plant and then destroy it. Destroying the plant would make sure that the virus does not contaminate other houseplants.

Environmental stressors

Environmental stressors cause natural harm to your plant and they are the most difficult to get rid of, primarily because they occur naturally. Most of these stressors might not bother you, but they do have a negative impact on the health of the plant, thus making it yellow in color.

Excessive phosphorus or fluorine can burn the edges of leaves, extracting its natural color. When the leaf edges and the margins of the leaves burn, they leave a stash of yellow band on the leaves, hence the color.

Chlorosis is another environmental factor responsible for yellowing of prayer plant leaves. In either of these cases, you can begin by watering the plant with purified and good quality water, checking the plant for signs of root rot, and repotting the plant if necessary.

Also Read: Why Are My Fern Leaves Turning Brown?

Prayer Plant Care Tips

Prayer plant is very forgiving but is often seen getting ill from the environment it is placed in. To please your plant and to keep it healthy, you should follow the below mentioned care tips:

  • Do not expose your plants to direct sunlight. Prayer plants enjoy bright sunlight, but direct exposure to it can cause rapid burns, causing them to scorch. This also depletes them of their moisture content and other essential nutrients. It is always preferred to keep your plants under shade, indoors, where they get medium light throughout the day. Do not keep them in dark places, or they’ll rot really quick.
  • Insert your finger till the topmost layer of the soil, and then take it out. If it is damp and wet, avoid watering your plant. However, if you feel that the soil is arid and excessively dry, water it immediately in small proportions throughout the day. Do not fix a schedule for watering. Plants do not go by our schedule.
  • During the spring and summer months, mist your plants often. If you are feeding them, do it once in a month through the use of liquid fertilizers. This will ensure that they have adequate nutrient intake while also confirming their humid conditions.

Conclusion

Some of the regular prayer plant varieties include Maranta, Calathea, Stromanthe, and Ctennathe to name a few. The variety of your prayer houseplant does not matter until and unless you are searching for causes and possible solutions for the leaves turning yellow. The aforementioned causes and care tips remain the same in all these prayer plant varieties and can be used with each of them. Additionally, you can also combine these solutions or increase their dosage for good and unique results.

Best Potting Soil for Peace Lily Plant

The peace lily is a gorgeous house plant native to warmer atmospheres of South America and Southeast Asia. The peace lily plant consists of lush green leaves and a single white, resplendent leaf that hoods the stem bud.

The two-toned look of green and white in the peace lily plant adds a splash of colour to even the most monotonous surroundings. This article will tell you all about caring for a peace lily, including minutiae like the best potting soil for a peace lily.

The peace lily is a social media favourite and can be found in all Pinterest-inspired homes. In addition, interior decoration is inclining towards using plants and flowers to add some colour and texture in professional spaces such as offices.

Best Potting Soil for Peace Lily

The peace lily is a plant native to warmer weather conditions such as those present in SouthEast Asia. Peace lilies do much better in low water and high heat than in high water and low heat; a peace lily cannot bear cold drafts.

Soil would be suitable for peace lilies only when it is well-draining and can hold moisture. However, nearly every soil designed for houseplants can work well for a peace lily, given that you take adequate steps to drain the plant.

Choose any soil meant for houseplants and water it. Fertilize the ground as required and make sure to make drainage holes at the bottom of the flower pot to prevent waterlogging.

Also Read: Holes in Peace Lily Leaves: Why and What Causes

How to Make your Potting Soil for a Peace Lily Plant?

You can make your homemade potting soil for peace lily plants easily. To make your potting soil mix a peat potting soil with one part peat moss and perlite. Also, add one part sand.

Place all the ingredients in a bowl and mix well to form your homemade potting soil fit for a peace lily plant. Water and fertilize as required.

Caring for a peace lily

Peace lilies are a beautiful plant to have around and not at all difficult to maintain or take care of. With regular Watering, little light and some fertilization, they bloom beautifully.

Light

Peace lilies thrive in low, indirect light (both sunlight and fluorescent light). If you are confused about where to keep them, place them on a window-sill. While peace lilies can tolerate light, they do not do very well in bright sunlight, thus keeping them in partial shade.

Also Read: How Much Sunlight Does Peace Lily Need?

Water

Peace lilies need a moderate amount of water for their growth and nourishment. Both extreme cases, i.e. overwatering and underwatering, can be harmful to the peace lily plant. While overwatering causes waterlogging and prevents the roots from soaking water for photosynthesis, underwatering kills the plant by drying it up.

Water your peace lily around every 7-10days and even fewer times during winters. An excellent way to know if your plant needs water is to check the dampness of the soil. Fading, wilted or brown leaves are signs of water stress and should be checked immediately.

Also Read: How Often Should I Water My Peace Lily?

Drainage

Drainage is important for most plants but is essential for a peace lily. Lack of drainage holes in the pot or well-draining soil can slowly kill your plant by causing waterlogging.

Before transferring your peace lily to a new plant, look for drainage holes and make them if they do not exist. Also, ensure that you have chosen a well-draining soil for your plant to grow in.

After watering the plant once, allow the top two inches of the soil to dry before watering again. Between each Watering, dispose of the excess water in the tray below the pot.

Temperature

It would help if you placed peace lilies in a maintained temperature between 65-78 degrees Fahrenheit. Please keep them in warmer places such as inside the house during winters as peace lilies cannot tolerate cold.

Maintain a consistent temperature and avoid extreme weather changes impacting your plant directly.

Fertilization

Peace lilies do not need to be fertilized too often as they can survive on a few vitamins. Instead, fertilize your peace lily plant once every spring and summer as these are the months when it is most active. Do not fertilize during cold months as the plant stays dormant then.

Transplanting

With time your plant will grow too big for its pot, and that is when you must transplant it to a new and bigger pot. Also, once the roots start to drink up the water too quickly, you should transplant them. Another sign that your plant needs transplantation is the presence of full leaves and a compact appearance.

Also Read: Best Potting Soil for ZZ Plant

Why is the peace lily plant so famous?

The peace lily plant is a very popular closet plant choice and is seen as décor pieces in homes, offices, rooms, hospitals and more. There are two reasons behind the popularity of a peace lily plant: its beauty and its benefits.

While anyone can easily notice the visual beauty of peace lily, not many are aware of the multitude of health and other benefits it provides. Let’s have a look-

Low maintenance

The peace lily is a sweet-tempered and low maintenance plant; it needs to be watered not so frequently, it does not require too much light or fertilization. Therefore, even the busiest of people can find it in themselves to look after the requirements of a peace lily plant.

So if you are forgetful or extremely busy and still want to own a house plant, the peace lily is the answer.

Air purifier

Peace lily plant is a natural air purifier; it cleans the air of the area it is kept in. Peace Lily plant purifies the air of harmful substances such as Chemicals and their vapours. Indoor air can be just as dangerous and unhealthy as outdoors air and can cause health issues.

Peace lily plant is scientifically proven to cleanse the air of pollutants like carbon monoxide, xylene, benzene, formaldehyde and harmful chemical vapours.

Acetone vapours

Acetone used in paints, varnishes and even nail paint removers is severely harmful to humans. Exposure to Acetone vapours can cause headaches, lack of coordination, low blood pressure and other neurological disorders.

Peace lily plants absorb these acetone vapours present in the environment, thus catering for a safer environment. Consider getting peace lilies if you have recently painted your home/office or own a nail salon.

Better sleep

In the contemporary world of hustle and grind, we often lack a good restful sleep. Yet, a good night’s sleep is essential for our entire body-right from our mind to our skin. Better sleep means better health, better digestion, better concentration and coordination.

Peace lily plant promotes a peaceful environment and calms the mind to accelerate getting a good night sleep. If you are dealing with insomnia or sleep problems, get a peace lily plant to promote serenity.

Mildew

Mildew is a nagging pest that takes home in wet areas such as corners in the shower, humid rooms etc. mildew grows on clothes and other surfaces to nag us. Thankfully peace lily plants absorb excess moisture in the air and prevent mildew formation. However, mildew spores can be damaging and harmful in homes and offices.

Décor

My favourite advantage of owning a peace lily plant is the easy décor option. Peace lily plants are so versatile that they can be placed in any surrounding-colourful, monotonous, formal, informal etc., and they would still harmonize with the room’s rhythm.

You can keep your peace lily in your room, in the living room, in the office reception, washrooms etc. and it would look good.

Peace Lily Problems

Now that you know how to take care of a peace lily plant and what soil conditions are best for it let’s look at the common problems you may encounter while growing a peace lily and how to cure them.

Wilting leaves

A very common problem gardeners face is wilting of leaves of the peace lily plant, which can be caused due to several reasons. Both overwatering and underwatering are popular causes of the sagging of leaves as both restrict the absorption of water by the plant.

Brown Discoloration

Another common plant issue is brown discoloration on the leaves; this can be caused by water and light problems. Overwatering is most likely the cause of brown edges as well as too much light.

Also Read: Why Peace Lily Flower Turning Yellow, Brown or Black?

Yellow leaves

Watering can cause yellowing of leaves and give the traditional lush green leaves a wilting appearance.

Pests

Pests can eat away the plant’s foliage giving it an unhealthy appearance and killing the plant by causing various diseases. Therefore, it is essential to keep the leaves clean to avoid pest infestation and look for any signs of them.

Conclusion

Peace lilies are a resplendent house plant infamous over social media for their aesthetic. The peace lily is native to warmer regions and thus needs low light and little water. The best potting soil for peace lilies drains well and is meant to cater to the needs of a houseplant.

Why Chinese Money Plant (Pilea) Losing Leaves | Falling Off?

Falling Off Chinese money plant losing leaves is a very common problem that has an easy solution to it. You just need to know the procedure and work upon it in a proper manner. This plant is a delight for every gardener or any plant lover to grow.

You can easily nurture this plant which is coin-shaped. The fertilizer is very essential for the plant to grow. It is essential to repot Pilea in a very big pot. This plant is very much propagated with the help of the daughter plant that commonly grows surrounding the mother plant in a well to do conditions. The Pilea prefers bright light and is good and is a beautiful plant to grow.  

What Causes: Pilea Peperomioides Dropping Leaves?

Every plant needs light and fertile soil in a very good but correct quantity. Taking care of a plant is not a kid’s play. This money plant has rounded, deep green-colored, glossy leaves that are a pleasant sight to the eyes. The dropping of leaves is a common problem that may occur with this plant. There are several causes attached to it namely 

  • The presence of the poor drainage of the soil. Overwatering and even underwatering of the soil. 
  • Lack of prominent nutrients in the plant soil, as well as the heavy lack of exposure of the sun, pest infestation, frosting, aging of the plant leaves, are all the possible causes of this issue. 

This plant species is not as much widely available as the other types of house plants. These plants are widely known in the world and are rare to purchase plants. Despite the fact that its beauty is exemplary it is a great plant to start with when going for any plantation adventures.

Also Read: Best Potting Soil for ZZ Plant

Reasons for the Chinese Money plant Dropping the leaves 

There are several reasons for the money plant to drop its leaves. Some of the wide reasons can be considered only after carefully assessing the behaviour of the plants. The dropping of leaves can be largely caused by the combination of various factors or even one broad factor. The common causes may include

1. Poor Type of the Soil Damage

If the soil is not drained enough then this may be a problem for your plant. Excessive water has the power to inhibit the oxygen present in the soil. You can easily understand this by feeling that the plant is drowning and is not in very good shape. This can result in rotted and dried roots. After the damage of the roots, the transport of the minerals can easily stop. This will result in the entire plant shedding the leaves as well as wilting. 

The poor soil drainage is because of the presence of the poor soil mix. The water won’t be able to flow very easily. Another reason associated with it may be the lack of various drainage holes in your provided container. 

2. Underwatering or Overwatering 

These plants are succulents. They have common means to store more amount of the water for their own need and also to survive dry places for an extended period of time. The stems are very much fleshy and the leaves commonly contain the extra moisture proportion which can be widely used for future needs and uses. 

Since they have intact water too much water can be very harmful to them. The result of overwatering the plant is very much the same as having poor drainage in the soil. The roots will commonly rot above ground or under the soil. The plant will widely experience the yellowing of the leaves. The leaves will drop one by one. The plants will commonly lose their turgid look and hence plant will eventually wither in the end. 

Also Read: How Often Should I Water My Peace Lily?

3. Lack of Various Soil Nutrients  

The deficiency of nutrients can result in the soil being unhealthy in nature. One common indication of the deficient nutrient supply is the slow or even the stunned growth of the plant. 

4. Lack of Plant’s Exposure to a Very Bright Light 

The Chinese money plants are lovers of the very bright lights but the light should come in an indirect manner. If the room is very dim then there is a possibility that the plants will eventually turn very leggy.

They will eventually grow very tall with a lanky appearance because of the presence of the weak cell walls in their stems and in their various leaves. The entire plant will be very thin as well as the colour of the plant will be pale. The leggy results in the premature type of drop of the flowers as well as the leaves. 

5. Pest Kind of Infestation 

It is a very rare case but it is a sure possibility. Mealybugs and scale are commonly found on the underside of its leaves. They work in a subtle manner. They might cause huge damage to the plant. They are known to suck on the leaves and also create holes in the leaves. These leaves then again start to turn yellowish in the color and have the tendency to turn limp. The leaves are known to eventually drop. This may cause brown or even black spots on the leaves.

Also Read: Can You Put a Peace Lily Outside?

6. Frosting  

The plants are best grown within a temperature range of 16 to 24oC (60 to 75oF). This plant is much more tolerant to the higher temperature than the lower temperature range. Therefore extreme drops during the winter temperature may be harmful. These money plants are not really frosted tolerant. The frosted leaves are meant to dry and finally drop. 

7. Aging of the Leaves of the Plant 

The leaves dropping can be a common result of a very natural kind of process. The leaves may have aged and hence resulting in the dropping. It is a pretty normal phenomenon and hence the aging of the leaves should never be a thing to be worried about. This is the way by which the young leaves will get time to flourish themselves very easily. 

8. Leaf Type Shine Products 

Though we want the plants to have vibrant leaves using the leaf shine products can actually result in much harm. When you actually coat the leaf with the available leaf shine this results in much more harm than the benefit. The clogged stomata make the leaves breathe in a very difficult kind of manner. With the decreased levels of food, the plants will die as well as starve. After some moment the plant’s leaves will stop dropping. The most common examples are exposure to the wind as well as air conditioning problems.

Also Read: Do Pothos Need Drainage

How to Prevent  Money Plant from Dropping the Leaves?

There are various methods by which you can prevent the dropping of the leaves. The most common methods include 

#1 Use of the well-drained soil as well as the pots having perfect kind of the holes 

The soil mix will surely help your plant to live and thrive in a very good condition as well as the atmosphere. You can commonly add various things for this purpose like perlite, sand, or even vermiculite. This is used to make your soil porous. This very little space will commonly allow the large portion of the water content to pass through very easily. This helps to create a good amount of aeration. This makes the oxygen very much available to the roots of the plant.

After mixing the soil check how fast it commonly drains by pouring in water. The drainage holes must have a good size that is proportional to the size of the commonly used pots. 

#2 Try to water the plant only when the soil feels dry 

Daily watering of the plants is very essential and hence enriches the plants. Watering is very much enough when the season is very hot as well as humid. Watering once every two weeks or even once a month can also benefit you very well. To know whether it is the correct time to water all you need to do is dip your finger and check the soil at least it should be 2 inches deep.

Also Read: Why Are My Fern Leaves Turning Brown?

#3 Make sure that the water is always drained out 

When you are watering the plants make sure that it passes through the holes as well as the soil very well without any issue. Don’t forget to remove the plate present under the pot. Try to use various terra cotta pots as they can dry very easily without any issue. It will only just accumulate more percentage of the water than what your plants commonly need.

#4 Add a liquid kind of the fertilizer 

The Chinese money plants do need a good amount of the various common nutrients to survive as well as grow. Fertilizer can be added at an interval of two months. For this try to use the soluble kind of fertilizer. Try to dissolve the fertilizer in the water and then pour the amount into the soil to nourish the soil very well. Be careful that you do not overfertilize the soil as this may cause sudden death and damage to the plant.

#5 Expose the plant to Indirect as well as the Bright Light 

Locate a common place where there is a presence of enough source of light. Keeping it on the windowsill is a very much great spot as well. This helps to prevent excessive heat as well as helps to prevent the burning of the leaves as well. The leaves will not burn at all and hence your plant will be in good shape and will be in a very good condition as well. Having a glass window is a very good option. Try to open the window. This helps to make things work very well.

#6 Try to Manually Remove the various pests 

The best way to remove the various bugs is to manually remove the bugs from the leaves. If there is severe damage met to the leaves then it is good if you manually remove the bugs one by one. The manual removal of the bugs makes things very easy for you. Use a liquid detergent. 

#7 Remove the various aged leaves 

Try to remove the aged leaves at your end. This provides the space for the young leaves to grow as well as to mature. 

#8 Try to choose a very good Location 

Do not put the plant near an air conditioner. These plants are fragile and are known to make the things worse. 

Conclusion 

Chinese money plants are very good and beautify your house very much without any major issues. These plants are very much superior in the quality and are known to provide freshness wherever you install them. These plants are fresh and supplement the freshness when the air suits them. So plant one for your house and don’t be afraid the leaves will not fall off that much easier if you follow these steps very well.

Best Potting Soil for ZZ Plant

Potting soil for your zz plant is a combination of garden soil, vermicompost and sand. It’s a medium in which you can grow plants, herbs and vegetables in a container or pot.

Apart from sand, perlite, grit and vermiculite, you can include coconut coir or peat moss and limestone in potting soil. Here we use black grit not just for improving drainage but to improve air and water flow.

Generally fertilizers are not added for potting soil because it is too aggressive for them. You can use fertilizers for larger plants.

The zz plant can easily grow in the nutrient rich and porous soil mix. For improve aeration of soil combine regular potting soil with cacti or perlite soil. This plant doesn’t like to stand on wet soil for a long period so avoid garden soil.

The medium will play an essential role for every plant growth. This plant was not fussy with their soil mix but the correct soil composition will boost the plant growth quickly.

In this write-up you’ll know right soil composition required for your house plant in particularly zz plant.

What Type of Soil Does ZZ Plant Require?

It can be intimidating for a new parent plant to know the soil composition elements and consider the perfect soil composition for your zz plant.

Here are the few factors that we recommend you to consider before selecting the soil composition for ZZ plant. These include:

  • How the nutrients rich in the soil?
  • Does the soil drain well?
  • Does the soil hold some moisture?
  • How is the aeration in the soil? 

The above questions are needed to be check when you are looking for plating ZZ plant. These plants can be grow from the rhizomes through the roots comes out and then leaves and stems grow from the top.

For growth and flourish, the plant needs rich nutrient potting medium and if the soil have lack of nutrients will result in improve growth.

Secondly, make sure the potting mix is well drained and it permits the simple water flow and nutrients flow for the higher growth of the plant.

The garden soil is heavy and it will block the airflow and water, because the soil is too light and it will not resist the water at all. Here, we require a soil composition which is well drained and well aerated, but at the same time must grasp the water and nutrients for the plant growth.

Zz plant will prefer the dry or moist soil but not soggy.

Though the potting medium must hold moisture but being moist for longer hours can trigger fungal growth. So, the soil composition must have holding capacity of moisture in moderation apt for zz plant.

Your ZZ plant soil must be well aerified, if it is closely packed then oxygen flow will block and retain the soggy soil for bacterial and fungal growth and root rot.

Don’t be afraid or confused about the soil composition for your ZZ plant and it can easily fulfil your plants needs.

If you’re not sure what to do, simply follow the composition that I have tried and tested.

Also Read: Can You Put a Peace Lily Outside?

Best Potting Soil Mix for ZZ Plant

Fortunately, your ZZ plant is not very picky about the growth medium because it is one of the most resilient plants in the market.

But, we need to thrive our ZZ plant, not just to survive, we may need to help it, mature quickly.

These are hardy plants, and when planted in suitable potting soil, they can thrive as long as they receive proper care and nutrients.

Use a mixture of perlite, peat and even sand (sometimes) to ensure proper drainage of the plants.

However, if you want to prepare potting soil for ZZ plants, mix regular potting soil with the cactus mixture to ensure good drainage and fast nutrition intake.

(Also Read: Do Pothos Need Drainage?)

The cactus mixture contains perlite, limestone and sand, making it a porous and well-draining mixture and also ensures proper root growth.

Let have a look on my recipes that will works well with all ZZ plants.

Recipe no. 1

  • ¾ share of organic potting soil in a container
  • ¼ share of succulent mixture
  • Handful of compost

Recipe no.2

  • ¼ share of potting soil
  • ¼ share of peat
  • ½ share of coarse or perlite sand

Grind three parts of potting soil into a single part of cactus mixture to start with and the cactus mix will help to improve the draining capacity as well as soil’s air space.

Another way to improve soil drainage is to add perlite to the mixture. Perlite brightens the soil structure and promotes better absorption of nutrients and water.

Add 1/2 share of perlite to 1/4 share of potting mix and you can also add 1/4 of peat.

The above options will produce positive results and it will protect your ZZ plants from soaking in water for a long period.

Can I Use Cactus Soil for ZZ plants?

As an ideal, if the soil of ZZ plant dries out between watering. Cactus soil is an excellent choice for your ZZ plant because it can quickly absorb water and drain water quickly.

Although cactus soil is very effective for ZZ plants, it can keep plants dry for a long time, resulting in prolonged drooping and brown leaves.

I recommend mixing something that can keep moisture at a certain level and may be very suitable for your houseplant.

Mix high-quality potting soil with the cactus mixture to improve water retention, while having good drainage and coarse mixed particles. It will also provide nutrients to plants and promote root growth.

Ideal mixture is 1/2 part cactus soil, 1/4 part potting soil, and 1/4 part peat.

Also Read: Why Is My Fiddle Leaf Dropping Leaves?

Do ZZ Plants Like Acid Soil?

ZZ plants like slightly acidic soil.

The ideal pH value range set by ZZ plant is between 6.0-7.0. Make sure the soil is not too sour, as this will burn the leaves and stunt of the ZZ plant.

Any pH range around 6.5 is ideal for ZZ plants.

When Should I Transplant My ZZ plant?

ZZ plants have a good growth rate and their roots are rhizomes. You need to know your ZZ plant to determine when to replant it.

The roots grow vigorously, and when the roots come out of the holes, it indicates that the plant needs to be transplanted. Other signs that your ZZ plants indicate that they need to be transplanted are:

  • Withering leaves
  • Browning leaves
  • Stunted growth
  • Pots break down started
  • Excessive root growth

These signs should be detected immediately and ZZ plant should be transplanted.

It is recommended to transplant in summer and spring, because winter is the dormant period, transplanting will affect the growth of plants.

Do not fertilize immediately after transplanting, let them adapt.

Ideally, you should repot your ZZ plant within 2-3 years, because the transplantation will not cause any harm if necessary. It can promote your overall health and growth.

Can You Put a Peace Lily Outside?

Yes, one may plant their peace lily outside as provided as people preserve it in the shadow and shield it from the frost. When you reside in a hot environment, you might cultivate these in the shaded yard. Also, during summertime, you may provide a Peace lily bloom by moving it outside. They may, nonetheless, be quite demanding.

As a result, take them inside even before the weather becomes chilly enough in the autumn.

Peace lilies are beautiful house plants, although they could also be grown outside in specific locations. Outdoor peace lily maintenance is quite simple if the environment is favorable.

We’ll go over some ideas for cultivating thriving peace lily plants in your yard in this post.

Peace Lilies

Peace lilies are evergreen tree plants that flourish in indirect sunshine and steady water on the jungle floor. The secret to keeping a peace lily alive and comfortable is to replicate similar circumstances at homes. Peace lilies yield white to off-white blooms by the first week of summertime if given adequate sunlight and can flower all year if given the appropriate circumstances.

The height of peace lilies cultivated inside the house can reach up to 16 inches, but the outside peace lilies differ in this characteristic. The outdoor plant leaves are capable of reaching 6 feet if taken care of properly. Peace lilies prefer zones 10 and 11 as they cannot face harsh chilly circumstances. 

Also Read: Why Peace Lily Flower Turning Yellow?

Transferring a peace lily from the house to the garden

Indoor peace lilies may be transplanted to the yard, although they will require time to adapt to their new surroundings. Before actually transplanting the crops, tough them off by leaving them outside a few times every day.

Growing Peace Lilies in the Garden

Peace lilies will give you the best feeling with the radiance they possess. They will illuminate the garden in the evening, but not everyone can grow them in your garden. Living in zones 10 or 11 will be beneficial for you to grow peace lilies in your garden. These plants favor less shade as it is comparable to their home environment of the forests.

Peace lilies can also be grown outside in a pot or the soil. Peace lilies cultivated outdoors often reach a peak of 2 to 3 feet and a diameter of 3 feet. They thrive in tidy leaf piles. Accommodate for optimum airflow; seeds must be placed 2 1⁄2 to 3 feet away.

Feed the soil daily to keep it hydrated. tTe tips of the foliage will turn brown if they are overwatered. You need to fertilize with a proper fertilizer twice annually, in the autumn and springtime. Even with too many fertilizers, the leaves of peace lily will turn brown in the shade.

Let’s dive into the details of the conditions required to grow Peace lilies outside.

Also Read: Holes in Peace Lily Leaves: Why and What Causes

Requirements To Grow Peace Lily Outside

Sunlight

The peace lily can’t stand being in direct sunlight for long periods. The plant prefers moderate shadow and should be protected from strong sunshine. You must preserve the plant in shaded areas if possible since it thrives in that environment. As a tropical plant, the peace lily is accustomed to growing under the shade of tropical forests.

Another reason for keeping the peace lily plant under shade is that extreme sun exposure will burn the leaves and stop their growth. Too much light is more harmful to new plants. Therefore if you wish to save your garden’s beauty, plant the peace lilies under shade.

It is essential to understand that peace lilies will flourish in light, but the amount of time and extent of sunlight needs to be considered. The peace lilies have the capacity for the early morning sunlight, but afternoon sunlight is an absolute no as it will cause sunburn to the peace lily, which is a problematic issue.

The afternoon sunlight will probably cause the death of your beautiful peace lily. Thus, be cautious of where you plant the peace lily.

Also Read: How Much Sunlight Does Peace Lily Need?

Soil

It is not difficult to decide what kind of soil one should use for planting the peace lily in the garden. As we have mentioned, the peace lilies are found in the evergreen forest. The soil there is enriched with natural materials, and it’s very moist, which is favorable for the plants.

Therefore the yard soil should also be similar to their native place. This will ensure that the peace lilies will bloom perfectly.

Plant spacing

The space between the plants is another important thing that you need to know. For excellent growth of your beautiful flowers, plant them 2 ½ to 3 feet away from each other. This will also help in the airflow.

Water and Environmental conditions

Peace lilies lose water through their foliage, mainly when planted outside, and require frequent, thorough hydration to thrive. Also, repeatedly feeding per week during summertime is an excellent method for keeping the crop strong, while you should spray less over the cold whenever the plant’s development decreases.

Because peace lilies are vulnerable to chlorine and chilled water, leaving the water rest for several hrs then allowing it to warm up to room temp will hopefully deter freezing jolt or chlorine impairment. Peace lilies being tropical plants that are susceptible to winter damage. Houseplant’s peace lilies in cooler regions must be brought inside when temperatures reach 40 ° c Fahrenheit because this can destroy the foliage, stalks, even roots.

Also Read: How Often Should I Water My Peace Lily?

Pests

Peace lilies attract a lot of pests, but there are some bugs it is most susceptible to :

  • Mealybug: These are tiny fuzzy white masses towards the bottom of leaf stems. This bug can be treated with a variety of chemicals, and numerous procedures could be required. Consult a botanical expert for advice.
  • Scale insects: these are little brownish chunks that appear on the undersides of stems and foliage. An appropriate horticultural or insect oil can readily be used to cure them.

Basic Peace Lily Concerns

  • Excessive watering, too much fertilizing, and a shortage of moisture can all cause brown foliage edges. Study to recognize and respond to the plant’s cues. If the base of the leaf surface is brown, the mature leaflets may be unable to cope with the newer, faster-growing leaves.
  • Another issue is the yellowing of leaves. It may or may not be a concerning factor depending on the reason. One of them is when the leaves mature, they turn yellow and eventually shed from the plant. So it should not be your concern. Some other factors will be too much watering, too little moisture, pests, excessive sun exposure, or anything which acts as a stressor for the peace lily.

It might be a tricky process if a peace lily plant gets finicky and experiences problems – but you wouldn’t understand why. When anything wrong happens with vegetation, it responds in a variety of ways. Below is a rundown of the top frequent peace lily challenges a peace lily owner has to face:

So one needs to be vigilant about the factors that can cause yellowing of the leaves. Chop off the yellow leaves from the peace lily plant as they would only cause more damage to your peace lily. Furthermore, removing these leaves will help the plant grow young leaves and allow them to nourish better.

  • One more problem in the peace lily is drooping. Excessive or inadequate watering is the most prevalent trigger of drooping. However, it could also be triggered by abrupt temperature fluctuations or transplantation stress following repotting. Just irrigate if the topsoil is completely dry. When the vegetation is in bright sunlight, close to an element of heat, or subjected to a freezing blast, it should be moved. After that, keep an eye on your plant till it heals.

Also Read: Overwatered Peace Lily

Fertilizer

To generate blossoms, most plants require in-ground potassium. During springtime and autumn, give the crops a 1/4 to 1/2 intensity 20-20-20 fertilizer over two months. With peace lilies, high dose fertilizer is very much. As this plant is generally inactive throughout the late autumn and early winters, don’t fertilize it.

When should you Harvest Peace Lily Seeds?

The seedlings of a peace lily could be gathered and then used to start fresh blossoming plants. In the middle of the Peace lilies flower is a tiny capsule of seeds. Whenever the eggs are immature, the bean can seem pale green, brownish, and black. Its seedlings are fully ripe when the seed capsule has become black. Extract the seed pods from blooming peace lily flowers with shears. The seeds should then be scraped from the pods and placed in a package for future purposes.

Conclusion

The interior or outside peace lily likes settings like those in its natural habitat, the forest. We hope this post helped our readers learn about various aspects of a peace lily and all the conditions needed for the growth of the peace lily plant in your garden. Now you can start having beautiful, radiant, Peace lily flowers at your home in just a few steps.

Do Pothos Need Drainage

Pothos plant is a popular house famous for low maintenance and beautiful stems. Pothos plant is known by many other names such as devil’s ivy, golden pothos, or money plant. Golden ivy does well in little water and low or indirect light.

The pothos plant makes a beautiful edition in every home, room, or office. It has light green leaves growing on similar colored soft stems with veiny tips. Pothos tend to rise and fall out of the vase/pot it is grown in and thus can also be used in hanging pots.

A houseplant, the pothos plant is known for its distinctive looks and easy to take care of attitude. The pothos plant needs little to average indirect light and some water. While they thrive in nutrient-rich soil, they don’t necessarily die in soil that isn’t very high in nutrients.

Moreover, pothos plants can be grown in a vase of water or even a pot of soil nourished with fertilizer and prepped with water. Fun fact- pothos plants do not need sunlight to grow.

What is Drainage in Plants?

Each pot (at least a good one) has drainage holes at the bottom. Drainage holes are tiny holes made in the base of a pot, allowing excess water to drip down from the soil. Most people place a tray under the holes to collect excess water and discard it timely to prevent water-logging.

Drainage holes ensure that excess water from the soil does not stay put and goes out of the plant, thus preventing overwatering, which can cause rotting.

Do Pothos Need Drainage?

Yes! Pothos plants are native to SouthEast Asia and Pacific regions, which are tropical; they are more tolerant of under watering than overwatering. As mentioned above, drainage ensures that excess water finds a way out of the soil and prevents waterlogging.

Pothos plants do not require a lot of water, and thus, it becomes imperative to allow them to drain. Here are the steps to follow to allow drainage-

Choose a pot with drainage holes and place a tray under it to collect water.

Also Read: Why Are My Fern Leaves Turning Brown?

Water the plant

  • Allow the top 1-2 inches of soil to dry before watering
  • Before watering again, discard the water contained in the tray

Benefits of a Pothos Plant

Most people care for a pothos plant for beauty and aesthetic pleasure; however, there are many benefits that it provides, most unknown to many.

Easy to maintain

For a plant lover/cultivator, the significance of a plant being low maintenance is very high. If you have a busy schedule and yet want to be a plant parent, pothos plant could be a good option for you.

Money plants can grow with very little water, so it is all good even if you forget to water the plant a few times. Moreover, pothos is a houseplant in the truest sense of the word as it does not require any sunlight to bloom and grow. Place it anywhere with artificial light and water it every once in a while.

Also Read: Why is My Croton Dropping Leaves?

Purifies the air

The pothos plant cleans the air of toxins such as benzene, formaldehyde, xylene, carbon monoxide, and other harmful toxins. These toxins have dangerous and often fatal effects on our health.

Pothos plant acts as a natural air purifier and cleans the surrounding air by absorbing toxins. It also absorbs excess carbon dioxide and ozone from the surroundings.

Increases humidity

Pothos plant also aids in excellent and restful sleep by increasing the humidity in the air. Higher humidity and lower levels of dryness aid in better breathing and thus make it easier to fall or stay asleep.

Also Read: How to Get Rid of Bugs on Jade Plants?

Versatile

Pothos plants are versatile and can be grown in many pots or containers, and even vases. They can be grown in containers kept on windowsills, shelves, mantles, or even containers hung from hooks on the wall.

Pothos plants grow out of their pots and look like vines; they look stunning when hung in pots overhead.

Feng shui, Vastu, money plant

In countries like India, money plants are named such as it is believed to bring wealth for the owners. Pothos plants are also considered to be suitable for Vastu (astrological predictions) and fengshui.

Caring for a pothos plant

Pothos plant does not need too much attention and effort from your side to bloom. With some light and little water, a pothos plant will flourish. Here’s how to take care of a pothos plant.

Light

Pothos plant does not require too much light. It can be grown indoors or outdoors, in closets, offices, and bedrooms. A tip for beginners is to keep the pothos plant in an area with indirect light, as that would be the most suitable.

Pothos plant does well in numerous light conditions except for direct sunlight under which it withers. You can also decide light conditions based on the variegation of the plant. As only the green parts of a leaf can photosynthesize, choose light conditions depending on it.

If variegation is less, choose more light and vice versa.

Water

Pothos plant requires an average amount of water. You can water your plant once or twice a week depending on the weather at that time and the dampness of the soil.

Since pothos plants can thrive even in little water, you can adequately take care of them even if you are someone with a packed schedule. Say you forgot to water the pothos on the designated day; the plant would be fine for a few more days without water.

Allow the top layer of the soil to dry before watering the plant again, do no overwater as it can cause rot. Place a saucer below the drainage holes and empty it before the next watering to prevent waterlogging.

Also Read: How Often Should I Water My Peace Lily?

Fertilizer

Fertilizers keep the soil rich in nutrients that are required for a plant to grow and flourish. Pothos plants do not need too much fertilization; they fertilize every three months with a natural and balanced fertilizer for the best results.

Cleaning

Gently wipe the leaves of the pothos plant with a damp cloth to keep away dust and insects like mites which can eat away your plants’ leaves. Do not use industrial cleaners as they can clog the leaves. Do not neglect cleaning your plant.

Pruning

Pothos plants tend to sprawl and grow out of the pot. It is this very sprawling look that gives it the appearance of being a vine. As for pruning, allow the plant to grow naturally but cut bare and long-running stems to allow a bushy growth.

Pot requirements

Pothos plants can grow in many types of pots- from window-sized to hanging and even vases. Choose a pot that is 2 inches bigger than the root ball and with adequate drainage holes.

Voila! You have successfully allowed drainage in the pothos plant.