Are Worm Castings Good for Tomatoes?

Are you a tomato lover looking for a natural and effective way to fertilize your plants? If so, you might have heard of worm castings – a nutrient-rich organic fertilizer that is gaining popularity among gardeners. But are worm castings good for tomatoes?

Yes, worm castings are really good for tomato plants. Worm castings are a natural and sustainable fertilizer made from the waste produced by earthworms. 

As earthworms consume organic matter, they break it down and release it in a form that is easily absorbed by plants. 

This process makes a nutrient-rich substance that is packed with vital minerals and microorganisms that help plants thrive well.

Nutrients in worm castings
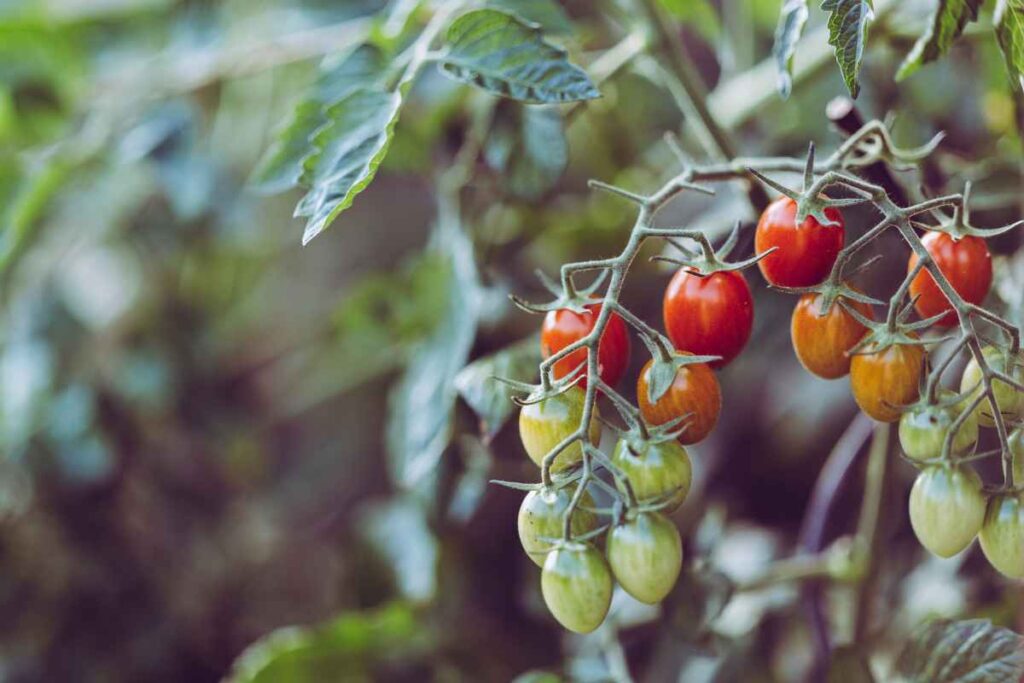
Worm castings are natural essential nutrients that are crucial for plant growth and development. They contain high levels of nitrogen, phosphorus, and potassium referred to as the NPK ratio. In worm casting, the NPK is 5.5.3. These macronutrients are responsible for various functions in plants, such as leaf and stem growth, root development, and flower and fruit production.

Another key component of worm castings is the presence of beneficial microorganisms. These microorganisms help to break down organic matter and release nutrients in a form that is easily absorbed by plants. They also help to suppress harmful pathogens and pests, while promoting overall plant health.

By using worm castings as a natural fertilizer for your tomato plants, you can provide them with a rich source of nutrients that will help them thrive. The nutrients in worm castings are released slowly over time, providing a steady supply of nutrition to plants without the risk of over-fertilization.

Also Read: Is Wood Ash Good for Tomatoes?

Benefits of using worm castings for tomatoes

Worm castings are like a superfood for your soil and plants. They contain organic matter and beneficial microorganisms that can help improve the health and structure of your soil. 

That is essential for your plant because healthy soil means healthy roots and healthy roots mean healthy and productive tomato plants.

When you use worm castings as a natural fertilizer, you are also providing your tomato plants with a steady supply of nutrients. 

Unlike synthetic fertilizers that can be harmful to the environment and cause nutrient imbalances in plants, worm castings release nutrients slowly over time. 

This means that your plants have access to all the essential nutrients they need to grow strong, healthy, and productive.

Moreover, worm castings can also help protect your tomato plants from harmful pathogens and pests. The beneficial microorganisms present in worm castings can help to keep harmful bacteria and fungi away. 

Finally, using worm castings is a sustainable and eco-friendly option for fertilizing your tomato plants. Synthetic fertilizers can be harmful to the environment, but worm castings are all-natural and can help your plant grow well.

How to Use Worm Castings for Tomatoes?

The first step is to make sure you have high-quality worm castings. You can buy them from a garden centre or online, or you can make your own by composting them with worms. Either way, make sure you are using fresh, well-composted worm castings for the best results.

The first way to use worm casting is to mix the castings into your soil before planting. This will help improve soil health and provide a natural source of nutrients for your tomato plants.

Another way to use worm castings for tomatoes is to create a worm-casting tea. This is a liquid fertilizer that can be applied to your tomato plants throughout the growing season.

To make worm-casting tea, simply steep a small amount of worm castings (about 1-2 cups) in a gallon of water for 24-48 hours. Once the tea is ready, strain out any solids and apply the liquid to the soil around your tomato plants. This will provide your plants with a quick boost of nutrients and help improve soil health.

You can also use worm castings as a top dressing for your tomato plants. Simply sprinkle a small amount of castings around the base of each plant. That will help release nutrients slowly over time and improve soil structure.

Finally, you can use worm castings to create a compost tea. This is similar to worm-casting tea, but you’ll also add other compostable materials to the mix. Compost tea can help provide your tomato plants with a range of nutrients and beneficial microorganisms, helping them grow strong and healthy.

Comparison with other fertilizers

First, let’s look at synthetic fertilizers. These are fertilizers that are chemically produced, and they can provide a quick boost of nutrients to your plants. 

However, synthetic fertilizers can also have some downsides. They can be harsh on your tomato plants and cause nutrient imbalances if you do not use them correctly.

Also, synthetic fertilizers do not contain organic matter or beneficial microorganisms, which are important for soil health and plant growth.

On the other hand, organic fertilizers are made from natural materials such as compost or manure. Like worm castings, they can help improve soil health and provide a slow release of nutrients to your tomato plants. 

However, not all organic fertilizers are created equal. Others, like compost, may not provide the complete range of nutrients that your tomato plants need to grow strong and healthy.

Worm castings are a great option for organic and natural fertilization. They contain a wide range of nutrients that your tomato plants need, including nitrogen, phosphorus, and potassium. 

Moreover, worm castings are easy to use and apply. You can mix them into the soil, create a tea or top dressing, or add them to your compost pile. And, because they are all-natural, you can feel good about using them in your garden without harming the environment.

How to make your own worm castings

Here’s how you can make your own worm castings – 

Step 1: Get a worm bin. 

You can purchase a worm bin or make your own using a container with a lid. Make sure the bin is big enough to hold your kitchen scraps and worms.

Step 2: Add bedding. 

Worms need bedding to live in, and shredded newspaper or cardboard works great. Wet the bedding and fluff it up to create an airy environment for your worms.

Step 3: Add your worms. 

You can purchase red wiggler worms from a garden shop or online. Add them to your bin and cover them with bedding.

Step 4: Feed your worms. 

Your worms will eat kitchen scraps like fruit and vegetable peels, coffee grounds, and eggshells. Avoid adding meat or dairy products as they can attract pests and smell bad.

Step 5: Harvest your worm castings. 

Your worms will turn your kitchen scraps into nutrient-rich worm castings over time. You can harvest them by separating them from the bedding. Store your worm castings in a dry, cool place until you’re ready to use them.

Conclusion

Using worm castings for your tomato plants can be a great way to provide them with the nutrients they need to grow strong and healthy. Worm castings are rich in nutrients, easy to use, and help improve soil health. Plus, they’re an all-natural and environmentally friendly option.

Whether you’re a beginner or an experienced gardener, using worm castings can be a great addition to your gardening routine. You can purchase them online or at a gardening store, or even make your own using a worm bin. 

Is Wood Ash Good for Tomatoes?

Yes, wood ash is safe to use on tomatoes. Tomatoes are by far the most commonly grown vegetable in gardening. Tomatoes are grown for their taste and to enjoy gardening. Some even participate in competitions and take pride in a bountiful harvest.

Is wood ash good for tomato plants?

Wood Ashes are a good option for the tomato plant since they promote fertility. Wood ash is high in potassium, often known as potash, which is an important mineral for plants. Ash may be seen as a leftover of burned material, and as the ash looks useless.

In reality, plants can benefit from using ash as they like potassium, which can be found in wood ashes. You have the option of composting it first or spreading it around the bottom of the tomato plant. Therefore, the ideal way to feed wood ashes to tomatoes is to make ‘tea’ for the plants.

Wood ash is a relatively strong tomato fertilizer, significantly increasing growth of the tomato plant and tomato output compared to untreated plants and nearly able to keep up with traditional fertilizer.

The most essential thing to remember about this is that ‘wood-ash’ must be handled carefully.

Never use hot wood ash in the plant since it is hazardous to your fragile plants and might spark a fire. As a result, always set aside to cool appropriately before using it. And, of course, while working with wood ash, you should always use some form of protection.

Also Read: How to Use Banana Peels for Cucumber Plants?

Uses of Wood Ash in Your Tomato Garden

You can easily use wood ashes to enrich plant-soil if you have a fireplace or woodstove! Wood ash is rich in nutrients and phosphorus, making it ideal for use in the vegetable garden. But it’s also crucial to know the helpful uses of wood ash.

Fertilizers

Wood ash has a variety of nutrients that the tomatoes will indeed be ready to extract. The amounts of these nutrients can fluctuate depending on whether you burn hardwood or softwood. Some claim that hardwood contains more minerals than softwood.

Whatever you use, it will most likely be high in nutrients and minerals such as potassium, magnesium, and calcium.

Calcium is not just used to maintain your tomatoes healthy, but it also eliminates blossom end rot.

Potassium is considerably more important. This vitamin boosts yield, which is always an advantage. Potassium is more important than calcium in the overall well-being of the tomato. Low potassium levels in your soil cause Blotchy ripening of tomatoes and an increased risk of yellow patches.

Magnesium is another essential mineral for maintaining tomato plant leaves robust and green so they can continue to absorb sunlight. Yellowed, curled leaves are generally an indication that your soil is deficient in magnesium.

Adding wood ash to your tomatoes improves your chances of having healthy tomato plants. It helps to enhance the size and quantity of the plant.

A study states that, adding wood ash for tomato plant will help to increase the yield, fruit size and overall health of the plant.

Also Read: How Often to Water Green Onions?

Compost Heap with Wood Ash

Since wood ash is alkaline, it may aid in reducing the acidity of a compost heap. This optimizes the environment of composting worms and produces compost that is ideal for mulching around veggies.

Add a single layer of wood ash to the compost heap, once in a week and should be used only every six inches.

Always add cooled and dry ash into the heap, along with all the other essential ingredients.

For active or heated compost heaps, once a month is advised in summer or spring. But the ash and debris to cold or infrequently used compost piles.

Wood Ash for Soil pH

Tomatoes are some of the plants which need nutrients frequently to grow properly. And they are also the plants that are sensitive about their soil requirements. Not only that, but pH is a soil condition equally as significant as nutrient richness.

Tomatoes prefer acidic soil with a pH of less than 7. Too alkaline or acidic soil has a harmful impact on nutrient levels. If you see that the tomato appears Blotchy, check the pH of the soil. If it’s less than 6, your soil has become too acidic for the tomatoes to excel.

Most veggies need a pH range of 6.5 to 7.0. If the pH of your soil is less than 6.5, forks or rake wood ash to help boost it. To determine the pH of your soil, use an affordable test kit.

In terms of acid neutralization, wood ash is roughly half as efficient as lime. As a rule of thumb, spread about two ounces of ash per square yard. Wear gloves to protect your hands and do this on a calm winter day.

Root vegetables, such as cabbage and Brussels sprouts, grow in acidic soils. Apply wood ash before seeding in the winter or in actively developing plants.

Because wood ash is strong in potassium, which promotes blooming and fruiting, it’s perfect for usage around most fruit trees and fruiting veggies like tomatoes.

Take precautions when applying wood ash near plants that demand acidic soil, such as blueberries. It should not come into contact with seedlings or be used on potato beds since alkaline soil promotes potato scab.

To turn the soil sufficiently acidic for most other crops, you’d need to use a lot of wood ash, but it really is worth re-testing the soil’s pH every two years to ensure it doesn’t go beyond 7.5.

Repellent for Pests

If bugs and a few other insects bother you, you’re in luck. Wood ash is quite effective in repelling these nasty bugs. Snails, slugs, or a few soft-bodied insects, such as aphids, are repelled by the salt in the ash.

Unfortunately, the repellent characteristic of wood ash is rendered obsolete once wet. Later in the day, sprinkle your dry, cold wood ash all around the base of your plants. To avoid any undesirable harm, avoid getting the ashes on the stems and leaves of the tomato plant. However, the repellent characteristic of wood ash is rendered useless when wet.

Mulching

You may want to keep your soils wet, particularly during dry seasons. The most efficient method is mulching because it allows for the gentle release of nutrients into the soil and the avoidance of moisture evaporation surrounding the plants.

You can safely use wood ash to cover your garden plants and fruit trees. However, avoid applying ash on plants that thrive in acidic soil, such as raspberries and blueberries.

Inhibit weed growth

Wood ashes can also be used to inhibit weed plant growth. Wood ashes have been found to be effective in promoting plant development.

Still, they can be used to eradicate one of the plant’s biggest enemies: weeds, which take the nutrients and minerals which you spread in the garden in the form of fertilizers, and because of this the tomato plant will be unable to take the proper minerals and nutrients causing the tomato plant to become blotchy. It has been found that excessive wood ash elevates the pH of the soil, making it even more alkaline.

However, if you use too much wood ash to kill weeds, you may end up with a barren garden; hence, use wood ash with precaution. To use wood ash to kill weeds, spread a thick layer of ash to the sections of the garden where you want to inhibit weed growth, but just don’t mix it in.It is a highly effective method of using wood ash. However, just a small amount should be used.

How to Prepare the Soil for Tomato Plants?

Dig compost or manure thoroughly into the beds of soil to prepare the garden for tomatoes. When replenishing soil in the spring, apply old or composted manure.

Do this in a three-foot-diameter-by-two-foot-deep area, keeping in mind that roots will spread out and down.

How do you add nutrients to the soil before planting tomatoes?

Compost and green manure are helpful to add nutrients for tomatoes and many other plants. Compost improves soil fertility and adds basic nutrients. All year round, composted manure offers nutrients and the manure that has been composted also helps plants in getting nutrients throughout the growing season.

Tips for Using Wood Ash for Tomatoes

Safety concerns

Since wood ashes are alkaline and have a high pH value, you should use protective eyewear, gloves, and a face shield. Avoid spreading them in the wind as well.

Using only wood ash

Always make sure to not use ash from the combustion of rubber, cardboard, coals, or painted or colored wood. These materials may contain hazardous compounds.

Do not use wood ash during seeding

Try not to use wood ash during the seeding process as wood ash contains too many salts, affecting the growth of plants.

Appropriate application

The maximum recommended application is 3 pounds per 100 square feet of the soil surface in a single season.

Homemade fertilizer for tomatoes

Five pounds of ashes should be placed in a breathable fabric or jute bag, tied securely, and soaked in 200-litre water.

Allow it to settle for four days before pouring a cupful over the tomato plants. Use this once a week until they begin to blossom.

Storing Wood Ash

To minimize nutrient loss, wood ashes that are not immediately applied to your plants should be kept in a dry place. Ashes placed outside lose most of their potassium in a year due to rain leaching.

Ripen on the vine

Tomatoes can ripen if harvested after they begin to turn pink. They can taste nearly as nice if taken early and placed inside to mature as if they had ripened on the vine. However, the temperature is essential. Tomatoes taste best if harvested early and matured at room temp when outside night temperatures drop below 60o F in late summer and autumn. They do not have to be placed on a window ledge.

Proper site

Tomatoes need a lot of sunlight. Thus they need to be in direct sunlight for at least 6 to 8 hours of direct sunshine. You may plant them in partial shade, but the yields and taste will not be as good as other tomatoes.

Conclusion

Can I use wood ash for tomato plants? Yes, potassium or potash present in wood ash will benefit tomato crop to increase the yield and size of tomatoes.

How to Use Banana Peels for Cucumber Plants?

Peels of bananas are excellent for the plants you have, at least this is according to the internet. You can put some of them in the soil at the bottom when you plant roses. They can be added to water and allowed to sit for several days to make a tea made from banana peels, an excellent fertilizer for indoor plants like cucumbers.

Dry them to an opaque leather, then crush them into the banana skin powder, which is fantastic for gardening. I’ve even come across a website that has fertilizer spray from these.

The consumption of banana peels is popular and has been reported to have numerous health benefits and may even improve the appearance of teeth.

Let’s look at the real-world benefits of fruit peels for plants. Are they more beneficial than an additional source of organic matter? 

Banana Peels for Plants – The Claims

This blog began after watching a YouTube video claiming banana peels had an NPK range of between 0-25 and 42.

If you come across claims like this, it’s imperative to give them an initial sniff test for real. Does it sound reasonable? Does it appear plausible? If not, make a run for the hills, as other advice is questionable.

A banana peel is a part of the plant. A plant requires protein for its function. All living creatures require it. Protein is nitrogen-containing. The zero number for nitrogen is completely absurd. There is no living thing, and any plant material has a nitrogen content of zero.

All living things contain water, and they are a great water source. Humans are mostly water, like plants. If a banana is composed of 80% water, how could the potassium content be at 42 percent? This is about 80 percent.

If you didn’t even know the 80% moisture level, The above NPK number suggests that 67% or 1/3 of the banana peel is potash and phosphate. Does this make any sense? NO!

It’s not the only website that claims that the potassium level was 42. That is absurd.

Also Read: How Often to Water Green Onions?

The Question to Ask

Organic matter of all kinds is beneficial for soils and plants. They all serve as the plant with carbon and nutrients as organic matter is decomposed.

The key question is: are banana peels healthier than other organic matter. Are they able to provide unique beneficial chemical compounds? If so, then they could be Superfood for plants.

Vague Claims for Banana Peels

Do a little Googling, and you’ll find various claims that state that banana peels are of “high” nutritional value. There are even claims that peels have more nutritional value than fruit. It sounds plausible, but you might have observed that there aren’t any numbers in these assertions.

What does “high” mean? What is the highest value relative to other organic things? They are just clever words that attempt to make you believe in fiction without any numbers. 

Dry or Wet Weight?

When numbers are given, there’s an issue in the data. Does this come from dry or wet weight? If someone claims that banana peel contains 42 percent potassium, is it an average wet or dry peel? This is an important point because most of a banana’s peel’s contents are water.

Chemists circumvent this issue by declaring chemical content in dry weights. However, many sources use the numbers and, if they attempt to find them and then report them as wet weights, that overstates the value by an enormous amount.

Are Bananas High in Potassium?

Actually, not really. Bananas are higher in potassium than other foods like meat and grains. However, all vegetables and fruits contain more potassium, “there is nothing unique about bananas. Potatoes, tomatoes and beets are also rich in potassium and are often higher in potassium than the average banana.”

One cup of chocolate milk has the same quantity of potassium as the banana.

Magical Properties of Banana Peels

There are also a few vague claims about the other substances in banana peels, which may benefit plants. However, I could find none of them which could be examined.

There is a myriad of assertions for the health of our bodies, which include things like antioxidants. However, an examination of the facts at the research shows that the evidence isn’t in place for the advantages of these substances, at least not yet.

Banana peels are another source of organic matter from plants.

Banana Peel Tea

Some suggest steeping the banana’s peels into the water by using hot water or simply letting them rest for some time in the sunlight. You might be interested to know about sunlight need for your cucumber plant.

There is only a small amount of decomposition throughout this process. This implies that the bulk of the nutrients are kept inside the peels.

Potassium is absorbed from organic matter faster because it isn’t chemically bound. Banana peels have higher levels of potassium. So tea may add potassium, but it’s not much else.

Beware of scams made by the tea-related assertions for plants.

Banana Peels for Roses

It’s a popular tip. Put some banana peels into the hole before planting roses. Some choose to cut them into tiny pieces.

Why only roses? Wouldn’t it be the best advice for any plant if this were good advice? Perhaps it’s because people love bananas and roses? Or is it garlic?

The banana peels rot, and they transform into black-white mush. Is it hard to imagine this as a good idea for young roots?

Look at the NPK. It’s extremely high in potassium concerning nitrogen and phosphate. This isn’t a great combination for plants. To make up for this, some people use eggshells! We’re aware that eggshells won’t break down in most soils. How can including calcium help balance the issue?

The idea was probably born out of the belief that bananas contain an extremely high potassium level and the widespread belief that potassium can stimulate roots, which isn’t the case. Based on this false information, is it logical that the peels of bananas are good for roots and roses on flowers?

This is an absurd idea.

Bury Them Around Plants

If you do not include them in the planter, dig your roses’ soil, add the peels, and fill them in with soil. The roots grow on the top couple of inches of soil. Digging around the roots of the shrubs is not a wise idea.

Also Read: How to: Growing Leeks from Scraps?

Few Important Cucumber Plant Caring Tips

With numerous advantages, why not test this for yourself? Here are the steps you’ll need to start in cultivating cucumbers vertically.

Choosing the Container:

The first step is to choose the proper container. The container should support the vines of the plant and the support beams or trellises. So, choose one that is deep enough. A container that is 12-14 inches deep can be used.

Plant Support:

It’s time to pick the appropriate foundation for this plant. It is possible to purchase fencing made of wire mesh, trellis, or even garden nets. Be sure the support is between 5 and 6 feet high, and it is about 6 inches over the soil. This will allow you to have enough room to grow comfortably and to weed the plants as needed.

Get Planting:

It’s now time to start planting! Plant the garden about eight inches deep, and then place it over with healthy compost. After that, adjust the trellis and support once more and if needed. After that, you can place the cucumber seeds approximately 1 inch deep in the soil. Allow each row 10-12 inches to spread out. Then, sprinkle the seeds with mulch.

Helping plants expand:

When the plant starts to sprout, you’ll need to aid it by growing around the support beam. Assist the tendrils in curving around the beam of support gently. If you believe that the vines may require more support, you could tie their support to it until they’re used to the idea of growing that way. Make sure your knots don’t get too tight, and there’s enough space for plants to develop.

Watering Cucumbers:

Also, ensure that you water the plant often to keep the soil damp. If you reside in an extremely dry area, you should take extra care to make sure that the plant doesn’t die. Keep adding mulch as the plant grows but be careful not to over-fertilize.

What Should You Do With Banana Peels?

The banana peels could contain a psychoactive substance, and inhaling them can cause a “high” or a feeling of relaxation. It could be an old myth connected to the song of the same name from 1966, “Mellow Yellow” by Donovan.

Some consume them as an edible dessert or smoothie drink, which is fine. Vegan food blogger’s recipe calls for the banana peel to make a ‘pulled pork substitute.’ I do not think so!

Banana peels are another kind of organic matter made from plants.

Incorporate them into the compost pile or scatter them on the ground to be decomposed. They can improve the quality of the soil and the plants; however, they’re not superfoods.

Do not get enticed by all the bizarre ideas available on the internet. If you enjoyed this article, please share this post with your friends.

How Often to Water Green Onions?

Are you curious as to know how often water green onions? You would be in the right place if you answered yes. You can quickly grow green onions in any place. You can grow green onions in any location, whether a large yard or a small deck. You can increase your green onions to enjoy onion’s intense, fresh flavor in your soups, casseroles, and salads.

How often should my green onions be watered?

Keep the soil moist. Too much moisture can lead to illness and insect infestations. To ensure a continuous harvest, you can plant more scallions every three weeks.

Also Read: How to: Growing Leeks from Scraps?

1. Select the type of onion you want to grow

The green shoots, also known as scallions or green onions, that grow up just before the onion bulb forms are called green onions. These are immature onions. You can find hearty scallion seeds, such as A. Welsh onions. Or, you can choose your favorite white, yellow, or red onion to grow.

You can choose to plant red, white, or onion “sets” instead of starting green onions from seeds. These are mini bulbs with bare roots that have been bound with twine or rubber band. A few can be used as scallions, and the rest will mature into onions bulbs.

2. Prepare a planting area

Pick a place in your garden or yard that receives full sun and has good drainage. To enrich the soil’s nutrients, you can till the dirt to 12 inches. It will help green onions to grow strong and healthy and produce more shoots throughout the growing season.

Before you start to till the soil, make sure that rocks, sticks, and weeds have been removed.

If you have a little area to work with, you can use a garden rake to till the soil. Rent or buy a soil tiller if you need to cover a larger size.

You can make a pot with potting soil rich in the compost if you only want to grow a few green onion plants.

3. Plant the seeds/sets

You can plant your seeds or sets as soon as the soil has become workable. It is approximately four weeks before the last frost. Seeds should be sown thickly, about 1/2 inch deep, in rows 1 foot (3.33 m) apart. Sets can be planted root-side down, 2 inches, 1 inch deep in rows spaced 1 foot (0.3m) apart. You should water the garden bed well.

The soil should be between 65 and 86 degrees Fahrenheit (18.33 degrees Celsius to 30 degrees Celsius) for onion seeds to germinate. The time it takes for onions seeds to germinate can take up to one month.

You can start seeds indoors if you live in a cold area with a late season. The seeds should be planted in starter pots of peat seed. Keep them well-watered. The seeds should be kept in a sunny, warm place during the germination process. Once the ground soil is dry enough to work with, you can transplant the seedlings into a garden or larger pot.

Also Read: Why Is My Cilantro Turning Yellow?

4. If necessary, thin the plants

Once the first green shoots start to poke up, you can decide whether to thin them or give them more space. The best strategy to grow green onions is in bunches. However, mature plants should be spaced at least 2 to 3 inches apart for the best results. If necessary, take a look at the garden and remove any weaker seedlings.

5. Mulch the seedlings

You can cover the soil around seedlings with grass clippings, pine straw, or even fine pieces of bark. It will keep weeds at bay and the soil moist.

You can skip this step if you grow your green onions in pots. Grasses won’t be an issue, and you can easily manage the moisture.

6. Make sure they are well hydrated

All season long, green onions require well-drained soil. The onion plants need to be provided with approximately 1 inch of water each week. The soil should not be too dry for optimal plant growth. However, it should remain moist. You should water your garden bed every couple of days or whenever it starts to look dry and dusty.

You can also test the soil conditions to see if the onions require watering. Place your finger in the soil, right up to the second knuckle. You can water the ground if it feels dry. If the soil seems dry enough, you can water it again after a few days. You may not need water if your area has been wet recently.

Also Read: Cauliflower Leaves Turning Yellow

7. When the green onions have reached maturity, harvest them

The green shoots will reach 6-8 inches in length after three to four weeks. You can harvest them by pulling the whole plant out of the ground. The bulb will not have formed yet. Both the green and white parts of onion are delicious.

You can let the plants mature and become storage onions by simply allowing them to remain in the ground. When the bottom of the plants begins to form a bulb, it will be ready for harvesting in the fall.

You can only use the green parts of the onions and not the white ones near the roots. To do this, you can take the help of a pair of scissors. You should leave about an inch of growth. You can harvest the onions again when they reach 6-8 inches in length. As the plants mature, they will be stronger-tasting.

Also Read: Holes In Pepper Plant Leaves

How to take care of green onions?

Sow onion seeds as soon as the soil can be worked in spring. Onion seeds can germinate at any soil temperature between 65 degrees F to 86 degrees F.

Cover the seed with 1/4″ of soil, and then let it dry. You can begin seeds indoors six to eight weeks before planting. You can place them in your garden approximately 1-1 1/2 inches apart. Press the sets into the soil around 2 inches apart to plant onions.

Full sun is best for onions. They need a pH of 6.0 to 7.5, well-drained soil, and plenty of premium compost. Utilize a balanced fertilizer throughout the growing season.

After your green onions are established and sprouted, it is easy to keep them healthy.

Green onions need approximately one inch of water each week. Soaker hoses are helpful for irrigation if green onions have been grown in rows or raised beds. To conserve soil moisture and deduct grass growth, mulching around plants is a brilliant idea.

The soil should not be soggy, but it should be moist. The finger test is a great way to determine if your green onions require watering.

Just stick your finger into the soil to the point where the green onion plan is. You do not need to water if the soil is moist. You can water the soil if it feels dry.

You can repeat the finger test up to once per week, depending on how much rain you have received.

You can also grow green onions in any container. Containers can dry quickly in scorching summer temperatures, so it is essential to water them at least three times per day if there is not enough rainfall.

Too much soil drying can lead to the bulbs becoming dry.

Ensure that the container has drainage holes. Containers should not be filled with soggy soil.

It may take some practice to get the watering amount right, but it is not difficult.

When green onions are tender and young, they are the best to pick. When the bulb’s tops are 6-8 inches tall and the bulb has begun to swell, it is time to dig or pull them.

Use dried bulbs by waiting until the green tops are brown and withered before you stop watering. Most green onions can be harvested in 70-90 days.

If you are cutting or preparing green onions, be sure to leave about 1 inch above the root. This section can be replanted in the soil. The root section should be placed about 1 inch deep in the soil root side down.

Within a few weeks, the root section will re-sprout green tops. You can repeat this process multiple times with the same root portion.

Also Read: Does Swiss Chard Grow Back After Cutting

Conclusion

You’ll have fresh green onions available for garnishes and recipes whenever you need them. To sum it all, stick your finger in the ground close to the plants. If you don’t feel any moisture, it’s time for water. We recommend watering your plants with 1 inch of water every week for 12 weeks, depending on how much rainfall they have received.

Keep the soil moist. Too much moisture can lead to illness and insect infestations. To ensure a continuous harvest, you can plant more scallions every three weeks.

How to: Growing Leeks from Scraps

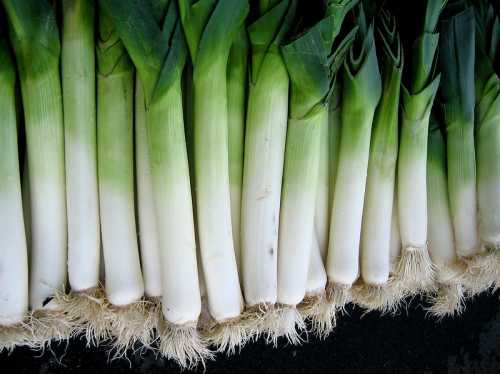
Growing leeks from scraps are very easy. Leek is a very good vegetable and is a really tasty one. The parts edible of the plant include a bundle of leaf sheaths that is largely called a stalk or even a stem. This species is a really easy one to grow.

How to Grow Leeks from Scraps?

Leeks are very much used in various cuisines. The use of leeks in vegetables is due to its onion-like mild taste. In the raw type of condition, the vegetable is very much crunchy to consume and is also firm in nature. The edible parts of the leek have a white kind of base. There is also the availability of the light green portions, and there is also the availability of the dark green shades of the leaves.

The very dark green type of the portion is largely discarded due to its texture. The leeks are chopped into various slices having fine measurements of 5–10 mm thick.

Leeks can be grown in several ways, but today, we will be sharing with you some of the most uncommon ways to grow leeks. The uncommon way we will be talking about is through scraps.

You can really start to grow a new plant from the rooted part of a leek stalk’s end.

Also Read: Why Is My Cilantro Turning Yellow?

Various steps:

  • The bottom white root end is left and is not thrown in the garbage. This bottom part is chosen to regrow leeks.
  • These two ends are very much put in a shallow depth bowl.
  • For this, prepare a bowl of very clear water and try to put the ends in it very carefully and keep or put it on the windowsill. Change the bowl of water very carefully after every 2-3 days to be refreshed. 
  • These root ends are very interesting to watch. Whenever you are washing the dishes or even doing something near it, this is a great site to watch. These are a great addition to your most beloved windowsill in winter.
  • After a couple of time or weeks, there is an obvious growth shown. The leeks might seem to regrow, and the green leaves will be shown to grow upwards.
  • You can check the water, and you can see the roots growing in the water. This will be seen at the bottom portion of the leeks.
  • This is a very exciting thing, and people do consider this option. Planting these species in the compost is also very good and a suitable option.
  • After they are grown well, their tops are chopped off and are used for cooking purposes.

The leeks are known to grow in a very similar way, like spring onions and celery. The one and the only difference is the size of the leeks. Growing more nutritious leeks involves planting them in the soil and regrowing them with correct nutrients.

Also Read: Cauliflower Leaves Turning Yellow

Various Leek varieties to grow

There are various leek varieties that you can easily grow. The common leek varieties include 

The American Flag 

This variety is very much hard to grow and has the capacity to overwinter in the mild type of climate. This species is known to grow 1.5-2 inches thick and also 20 inches tall as well. The species is known to possess thick, blue-green leaves. The species matures up to 130 days. Find the seeds in various quantities.

Early Giant 

These species are great for planting in the early spring season. This species has a very short maturation kind of period and lasts up to 98 days. This variety is known for its very consistent size and also possesses great flavors as well.

Autumn Giant Leek

This type of species is known to grow up to 30 inches and also consists of various stalks that are very much capable of reaching three inches wide when it reaches the stage of maturity. This species is ready to harvest in 135 to a time span of 150 days. 

Lancelot

This adaptable type of hybrid is known to grow up to 12 to 14-inch White type of shafts and also consists of various dark blue-green flags. This species is known to grow in many areas and in various other zones as well. This species is known to mature in 75 days.

How to Cook or Use Your Grown Leeks?

There are various common methods by which you can easily cook the leeks. Cooking leeks require you to spend less amount of time. You can follow some of the above-listed methods to cook leeks after you have grown them from scraps.

  • You can easily boil these leeks till it turns very mild and soft in taste. During this process, special and extraordinary care must be taken to chop the vegetables. If you don’t do this, the vegetables will be tangled and will be turned in a ball kind of shape when chewing them. You can serve these boiled leaves along with the vinaigrette. This is a quite popular way of consuming leeks in France as well as in various other regions.
  • Frying the leeks makes them crunchier and helps to preserve the taste.
  • The raw type of leeks can be popularly used in salads and dressings. This especially does well when they are the superior or the prime ingredients used in the dishes.
  • In the Turkish kind of cuisines, leeks are popularly chopped into very thick slices. They are then boiled for further preparation purposes and then are separated into discrete leaves. These are then filled in the fillings that are made up of rice, herbs, black pepper, and onions. For the sarma, the people tend to add currants, pine nuts, and cinnamon, and the minced kind of meat is added to the various fillings.

Leeks are a very popular ingredient for potato and leek soup. These are used to make plain leek soups and are a super ingredient for vichyssoise. They have great symbolism in the whales. They are used extensively as the part of the country’s cuisine. Leeks have come back into the popular flavor in various countries and are very favored by the people. 

So do grow leeks from the scraps as this can ensure the maintenance and the usage of the healthy produce in the long run.

Also Read: Holes In Pepper Plant Leaves

Benefits of Growing Leeks from the Scraps 

There are various benefits associated with growing the leeks from the scraps. Some of the common benefits involved are 

They are great to recycle 

When you regrow leeks from the kitchen and other scraps, you are doing a bigger favor for mother nature. Mother nature feels very happy when you waste the resources very little and utilize the resources in the right and the correct manner.

We all know that the recycling is a great way. It is one of the best and the original ways of all time. It is the very original way in which the household can help in reversing the impacts of climatic changes.

A very little effort is to known to go a very long way. If you can save the lettuce base from the trash and regrow it then you can achieve wonders. The landfills hence will possess less wastage, and there will be more usefulness associated with the resources in hand. Take the condition where many households save their lettuce from being thrown into the garbage.

Saving Wealth

If you are going to grow your own fruits and vegetables at home and use them for making snacks, dinner, and the breakfast, then you are saving your wealth on a large scale. To keep your money and savings, and wealth high, try to grow various vegetables from the scraps. It is very easy to grow in the kitchen too. You can utilize extra bowls and the cups that are lying around the kitchen to start a new project. Hence in a similar way you can easily grow leeks. 

Organic produce

If you want to consume organic food, then this is the best option for you. Growing vegetables organically ensures you what you are eating well.

Forms a great hobby 

Growing various vegetables and fruits seems like a very boring thing as there is a long wait till the plant reaches its maturity but growing from scraps is a fun way to see your plants growing and achieving specific heights. You can click photos every day and try to compile them in collage format and hence rest assured that the product is very healthy and safe as well.

Also Read: Does Swiss Chard Grow Back After Cutting?

They are great in the kitchen

These look very great in your kitchen area. They are like edible displays in your kitchen area. These have a nice smell and also look very nice due to the color and the look they possess. If you want to add some style, then you can go for stylish containers and rest assured to have nice produce in your hand. It brings a natural feel to your decoration and hence attracts people’s attention as well. So its like nicely remolding your kitchen with nice things in the hand and to work upon.

It can be grown in any home

You can grow these species in any home and surroundings. For this, you don’t require a backyard, and even you don’t require soil as well. All you need is that part of produce that was otherwise meant to become a part of the trash can or even bin.

Growing them is quite easy 

Growing leeks is quite an easy task and doesn’t involve great efforts by the people. People can easily grow this produce in a limited period of time. All you we are saying you have to do is follow very simple and easy steps without any wastage done.

Conclusion 

Till now, you might have understood how you could grow leeks. These vegetables are an impressive option for consumers and frame a great part of your everyday diet. Leeks are an interesting part of your food and make your food very tasty and delicious as well.

When you consume leeks, you become healthy as they will be grown in an organic way without the necessity of any pesticides and fertilizers. Leeks can be grown very easily and are good for the people of every age group. 

Growing them at your home is a good option for the people who go for natural produce. We would surely recommend you to grow these species and stay happy forever. Growing them will make you feel happy and healthy in the long run.

You can very easily and efficiently grow them at your home without the assistance of a professional. So follow the various steps as stated above and grow delicious leeks at your home with the help of the scraps. We really hope that you will surely follow these steps very accurately and will grow many leeks at home and will surely feel elated by the progress you have made in a very short period of time.

Why Is My Cilantro Turning Yellow?

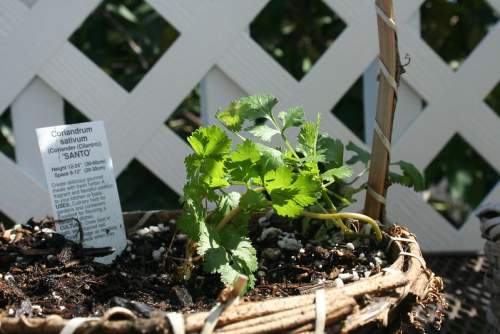
Cilantro turning yellow is a huge problem that people suffer when growing these species but don’t feel discouraged and grow Cilantros. Cilantro is used as a flavorsome addition to various varieties of soups, curries, salads, and various other dishes as well. It is also known as coriander.

In the United States, it is commonly and largely known as leaves, and coriander is known as seeds. The nutritional content of this is very much essential and also has various health benefits attached to it.  

Benefits of Cilantro

Cilantro provides anticancer effects and also adds flavors to a wide variety of various dishes. It motivates the health of the skin and also has properties to fight various diseases and infections. The use of Cilantro has various other benefits attached to it. So grow Cilantro but in the right way to avoid turning yellow.

Why Cilantro Turning Yellow?

Cilantro can also turn yellow when it is not getting enough sun, water, or nitrogen. Other causes could be overwatering and even pest control spraying. Various other causes associated with Cilantro are 

1. Insufficient Light And Heat can Turn Cilantro Yellow

Usually, this species is added to the list of the species of herbs. This is because these herbs don’t need much of the sun. These species don’t even do well in the dark areas also. This means that this can’t grow well in the shade as well. A dim-lit window is also a poor option for this species.

So the correct way to grow them is in full sun, but the temperature must be cool. The correct temperature range must be 50 and 85 degrees Fahrenheit. 

Fixing this problem in various simple steps

Try switching the Cilantro’s position once and try to keep it under broad sunshine. Try to increase the lighting if you are trying to grow Cilantro indoor.

Always try to prune the Cilantro to ensure that the leaves are towered in your salad instead of harvesting them.

Also Read: Cauliflower Leaves Turning Yellow

2 Under and overwatering of the Cilantro

When you overwater Cilantro, the leaves are known to turn yellowish in color. If you are really going for container gardening, then this is the common problem observed.

Due to overwatering, the soil gets deprived of oxygen. Thus the overall functionality is inhibited and also leads to chlorosis. Don’t try to determine the present moisture content of the soil by seeing the surface; dig deep to know more.

If you find out that it is wet, then you are overwatering if you keep on adding water to it. This is a bad practice and can affect the plant in the worst manner.

Some signs of overwatering 

  • Some leaves turn black.
  • The Cilantro doesn’t become less wilted after watering.
  • Leaves turn yellow and fall.
  • You notice mildew on your herbs.

Also Read: Holes In Pepper Plant Leaves

3. Dehydration

When you underwater Cilantro, it leads to chlorosis. If you really want to explore deep soil and also want them soft and in good shape, avoid underwatering them. Only under the full sun water the plants at least one time a week. Then try to observe its various growing conditions and see them grow well. Do see how it reacts to different water quantities and amounts and keep the level in great check as well as adjustment.

4 Yellowing of Cilantro due to nutrient deficiency 

For the growth of Cilantro, you need various nutrients. Therefore, you will have to note the particular amount of minerals and fertilizers they require. Don’t try to over fertilize; this could lead to permanent damage to the Cilantro.

The various nutrient deficiencies resulting in the yellowing of the Cilantro are 

Nitrogen deficiency

Older kinds of leaves rapidly turn yellow, and the newer shoots also turn in this way due to this deficiency.

Iron Deficiency 

Younger leaves are very much yellow in color and with various traces of green veins, while mature leaves are green in color due to this deficiency.

Magnesium Deficiency 

The lower kind of leaves become yellowed from both sides, and the veins remain green in color. This happens due to this deficiency in the plant.

Manganese Deficiency 

The presence of the yellow spots shows the Manganese Deficiency.

Hence one should look at these things if the plant is turning yellow in color. Fighting with these deficiencies helps to combat these deficiencies and make the plant grow healthy and well.

Also Read: Does Swiss Chard Grow Back After Cutting

5. Pests and various other diseases have the capability of turning Cilantro Yellow

Pests have the capability of causing yellowish patches and have the capability of turning the whole batch yellowish in color. Pests and other diseases can be a culprit and hence turn the Cilantro yellow.

Aphids

Aphids have the capability of turning the leaves yellowish in color. These insects use their mouth organs to suck the sap out of the leaves they popularly come in contact with. This process distorts the leaves and turns them yellowish in color. These creatures are well aware of the ways in which you can easily camouflage well. Therefore, there is a huge possibility of missing them at the first instance or even at first glance.

A sticky substance below the leaves shows the possibility of chlorosis. You may see small insects lingering on the plant parts.

Most people are a believer of the fact that Cilantro repels aphids from them. This is not true. The green color peach aphids attack Cilantro. This can be reduced by following various predatory measures. The common measures include lady beetles, lace wigs, and many more things.

6. Carrot Motley Dwarf Disease

This is a very toxic disease and turns the Cilantro yellow in color, or even orange and even red in color. It is caused by various combinations of different viruses and can be mistaken for nutritional deficiency as well. If you are doing everything correctly, and then also the plant is turning yellow, then the broad chances are the plant suffers from some nutrient kind of deficiency. Ensure the plants are weed-free and possess subsequent nutrition as well.

7. Leaf Spot

If your leaves look like they are soaked in water, but with different yellow spots, then there is something wrong going on. Transmission is possible during pollination. The planted seeds may carry the transmitted diseases. If this is the case, the Cilantro will also look yellow. 

To control the further spread of this disease:

  • Plant certified type of pathogen-free seeds.
  • Sanitize the various pots you’re going to reuse or avoid that altogether.
  • Remove the infected plants.
  • Sterilize potting type mixes when the seed is starting.

How to turn the leaves green again?

Reversing chlorosis is possible in the case where the following problem is there

  • Early lighting and temperature issues
  • Light underwatering
  • Nutrient deficiency

You are unlikely to turn the Cilantro green again because of the following reasons 

  • The leaves are old
  • Diseases stem from seeds.
  • You overwatered repeatedly and caused root rot.
  • Pests affected your crop adversely.

Rectifying these issues can help you stop the yellowing of the Cilantro without much effort.

Can you consume the Cilantro that turned yellow in color?

Better Health Channel (BHC) avoids the consumption of Cilantro that has turned yellow,. Eating a yellow, brown, witted Cilantro may cause you any damages. See the cause of the yellowing of the Cilantro first and then decide what to do next. 

Suppose by any chance any disease or aphids infected the Cilantro. In that case, it is better to throw them away as the plant may infect you as well and can result in very bad consequences in the long as well as the short run; however, if you figure out that the moisture stress, nutrient deficiency,temperature plus light imbalances have caused the yellowing of the Cilantro, then the Cilantro is very much safe from the disease. Still, it does not mean that you can consume it very quickly.

Can yellow Cilantro be bolted?

As long as you see the Cilantro not at all dying, you can easily bolt it very well. If the Cilantro lacked a portion of sunlight and you are willing to use the batch for the popular seed production. You can efficiently take it to the brighter areas so that you can easily go for bolting it very well.

Do check that there is no presence of any disease; then only you can ensure the growth of healthy Cilantro. So finding a good Cilantro to keep it disease-free is very much essential as well.

Conclusion

Cilantro is very good and has good nutritional values as well. These can be grown very easily without any issues and provides good nutritional values when they are not yellow in color. So avoid them becoming yellow in nature and then grow them without any issues. Growing a Cilantro needs extreme care and caution. People from time immemorial have used Cilantro. Growing them using different but right techniques will help you have healthy products that can be used as a salad or for any other eating purpose. I hope you to have healthy Cilantro and stay away from the yellow ones.

Cauliflower Leaves Turning Yellow

Cauliflower is a popular vegetable that belongs to the Brassicaceae group that notably contains cabbage, broccoli, Brussels sprouts, kale, and other related plants.

Brassicaceae, which contains mustard, is a commercially significant group.

Cauliflower cultivation is unquestionably tough due to the plant’s strict climate requirements.

Low temperatures during the vegetative stage, wet soil without standing water, and insect pest-free growth conditions are all key needs for cauliflower to provide the desired output.

Many farmers also experience difficulties with cauliflower production, such as cauliflower leaves turning yellow in certain situations. It can happen for a variety of causes.

In this post, we’ll go through all of the possible causes and their treatments.

Also Read: How to Grow Chinese Cabbage from Cuttings?

Cauliflower Production Requirements

Cauliflower is a chilly season plant that best thrives in nature, well-dug soil with a pH value around 6.5 or higher. A huge portion of organic material in the ground helps keep humidity.

To avoid ‘buttoning,’ the crop requires cold conditions, which means that numerous tiny heads grow rather than one huge one.

Cauliflowers are less cold-hardy compared to their cousins and should be sown after the final frost since the plant might be damaged in sub-freezing conditions.

This is typically cultivated in colder regions as fall produce and in the fall just crops matured will withstand cold.

It, therefore, generates a relatively humid and chilly environment. The optimal typical monthly temperature is between 15 and 20°C.

Warmer temperature & extended day duration is needed for the early types. Therefore, in the winter months or autumn-winter people like to grow it.

The crop placement largely affects the ultimate growth of the head of Cauliflower and thus the crops should be 46 cm away, allowing around 75 cm among rows.

Upkeep and care of Cauliflower have to create significant delicate heads consistently over the growing period.

The crops also need enough nitrogen, which must be supplied as a fertilizer side-dressing midway during the growing period. 

Cauliflower heads may be discolored by sunshine, therefore when they grow 2.5 to 5.0 cm in diameter, the crop needs to be blanched, which is a technique that keeps its head white.

This is accomplished by collecting the tallest outermost leaflets at the top and binding them securely using twine.

Loosen the knot regularly to monitor the growth of its head, look for bugs, and let its head dry out following rainfall.

There are self-blanching forms that produce leaves that protect the head spontaneously. 90 to 120 days following sowing the cauliflower plant is prepared for harvesting

Cauliflower which is completely developed and appears white must be harvested and marketed as soon as possible.

If the gathering is postponed, the hue of the leaves will turn yellow, and their richness and beauty will be lost. As a result, it’s critical to harvest the Cauliflower when it’s fully mature.

Also Read: How to Grow Pointed Gourds at Home?

Why Are My Cauliflower Leaves Turning Yellow?

If a plant’s chlorophyll components are lost, the foliage becomes yellow. The leaves could also become yellow as a result of insect infestations, infectious diseases, or environmental stressors.

The cauliflower foliage can become yellow for quite a variety of factors The following contains a list of them.

  • Natural Growth
  • Underwatering
  • Overwatering
  • Nutrient Deficiencies
  • Diseases and Pests
  • Stress

Natural Growth

First, the most obvious cause of fading leaves is the plant’s normal development processes. Its developing energy is focused toward earlier, more prolific development as it grows.

After doing their function of bringing the plant to maturity, the elder leaves begin to fade away.

This fading is quite natural, and it will impact all crops of a similar type at the right period while at an equal pace.

If, on the other hand, the wilting affects the entire crop, with certain individuals suffering worse than another it’s typically an indication of stress.

Also Read: Does Swiss Chard Grow Back After Cutting?

Underwatering

If your crop is stressed by not getting enough hydration, the colour of the foliage will fade.

Plants are failing to collect enough moisture from the ground and transmit it to the stems and leaves owing to a shortage of moisture in the soil.

As a consequence, the plants will have to use less moisture to perform photosynthesis. As a result, undesirable chlorophyll components that aren’t engaged in photosynthesis are discarded.

The leaves grow drier, crunchier, and yellow in hue. As a result, you must be cautious and consistent while feeding the cauliflowers.

Keep checking the ground (at least once per day), and if it appears to be dry, provide watering. Never overwhelm the crop plant roots with water; simply moisten the ground.

Also Read: Holes In Pepper Plant Leaves

Overwatering

Excessive moisture is a major issue in nearly every crop.

When the roots are submerged in water over an extended length of time, the tissues will decay owing to a shortage of appropriate ventilation.

When the roots begin to decay, they are unable to provide sufficient moisture to the crop and the greens begin to lose their chlorophyll pigment thus becoming yellow.

When you leave your ground damp all of the time, this is most likely the cause of your cauliflower foliage becoming yellow.

One can take the below steps to avoid an overwatering situation.

  • When growing cauliflower, use a ground that drains well.
  • Since cauliflower prefers somewhat damp soil yet not to have its roots soaked in water, employ little water regularly and for a short period.
  • Incorporate as much natural material into the ground as possible, since it will aid in enhancing the soil’s physiological health and drainage.
  • Mulches may be used to properly utilise water while cultivating cauliflower outdoors.

Nutrient Deficiencies

Low amounts of nitrogen, iron, magnesium and potassium, among other typical nutritional shortages in your ground, may turn plants yellow.

When plants acquire brown patches around their margins, and also yellowing or overall loss of hue, it’s a sure indicator that nutrition is a problem.

If you suspect your ground is deficient in essential elements, a simple testing kit helps validate your fears.

You may then use an appropriate fertilizer to correct the deficit and focus on natural soil development to avoid future issues.

Epsom salt (magnesium sulphate) can be added to the ground to increase the magnesium concentration and encourage the production of chlorophyll pigments.

Most such crop plants require potassium as nutrition. To avoid a potassium deficiency, you may purchase and use potassium fertiliser from the store. It will put an end to the problem.

Stress

Cauliflower is a cool-season crop sensitive to withering in extreme heat. The crop does quite well in daylight temperatures around 65 and 80 F. (18-26 degrees Celsius).

The plants usually wake up during the evenings or if the weather cools down. In the lack of rainfall, offer 1 to 12 inches (2.5 to 3.8 cm) of water each week and not allow the ground to dehydrate entirely.

Overwatering, on the other hand, might lead cauliflower to fade due to damp, waterlogged soil. On warm days, a coating of bark particles or any other mulch helps keep the earth cold and damp.

Diseases and Pests

Crops that are weakening due to pests and disease may typically begin to turn yellow. Look for apparent evidence of aphids, moths, or any other parasites, and also fungus or mildew stains.

Some of the pests and diseases are mentioned below –

Clubroot

Clubroot is a dangerous fungal infection that damages brassica plants like broccoli, cabbage, and cauliflower. Yellowing or weak leaves, as well as fading in summer weather, are the first signs of clubroot.

Early indications can be hard to identify if you see wilting cauliflower. The crop develops deformed, the club-shaped populace at the root system as the condition develops.

The infection, which resides in the ground and spreads swiftly towards other crops, must be eliminated as early as feasible

Verticillium wilt

Cauliflower is frequently affected by this fungal infection, particularly in humid, coastal regions. It usually affects crops in late summertime and early fall as they approach maturation.

Verticillium wilt typically occurs in the lower leaflets, causing them to wilt and become yellow. Starting afresh with healthier, disease-resistant crops is the safest alternative.

Because the fungus resides in the ground, transplants should be placed in a region of the yard that is rid of the infection.

Fusarium wilt

Lower leaflets are the first to become yellow accompanied by the whole plant. Leaves that have been impacted wilt, dry down, and then become fragile. It’s also possible that they’ll collapse from the branch.

To keep the infection under check, you must eliminate the diseased crops from the area. To limit disease transmission from one crop to the next, eliminate leafhoppers.

Maintain weed-free ground. Fungicides can also be used.

Conclusion

After going over all of the possible reasons why your cauliflower plants may turn yellowish we may say that the most important factors to consider are irrigation and disease pests infestation.

Water stress is a major cause of yellow leaves in several instances. Individuals frequently overwater or submerge their plants, causing them to show symptoms of infection.

As a result, it’s a good idea to keep a close eye on the plant’s moisture requirements and feed properly.

In addition, you must prevent disease bugs far from your valued crops.

Holes In Pepper Plant Leaves: What Causes and How to Prevent Them

Growing a pepper plant at home is not easy, but definitely a beneficial bet. If you are developing a Pepper plant all by yourself, then you would be well-versed with the difficulties that it invites. The most common being the continuous presence of a hole in pepper plant leaves.

Holes in pepper plant leaves indicate the damage that has been incurred by dangerous pests and insects. If you have found such damage being done to your plant, then you are in the right place.

In the preceding article, we would be raising questions regarding the causes and preventive measures that are required to be taken in case of pests attacks. So, without further ado, let us begin our quest.

What causes holes in pepper plant leaves?

If you are growing pepper plants in your garden or backyard, you must be faced with the possible question of “why are there holes in my pepper plant leaves?”

Well, you do not need to ask this question anymore. We will not only tell you what causes these holes but will also provide you with all the possible treatment methods so that your plants remain healthy ever after.

Also Read: Does Swiss Chard Grow Back After Cutting?

Cutworms

Cutworms are the most probable source of holes in your young pepper plants. Extremely young pepper plants attract cutworms, and that is why they attack these plants to do the damage.

Often, they go for pepper plant seedlings and attack them to weaken the core of your plant before the plant starts bearing fruits.

Aphids

Aphids do not only like feeding on pepper plants but also love feeding on almost all the vegetable plants. That is why they have been cited as the most dangerous insects for the kingdom of vegetable plants.

They attack the bottom-most sap of the plant by sucking onto them. So, in addition to holes, your pepper plant leaves will also show signs of wilting, yellowing, and dying. The solution to this source of massive damage is mentioned in the next section.

Flea beetles

Just like cutworms, flea beetles are also a fan of young pepper plants. That is why immature pepper plants demand and expect more attention than fully grown plants. In addition, flea beetles are known to leave tiny holes on the leaves of numerous pepper plants.

Their jumpy nature adds to the ease of moving from one plant to another.

Also Read: How to Grow Pointed Gourds at Home?

Corn Borers

Pepper plant pods are the main attack targets of corn borers. The leaves of pepper plants do not seem to attract them as such. Instead, they start attacking the plant by affecting the inside of the plant pods. In no time, the damage spreads to others pepper plants in your garden as well.

These caterpillar-like insects can be easily spotted and treated.

Other Pests

The aforementioned pests are primarily the reason behind recurring holes in the leaves of your pepper plant.

However, these are not the only ones to blame. Insects like leafcutters, tomato hornworms, moths, beet armyworms, butterfly larvae, grasshoppers, slugs, and snails are also dangerous to the progress of your pepper plants.

To identify these pests, you should arrange regular visits to your garden. Check and examine your pepper plant for any trail, holes, or damage everywhere.

The evidence can be observed under the leaves, on the leaves, on the stem, around the stem, on the soil, or on the ground surrounding the plant.

Also Read: How to Grow Chinese Cabbage from Cuttings?

How to Prevent Holes In Pepper Plant Leaves?

Since the only reason for holes in pepper plant leaves is the presence of pests, the preventive and treatment strategy also revolves around the same issue, that is, getting to remove them.

In the following sections, we will look at some pest-specific strategies that would essentially draw them away. This will be followed by tips that are generally helpful in finishing and repelling all kinds of pests.

Treat plants according to the type of pests.

Each pest has its own requirement regarding food, nutrition, and energy, and that is what makes it essentially different from other pests. Therefore, if we wish to target specific pests, then we need to adopt particular strategies.

The pests we mentioned above can be derailed from entering the garden spaces by following the practices listed below.

It is suggested that the steps are followed as they are listed, without any deviation in the methods.

Cutworms

As we have noted above, cutworms attack the seedlings of pepper plants. So, if you direct seed your plants to grow them, it would enhance the chances of cutworms attacking your plant. But, if possible, skip this method and go for something else.

However, if cutworms are troubling your pepper plants, a naturally made pesticide would be acceptable to keep them away from your plant.

The process would be more endearing if the worms are spotted as soon as they begin to thrive.

Aphids

Aphids are another dangerous source of destruction to pepper plants. However, there is not much that you need to do to drive away these pests.

You can use the most straightforward method involving water. Wash the affected part, and the aphids will go away. To some, this may seem a bit time-consuming. Nevertheless, it is effective.

You can also use natural pesticides to kill them off as an alternative to washing away with water.

Flea Beetles

Flea beetles are the easiest pest to identify; they keep flying all the time, complemented by their jumpy nature.

The solution is very easy. All you need is a potent mixture of water and soap in a spray bottle. Spray the plants thoroughly.

When your plant is ready to harvest, wash them and rinse them off any dish soap for making them edible to human beings.

Corn Borers

It would be easier to get rid of corn borers if we identify them in the earlier stage of damage and try to draw them away. Ladybugs are a natural solution to this problem of perpetuating corn borers from your garden.

Find a way to attract ladybugs to your garden. Next, try to place them near the pepper plants. Ladybugs feed on the eggs of corn borers, thus stopping their breeding process.

If this method does not work, wear your sturdy gardening gloves and try removing these pests from your hands.

For better results, you can supplement these ideas with a non-toxic pesticide.

Also Read: Coffee Grounds for Pothos

Additional tips: for unknown pests

Apart from what we have mentioned above, there are a lot of other considerations that need to be taken.

This is a specific matter of fact when one is not able to identify the pests they have on their pepper plant leaves.

That’s right! If you feel that identifying the right kind of pest is a hassle, then you can shift to adopting additional tips, which usually work with each kind of pepper plant pests.

This way, you can make sure that your leaves remain hole-free and undamaged for more extended periods.

Follow the below-given tips to enjoy a hassle-free pepper gardening process:

Ducks or chicken can be of specific help.

Keeping ducks and chicken in the garden where you are growing pepper plants is beneficial to the leaves, as they help finish the pests that feed on pepper plants by feeding on them.

Since the pests act as a source of food and nutrition to the poultry animals, they will hunt for them and finish them off before they create any undue damage or harm.

Maintaining cleanliness

In order to prevent the lingering of pests in your garden, analyze the area around your pepper plants and keep them effectively clean. In order to clean the area, begin by maintaining a fixed schedule.

Next, surf through different stores and select the best cleansing agent for this purpose. Begin by removing tall grass and unwanted crops (weeds). Uncleanliness is the main reason that pests are attracted to your garden.

Which plants to keep at bay?

If peppers are kept near certain plants, it can be a hazard for their leaves. Plants like garlic, onion, alfalfa, melons, and sugar beets attract insects and pests like thrips, leafrollers, and whiteflies.

If these plants are kept near pepper plants, pests can quickly attack their leaves, causing giant holes in them.

Deploying cardboard collars

If the problem of pepper plant leaf holes is troubling you to the core, then perhaps you would be willing to take out some additional time for deploying cardboard collars, which are essentially stiff, next to your pepper plant base.

This way, if cutworms plan to attack your pepper plants, they would fail, owing to the preventive shield created by deploying stiff cardboard collars.

Silver Mulching

Silver mulch repels pests and insects of all sorts, whiteflies the most. Therefore, if you have trouble surrounding them, find silver mulch from an authentic commercial store, and spread it evenly across the boundaries of your plant.

This is a tested and reliable method for driving away pests. Besides, it would also create a nutritious ground for your pepper plants to thrive. 

Spreading diatomaceous earth

Diatomaceous earth is a mixture that is essentially known to keep away insects of all kinds. In fact, it was earlier used on a regular basis as an insect repellant. It helps in killing insects, which can be harmful to the health of your plant.

If you cannot find the original mix of diatomaceous earth, do not worry! You can spread the food-grade diatomaceous earth type instead.

It is also suitable for the health of your leaves and provides a fertile ground for plants to grow. However, take special care during the monsoon season or when it starts to rain. This is because, under such circumstances, the mixture tends to wash away with water.

Wait for the rain to stop and reapply it again after some time.

Turmeric

The most straightforward home remedy for treating pests is turmeric. First, take some turmeric and mix it with water. Then, put it in a spray bottle. Shake the bottle. And your spray is ready!

Use this solution to treat your plants. Spray it on your plants twice a day for best results. Garden bugs and pests find it hard to resist the smell and properties of turmeric, so it keeps them away.

Conclusion

One does not need to be a gardening guru or an agricultural expert to fight back the harmful pests, which are a serious source of threat to pepper plants.

As we have seen above, whether or not you know about the exact worms that have attacked your plants and caused holes in their leaves, you can treat them and prevent them from returning next time.

Pests like cutworms and flea beetles are the most common causes of visibly large holes in your pepper plant leaves. However, it is never too challenging to grow your own pepper plant crop in a backyard or garden.

If you witness holes in the leaves of your pepper plants even after administering the treatment, as mentioned earlier, consult a professional, a gardener, or an experienced botanist.

Does Swiss Chard Grow Back After Cutting?

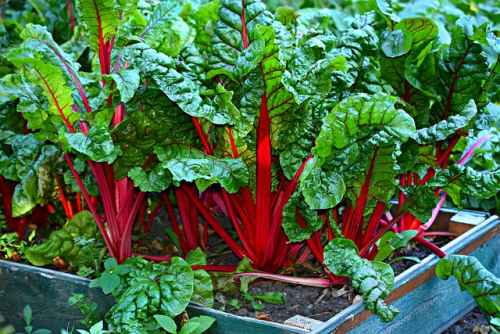
Swiss chard is a strong, beautiful plant that embraces scorching summertime and harsh winters. It’s also prized for its crackling, vitamin-rich greens, and asparagus-like spines. Does swiss chard grow back after cutting? The answer simply is yes. You may eat organic Swiss chard from the crop for up to 2 hours if you cut the greens properly.

Understand how to produce Swiss chard, often known as “chard,” a plant with vivid, multicolored stems. This nutritious vegetable thrives in both chilly and warm climates, and its mellow flavor adds nourishment and color to salads, spaghetti, pizzas, quesadillas, sandwiches, and other dishes. Here’s how to cultivate Swiss chard within your yard and collect it!

Also Read: How to Grow Chinese Cabbage from Cuttings?

Discussing Swiss chard

The stems as well as greens of Swiss chard, a species of the beet group, can be consumed cooked or uncooked. Leaf beet, silverbeet, seakale beet,  as well as spinach beet are all synonyms for chard. Swiss chard is available in a variety of colors, including pink, orange, yellow, red, as well as white, and is most recognized because of its brilliant and colorful stems.

Chard is usually cultivated like a cool-season plant since it thrives fast and efficiently in the milder springtime and autumn weather, but it can also tolerate higher temperatures. Although chard’s development slows mostly in summertime, its superior thermal endurance makes this a wonderful salad vegetable to produce whenever the weather overheats for the rest.

Chard is a healthy food that contains a lot of vitamins A, C, plus K. Which doesn’t have the unpleasant flavor of many other veggies, and this is an excellent alternative for spinach as well as kale if you don’t like those superfoods.

In addition to its many benefits as a gardening veggie, chard is indeed a wonderful tasty decorative crop to incorporate into your landscape! Its array of colors is stunning! You may also use chard alone or combined with blossoms in a jar or arrangement. Why should blossoms be the only ones having a good time?

Also Read: How to Grow Pointed Gourds at Home?

Step to Grow Swiss Chard

Sow the Seeds

Even though Swiss chard may flourish in inferior soil it flourishes when a bit of blood meal gets mixed into the ground. Initially in the spring once soil levels somewhere between 50 and 65 degrees, sow seeds. Make shallow sets that are 18″ apart. Throughout the rows, space the plants 2″ apart and top with 1/2″ of dirt. Make sure it is well-watered.

Seedlings should be thinned out.

In around a week, Swiss chard would then start to grow. Thin their seedlings to one planting per 9″ to 12″ when they are approximately 2″ tall. Seedlings can be removed by snipping these off at the ground level using scissors.

Cultivate Swiss Chard

Provide Swiss chard a lift with blood meal within that middle of the growing season. To protect the blood meal against wiping away mostly in rain, bury it with dirt. To keep the leaves from turning bitter, make sure they have enough water. A thick layer of compost will assist to keep moisture in the soil.

Set transplants whenever the temperature is still hot to ensure optimum development. Plant your chard 12 to 18 ” away, however in a well-fertilized garden bed, you might well be fortunate to get them as near as 10 inches off from each other. The petals may seem weak after transplant, but they will quickly recover! Chard is simple to cultivate from seed. Seed germination could be sped up with a quick pre-soak.

Also Read: How to Grow Radish Microgreens?

Pruning

Pruning your Swiss chard will only be necessary if it attempts to bolt to seeds. Keep only a couple of stalks and slice the remainder of its plant straight to 1 inch above the ground surface at that moment. Because as the plant fixes its effort on developing new ones, the old leaves assist it to undergo photosynthesis.

It doesn’t always inhibit bolting, however, and this can slow things down, allowing the plant to live longer. However, much pruning is done based on harvesting operations or to eliminate defective leaves. Typically, the outermost leaflets and stalks get picked first, allowing the interior stalks to function as photosynthesizers.

Propagation

Swiss chard grows from seeds, and all other techniques are unable to be successful. Seeds could be started inside or sown straight onto beds. Select high-quality seeds from a reputable provider. When the last winter period has expired, the seedlings should emerge within 1 to 2 weeks and might even be planted outdoors. It is best to acclimatize the saplings to the outdoors for a few hours each day before transferring them into the soil or a pot.

Also Read: How to Prevent: Mold on Microgreens?

Harvesting the Swiss Chard

Swiss chard is completely grown around 3 months after sowing. Chard is a “cut-and-come-again” plant, this indicates that once the exterior leaves are plucked, the interior leaves will restore them. Resist chopping into the center developing bud while harvesting leaflets, since this may lead the plant to cease generating.

When will the Chards be suitable to harvest?

Chard could be collected while the greens are immature and delicate, just under 4 inches (10 cm) in length, or beyond maturity. Once you’ve started harvesting Swiss chard, it may be harvested indefinitely until winter.

Swiss chard greens can be snipped while they are quite tiny for a refreshing touch to a mixed salad. Bigger chard leaves could be chopped and utilized for stir-fry recipes. Chard will generate excessive greens as much as it is pruned. Stalks or ribs could also be prepared and consumed in the same way as asparagus is.

Chard will thrive in areas where warm weather conditions are constantly in the 80sF (26°+C) and also can survive cold temperatures of 30sF (-0°C). When chard bolts then start to blossom in hot conditions, remove the blooms stalk quickly and the crop will generate additional leaves.

Cultivate chard beneath a plastic tube or in a chilly structure in cooler locations. Chard may be kept from chilling in a cold box by wrapping plants using straw/hay. Chard that has been overwintered can provide you with a springtime crop.

What is the best way to harvest chard?

For the greatest quality, cut Swiss chard very near to lunchtime if feasible. Use gardening scissors or perhaps a serrated kitchen knife to cut the Chards. Chop chard leaf after leaf—cut the exterior leaf first to enable the interior leaflets to expand higher and cut the entire plant 1 inch (2.5 cm) well above ground. In any case, the plant will continue to grow new leaves.

Soil frequently adheres to the bent stalks of chard. To wash them, fill a bowl halfway using lukewarm water then swirl them gently, and remove the leaves & place them inside a strainer to dry; continue if soil persists Before storage, allow the greens to dry completely or brush them thoroughly with a napkin or paper towel. When eating raw or cooked leaves, remove any midrib from bigger leaves. Big leaves are usually finest boiled down and diced like spinach or utilized in stews and soups, salads, or pasta.

How should chard be stored?

Swiss chard should be stored at 32°-40°F (0°-5°C) with 95 % humidity levels. Refrigerate the greens in a zippered plastic container in the veggie crisper area. Refrigerated chard can stay for around 10 days. When chard is kept too chilly or too extended, it develops brown patches mostly on the midrib as well as the leaves shrivel up yellow.

How to Grow Pointed Gourds at Home?

The pointed gourd, like cucumbers and squash, is a vine. It’s high in minerals, as well as vitamins and this is commonly found in stews, soups, curries, even desserts. This vine is often recognized for its potential to decrease sugar levels as well as overall cholesterol levels among humans. If all of the information has piqued your interest, take a peek at Growing Pointed Gourd at Home for more information.

One of the healthful veggies that may be simply produced in the yard is the pointed gourd. Its seed propagation procedure is the simplest and most critical stage in growing Pointed Gourd. We use already-grown seedlings to assist young plants in their development so that they can grow quickly. Its natal location has given it the name Parwal. This plant is a member of the Cucurbitaceae family of gourds. It also has a similar appearance to the veggie ivy gourd, however, it is larger.

How to Grow Pointed Gourd (Parwal)?

Cultivation

The optimal development of the pointed gourd needs a somewhat warmer and humid atmosphere. The plant remains dormant throughout the wintertime and is vulnerable to waterlogging, necessitating the use of well-drained sandy loam ground

Just at the stage of sowing, you should have a 9:1 female to male plant proportion. Because the pointed gourd is a dioecious species, just one species for each plant is chosen. As a result, if all of the seedlings in one’s yard are of the same type, your overall harvest will be nil. As a strategy, maintaining the sex ratio is critical for achieving optimum results.

Also Read: How to Grow Chinese Cabbage from Cuttings?

Soil Conditions

Light soils are required for growing pointed gourds. It would be unable to develop in dense soils. Soils ideal for cultivating Pointed gourds include loamy and clay soils, which are light. Furthermore, the PH level of the soil must be in the spectrum of 6.0 to 6.5.

Climate Conditions

A pointed gourd thrives in tropical and temperate climates where it could get enough sunshine. The development of pointed gourds is well adapted to both humid as well as hot conditions. Throughout that period, the temperature should be around 30-35 degrees Celsius. Regularly, the preferred site must get 5-6 hours of bright sunlight.

During the wintertime, the vining plant goes dormant. As a result, you must grow and collect pointed gourds well before the temperature drops. If you want to harvest the produce that year, then you must plant after the risk of a cold has passed.

Watering

Water each 3-5 days throughout the early stages of development. Raise the frequency to every other day after the plant begins to bloom and produce. Make sure the ground is equally wet yet not soggy.

Support

The pointed gourd is a vine that has to be supported to develop and grow. Construct a trellis or set up a pole or structure on the growing spot. Whenever the vines make the peak of the trellis frame, prune or gently pinch them. This should encourage the plant to concentrate its efforts on producing more blooms and fruits.

Natural Fertilizers

  • Before growing a pointed gourd, put cow dung fertilizer into the ground.
  • Conversely, you can apply the 10-10-10 adjusted liquid fertilizer periodically.
  • Using an all-purpose fertilizer at the transplantation phase gives the plants an extra push.
  • If the crop exhibits indications of weakening, you can fertilize it once again. One maybe two occasions a year, apply a side coating of well-rotted old manure to the plant.

Also Read: Mold on Microgreens: How to Prevent & Get Rid of Them

Diseases and Pests

  • Blister beetles or even Red bitter beetles seem to be some of the very widespread pests that attack pointed gourd plants. Water could be sprayed on the vegetation to control the former. In between periods of February and April, the red bitter beetle attacks the vegetation.
  • Root-knot Nematode, Mosaic, Fruit Rot, or Downy Mildew seem to be the most common diseases that afflict pointed gourd plantations.

Step-By-Step Guide

Cuttings, seeds, as well as root suckers all can be used to grow pointed gourds. You may implement the instructions outlined following while working with seeds:

  • To increase the likelihood of propagation, soak those seeds overnight upon obtaining those from a mature pointed gourd fruit or perhaps a farmers market.
  • After that, you must immediately spread these seeds in the yard.
  • Once the new plants develop 5-6 leaves, the poor ones will need to be trimmed out.
  • After 2-3 weeks following sowing, budding seedlings are ready for transplantation.

If you’re propagating from cutting, you’ll need 5-6 inches of vine cutting to get started. Tuberous roots will need to be pulled out in the springtime to propagate the crop from root suckers. These will need to be split and replanted. People with the limited room can cultivate pointed gourds using pots simply implementing the methods outlined below:

  • First and foremost, you’ll require a 16-20 inch pot containing enough drainage openings When the plant has grown to its full size, you may transfer it over to a wider pot
  • Potting must be done using well-draining sandy plus loamy soil which has been appropriately blended with old compost or manure
  • You must put the plant somewhere that gets enough sunshine.
  • While this soil must be maintained wet, you should avoid allowing it to get soggy.
  • A string or trellis could be used to hold the vine and allow it to make the most of the available vertical space.

How to Propagate a Pointed Gourd?

Root suckers or plant cuttings can be used to grow the pointed gourd. Seed propagation might be an option, however, the odds of germination are significantly decreased. When developing the vine, keep a minimum spacing of 1.5-2 meters between every pointed gourd vine. Let’s have a glance at how to plant the pointed gourd presently:

  • Tuberous roots must be dug from the ground in the springtime for root growth. They’ll need to be put straight into the ground and irrigated daily. Keep a male-to-female seed proportion of 1:9 to improve the probability of blossoming.
  • When cutting vines, you must first remove a 1-2 foot vine from one plant that is at most 1-2 years of age. There should be 8-10 nodes within that cutting. After that, you must infest all of the vine’s leaves but 2-3. The cutting would need to be put in a container with a 30 percent coding fertilizer and 70 percent soil combination. In between periods of February, and March you’ll need to moisten the pot then transfer this into the yard bed.

What is the best way to harvest a pointed gourd?

In most cases, after planting new vines and transferring these around February, the vine begins producing around 120-140 days that continue until September. These are available to harvest 15-18 days following pollination. From July to October, all fruits should be ripe.

Between these dates, harvesting ought to have taken place. Since fully matured fruits are unfit for consumption. Before plants hit maximum maturity, they must be harvested. As a result, the veggie Pointed gourd must be picked before it matures into fruits.

Also Read this: Can you grow zucchini from scraps?

Process of Yielding

Development management, nutritional management, fertilizer management, as well as water management all have a role in the yield of the pointed gourd. The yield is estimated to reach 15 to 20 tonnes per acre.

Maintenance Tips for Pointed Gourd Plants

The primary measures to follow during harvesting are nutritional care, fertilizer management, as well as water productivity. This should ensure that the crop grows well.

Post-Harvest Care

After harvest, cleanse the pointed gourd veggies. Before using them, make sure they’re clean.

Conclusion:

In terms of nutritional veggies, pointed gourd might be an excellent choice in home gardening. Parwal is a famous Indian vegetable that is cultivated virtually everywhere. It may very well benefit everyone in the house if it has been adequately grown. Several different types of pointed gourds generate a lot of fruit.