How to Revive Dying String of Pearls?

String of pearls is a succulent plant that can quickly be grown indoors. String of pearls is named such due to its unique design of flowing out of the containers in tiny little green beads that resemble pearls.

String of pearls is a beautiful lush green plant that attracts the attention of everyone present in a room. It can be kept on the ground, windowsill, or hung in baskets. 

String of pearls is also known as a rosary string of beads due to its appearance. A stunning houseplant, a string of pearls is small, attractive, and carries a faint scent of cinnamon.

How to Revive Dying String of Pearls Plant?

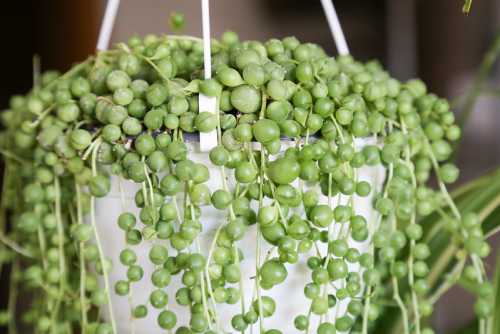
A string of pearls plants, if healthy, appears as a succulent, green plant with tiny beads resembling pearls or peas. On the other hand, it will look off-kilter and dull if your plant is unhealthy or dying.

The beads of the Dying plant are not round and are misshapen, the color is a dull green, and the buds are asymmetrical, unlike the strings of a healthy plant.

It is easy to recognize whether a string of pearls plant is healthy or not by simply looking at it. A dying plant looks excessively different, dull, misshapen, and brown.

Also Read: Why are the Leaves Falling Off My Angel Wing Begonia?

Causes of a Dying String of Pearls Plant

Many reasons can cause a string of pearls plants to die, such as water problems, pests, too much sunlight, and many more. Let’s have a look at the various causes.

Pot is too big or too deep

If your pot is too big, the plant will stay wet for longer and eventually cause rotting. For example, string of pearls has narrow stems which are susceptible to rot.

Another reason for a dying plant could be that it is placed too deep in the pot. When it is set too deep, the plant receives too much soil. String of pearls plant doesn’t require too much mud, and if given, it will stay wet for more extended and cause rotting.

Also Read: How to Get Rid of Bugs on Jade Plants?

Overwatering or underwatering

The most common reason for any plant to die is watering issues. Both underwatering and overwatering restrict a plant’s proper access to water.

Over-watering water logs the plant, and the xylem is unable to absorb water for photosynthesis. Underwatering doesn’t give the roots enough water to manufacture food for themselves. 

During hot summer months, water these succulents once every week, and during colder months, cut down on watering by giving it water once every 10-14 days.

Strings of pearls plant is a little succulent plant that doesn’t require too much water, make sure that you don’t overwater it. If the plant looks shriveled, you might be underwatering it, so increase the water intake.

Also Read: Why Peace Lily Flower Turning Yellow, Brown or Black?

Too much or too little sunlight

String of pearls plants do not thrive in too much sunlight; it prefers light, filtered light. Therefore, during hot summer months, keep your plant away from harsh sunlight as it could lead to shriveling and eventual death.

Like humans, these delicate plants can get sunburned and wilt under the intense heat of the sun. 

While the string of pearls plant does not like too much sun, they also don’t thrive in too little light. Therefore, if kept indoors, one must choose a spot that gets enough sunlight or artificial light. 

Make sure to choose a good location for your plant- it should be too bright or too dull; moderation is appreciated.

Insects or pests 

Bugs, insects, and pests can also cause the death of your plant. Growth of mold, white spotting on the leaves, and the presence of honeydew; all point to insects or pests on your plant.

You should use natural insecticides or pesticides as soon as you spot something fishy. The internet is filled with recommendations for natural insecticides/pesticides, research, and well and timely add them to save your plant.
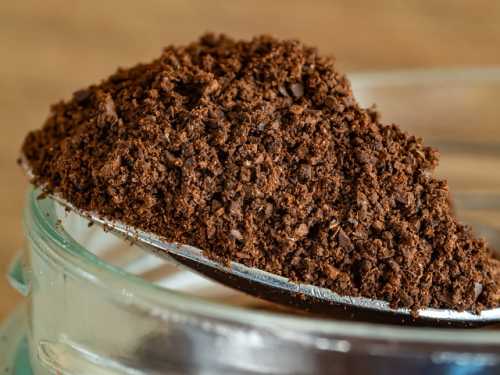
Wrong potting mix

Every plant has its specific soil needs; in the case of a string of pearls plant, well-draining soil must thrive. Therefore, make sure you use suitable soil for this thin-rooted plant.

If the soil is not well-drained, it will retain too much water and essentially accelerate its rotting process.

Also Read: How Much Sunlight Does Peace Lily Need?

How to Save a Dying String of Pearls Plant?

The first step in saving your plant is to recognize whether it needs saving or not. Next, look at your plant and check for dull, off-kilter buds, wet soil, shriveling, etc., to look for signs of dying.

If any of the symptoms mentioned above are present in your plant, it is most likely dying, and you must quickly do something to save it.

Knowing the cause 

The next important step is to gauge the reason behind the bad health of your string of pearls plant. Once again, look at the plant for tell-tale signs of why it is causing them to die.

Watering issues

Water problems are the most common reason behind the bad health of a dying string of pearls plant. Therefore, before taking any recourse towards the healing of your plant, check for water issues in your plant. 

If watering issues, both under watering and over watering, are causing the death of your plant, it can be salvaged. An overwatered plant’s soil is wet, damp, and sluggish.

An under-watered plant’s soil is dry, non-damp, and the buds appear to be fading. Check the dampness of the ground to gauge the cause correctly.

  • Replace your plant in an area with bright sunlight which falls on it indirectly so that it doesn’t receive too high a temperature
  • Ensure that the plant isn’t placed too near to the source of light/heat
  • Please place it in the vicinity of an air source like a fan to evaporate the excessive moisture.
  • The soil must be well-drained. Make sure the pot has drain holes, and if not, make them. Good drainage is a must.
  • Create a watering schedule. Water the plant once every week during summers and once 10-14 days during winters.
  • If you feel that the plant isn’t absorbing water properly, place the pot in a water basin for 15 minutes to properly moisten the soil.

Essentially the course of action you must take to save your dying plant would depend on the reason behind its bad health. Therefore, one must gauge the precise cause and then work towards rectifying it.

Conclusion 

String of pearls is an indoor, succulent plant that resembles pearls due to their resemblance to decadent pearls. They are beautiful in any surrounding and quickly draw everyone’s attention due to their unique design.

There are various causes behind a string of pearls plant death, including underwatering, overwatering, too much sun, too light sun, pot issues, pests, etc.

To save your dying plant, you must first gauge the proper reason behind its lousy health. Once the cause is found out, you can. Take the relative actions and save your plant. 

All the best!

How Often Should I Water My Peace Lily?

Peace lily or spathiphyllum (scientific name) is a closet plant that can thrive on little water and light. Peace lilies provide aesthetic pleasure due to their looks, clean air due to their cleansing properties and many more benefits.

Peace lily is an easy to grow houseplant that novice planters adapt well to. They make a beautiful addition to minimalist homes and offices, clean their surrounding air, remove mold spores and mildew etc.

Despite peace lily’s easy maintenance, a number of beginners are plagued by questions like”how often should I water my peace lily.”

Taking care of a peace lily is simple and is made easier when one is aware of the basics. In this article I shall endeavour to tell you all about peace lilies, their care and maintenance and how to keep them healthy.

Before we dive into the tips regarding the care of a peace lily, lets have a look at the benefits it provides.

How Often Should I Water My Peace Lily Plant?

Peace lilies do not need too much water, they thrive best when watered regularly yet sparsely. In general, you should water your peace lily plant once a week.

Watering once a week is the perfect amount of time a plant needs to absorb the water it needs, drain out the excuse and further dry itself.

To ensure that you do not underwater or overwater the peace lily, check the soil’s dampness before watering. If the soil is damp do not water, if it is slightly damp water a little and if it is dry water well. 

Following the principle of checking dampness in the soil will ensure a healthy plant that doesn’t face issues due to watering problems.

Also Read: Why are the Leaves Falling Off My Angel Wing Begonia?

How often should I water my peace lily in winters?

Peace lilies require little water, as you would be aware by now. In winter most plants require less water than they usually do, this is because unlike summers water doesn’t get absorbed by the sun during winter.

During the hot weather peace lilies should be watered once a week, but only after checking the level of dampness of the soil. During winters water your plant once every two weeks.

In winters you must follow the rule of watering plants only after checking the dampness of the soil. It is very easy to overwater your plant in this weather, so check the water level of the soil.

Make sure that the soil drainage is well and properly functioning or the plant will get water-logged and die.

If you keep your peace lily outdoors, bring it inside in the winters since cold and drafts are not healthy for them. Keep them indoors in a consistent temperature.

Also Read: How Long Can a Peace Lily Go Without Water?

How to Know If Your Peace Lily is Facing Watering Issues?

There is a simple way that can enable one to check if their peace lily plant is facing watering issues i.e overwatering or underwatering.

Yellow and brown leaves

Apart from aging, the most common reason for yellowing or browning of leaves of a peace lily plant is watering problems. Both underwatering and overwatering will cause the leaves to discolour.

If you notice the leaves getting discoloured, check the dampness of the soil and the drainage. If all looks good, the issue is underwatering and if the soil is wet then the problem is overwatering.

Also Read: Why Are the Leaves on My Christmas Cactus Limp (Drooping Leaves)?

Benefits of a Peace Lily

There are a lot of benefits that peace Lily plants provide, some of them are in noon while others not so much. Here are all the various advantages of having a peace lily plant.

Purifies air

Peace lilies purify their surrounding air and provide fresh air. Our houses are home to a number of pollutants ranging from fine dust to microbes. We Siri helps in cleaning these pollutants and provide clean air.

Peasley absorbs pollutants like benzene,xylene,carbon monoxide and formaldehyde. It absorbs 60% of the pollutants in the air and adds moisture to the air as well.

Aesthetic value

Peace lilies are a beautiful, lush green plant with a white flower and a hooded white leaf that protects the flower. The beauty of a peace lily is the reason why it is so commonly used for interior decoration.

Be it a minimalist house or a professional, spruced up office-a peace lily enhances the aesthetic value by a high degree without changing the tone of the place.

Peace lilies look beautiful as centerpieces, as a single décor piece, a style statement, in a green aesthetic corner and so much more.

Low maintenance

Who doesn’t like things that are wasted by us and also are low maintenance? Peace lily is a plant that is very easy to sow, grow and take care of.

Even if you have a busy schedule and can’t spend too much time taking care of your plant, you can accommodate the very little needs of peace lilies in your schedule.

It needs little water, low light, and barely any special treatment.

Also Read: Why Peace Lily Flower Turning Yellow, Brown or Black?

Good sleep

A little known fact about peace lily is that it promotes a restful and healthy sleep. In the fast-paced modern world that glorifies hustle and overworking, finding peaceful sleep can be an insurmountable task.

So many people suffer from insomnia and dissatisfying sleep. Peace lilies promote good sleep by increasing the humidity level making it easier to breathe, their beauty provides a sense of rest and they also control mold and spores in the air.

They calm the mind and help one to slow down. If you are trying to fix your sleep hygiene, a peace lily plant will greatly help you.

Absorbs acetone vapours

Acetone vapours are harmful for our health. Products such as parents, nail paint, rubbing alcohol and varnishes contain acetone which emit harmful vapours.

High exposure to these harmful vapours can cause a headache, concentration problems, fatigue, low BP and also speech problems. Peace lily plants absorb these harmful vapours and prevent damage to our health.

Peace and good fortune

Those who believe in the unknown might be familiar with the significance of a peace lily in terms of fortune. Peace lilies are said to bring peace and good fortune.

Peace lily plants promote prosperity, hope, purity, health, calmness, peace and innocence. It is considered sacred due to the various fortunate benefits it carries.

Caring for peace lily

The aforementioned list would have convinced many to get a peace lily for their home, office or desk. If you are thinking of getting a peace lily plant, here are the basics about caring for a peace lily.

Water

A very common mistake while taking care of a peace lily is overwatering and underwatering. Peace lily is a low maintenance plant that does not need too much water or light.

Overwatering a peace lily will essentially kill it by water-logging the soil and restricting the roots from absorbing water needed for photosynthesis i.e the process that makes food for the plants.

Underwatering has a similar effect on the health of a plant as it doesn’t give enough water to the plant to be able to stay alive.

Both underwatering and overwatering is bad for the health of a peace lily.

Water the peace lily once a week but always check the soil for dampness and water accordingly.

Light

Just like water, a peace lily doesn’t need too much or too little light. Simply speaking peace lilies need everything in moderation neither too high nor too low.

Peace lilies can be kept under a source of artificial light or in front of the windows. If no light reaches them at the place they are kept in, put it in a well-lit place every 2-3 days.

Repotting

Peace lilies Can benefit from repoting or dividing when they outgrow their containers. One can check if the plant has outgrown its container when they notice that it is drooping less than a week after being watered.

If you are repotting, move the plant to a container that is at least 2 inches bigger than the last one. If dividing, use a sharp, sterile knife to cut through the middle of the root ball and replant.

Fertilizer

Peace lilies don’t need too much fertilizer, you can add fertilizer once or twice a year. Summer is a good time for adding fertilizer.

Cleaning

The leaves of a peace lily can accumulate a lot of dust so it is advised to clean the leaves regularly. To clean, put the leaves under running water to wipe down gently using a damp cloth.

Do not use commercial leaf shines as they barely do any work. Be gentle with the plant while cleaning.

Temperature

Keep the plant with a consistent temperature ranging from 65 to 80° fahrenheit. In case of cold or drastic hot changes in temperature bring the plant inside and keep it in a composed environment.

Drainage

This plant can be susceptible to root rot so make sure that it has a chance to dry out between watering. Ensure that the container drains well.

Either choose a container that has drain holes within it or make small holes using a live by yourself. Put a dish under the container to catch water that drains out.

Peace Lily does not need too much water and so it is important that the excess water is able to drain out and the peace lily dries.

Hope this helps, take care of your peace lily!

Why are the Leaves Falling Off My Angel Wing Begonia?

People identify the name “angel wing begonia” with a beautiful plant that embraces large green leaves and heart shaped blossoms and flowers. 

This is also the reason why many people choose to grow Angel wing begonias as their houseplants. Growing to the maximum heights of ten feet, they are easy to grow, plant, and propagate.

These South American natives go by the scientific name of Begonia coccinea or begonia aconitifolia. While it is true that Angel wing begonias do not present much of a challenge while growing, it is also true that they are not as forgiving as their counterparts.

That is, if not taken seriously, these plants can backfire and revolt in ways that would create damage both to the plant and to your yield. One of these damaging conditions is the dropping leaves of angel wing begonias. 

In the following article, we would chalk out the causes that are responsible for such conditions and what can you do to treat them. 

Why Are the Leaves Falling Off My Angel Wing Begonia: Reasons and Solutions?

Have your begonia leaves started falling spontaneously? Are you confused? Well, don’t be! We have some of the most probable causes and their treatments listed below, that would surely help you out. 

Also Read: Why Peace Lily Flower Turning Yellow, Brown or Black?

Water 

The most obvious cause is that you are overwatering your Angel wing begonias heavily. If the plants are not watered evenly, the effects start to show in their leaves. 

Call it the excessive weight or the after damage, but leaves cannot bear with the burden and start to fall off immediately. 

Solution

Do not water the plant over the leaves. Instead, do it near the base of the plant, on the soil. Further, install a container that offers good drainage properties. Do not let the water clog, and water the plant only when the soil gets visibly dry.  

Humidity 

Begonias, like other plants thrive in humid conditions, primarily because it supports their food needs and photosynthesis. If you place your plants outdoors, then you might not know about this problem.

However, the indoor conditions remain devoid of ample moisture and humidity that is otherwise required for plants to grow, thereby making their leaves dry and dead. 

Solution

Install a humidifier inside your house, and regulate the humid conditions as per the requirements of your plant. 

If you have a lot of plants indoors, you can also fetch yourself a mini greenhouse to create the right conditions for your plant.

Also Read: Coffee Grounds for Pothos: How to Use

Infestation 

Given the beautiful flowers and blossoms, it would not be fair to imagine that angel wing begonias do not attract worms and insects. 

General worms, pests and insects sit over the leaves of your plant, thus making them dry, and in adverse conditions even killing them.

Cutworms are the most expected visitors on your begonia leaves.

Solution

Observe your plant regularly for any holes, or unusual spots. Inspect deeply for worms and insects. Next, get rid of them as soon as you spot them.

Use neem oil spray, and organic pesticides to do so. Remember to spray a little extra on the plant foliage and stem.

Also Read: How to Get Rid of Bugs on Jade Plants

Repotting 

Repotted recently? This should explain the sudden falling and rotting of your begonia leaves. If you have adopted an improper method of repotting, then you have possibly invited this problem upon yourself. 

Repotting during the wrong time, in the wrong pot size is another less known cause for Angel wing begonias shredding healthy leaves. 

Solution

Do not repot during the winter or summer seasons. These weather conditions do not present a favourable time for growing begonias in a new environment. 

At the same time, choose a pot that is slightly bigger than the previous pot. This will not restrict the movement of your plant, thereby making it easier for them to adapt to new surroundings. 

Also Read: How Much Sunlight Does Peace Lily Need?

Light 

Light is the most potent factor for carrying out the process of photosynthesis. Inspect the amount of light that your begonia needs, and create conditions that support the right kind of plant growth and flourishment. 

However, do not shower your plant with excess light. It will not do any good either. Sometimes the kind of begonia you foster does not demand ample light.

Solution

Spot the right place for your plant before growing them, either indoors or outdoors. The spot should receive regular, indirect, and bright light for most part of the day. 

Use grow lights (artificial) to give greater support to your plant during low light conditions. 

Also Read: How to Revive a Dying Pothos Plant?

Taking care of angel wing begonia 

You might have been successful in preventing your beautiful houseplants from shredding healthy leaves unnecessarily. But, how to make sure that your angel wing begonia remains healthy ever after? 

We have brought to your screens some of the general care and maintenance tips about your houseplants. Have a look at them and tell us how many you already follow!

  • To give proper attention and nutrition to your plants, it is important to feed them right. Fertilizers are the best source of nutrition for angel wing begonia. Select an organic liquid fertilizer and spray them over your plants weekly, or once in two weeks for best results.

A balanced fertilizer with NPK of 10-10-10 is preferred. 

  • A potting mixture that is moist and is filled with the goodness of organic matter is ideal to grow angel wing begonia. The root and stem system of this plant also demands a little heavy soil, since it allows the roots to spread and establish well. 
  • When choosing the potting material, always incline your preferences towards clay and terracotta, other than plastic and ceramic. The initial preferences will aid you in swiping away excess moisture from the pot. 
  • It does not matter if your plant is grown in outdoor soil or in a planting pot, excess sitting of water in the pot will lead to root rot and brown spots on their leaves. 
  • Pruning might create confusions for many plant lovers. But, that does not mean that we should not prune it. In fact, it is the most important practice. 

Pruning provides the plant with a fresh base to restart the growth process, making it healthier and bushier than before. 

An important tip for pruning is to regularly clean the shears when pruning different plants. This will essentially restrict the transmission of plant diseases from one plant to another. 

  • Flowering of Angel wing begonias take place only in the summer and during the onset of spring. To keep the blooming of these attractive flowers throughout the year, make sure to prick and pinch them off from the base very carefully. This practice would encourage the growth of new and beautiful flowers, varying in eye-catching colours. 
  • The best indoor place for growing angel wing begonias is near the east and west direction of the window. The light that comes through this direction is ideal for plants to thrive. 
  • There are numerous cultivars of an Angel wing begonia that are present commercially. Fortunately, these varieties do not expect different kinds of treatments and preventive measures. So, you can apply these tips to your plants, whether they are Begonia million kisses elegance, Begonia Apricot Shades, or Begonia Super cascade. 

Conclusion 

Known for performing the best and growing in the most convenient conditions, angel wing begonias. While they are not particularly tough to grow, the aforementioned tips should make your planting experience easier and more fun. 

Keep reading more of our content to get easy growing, care, and maintenance tips for your houseplants. 

Coffee Grounds for Pothos: How to Use?

Coffee grounds for Pothos are very necessary as coffee is the most excellent and organic source for Pothos. Pothos get nutrients with the help of coffee. It consists of various nutrients that are essential for the healthy growth of the Pothos. Pothos are the plants that need the micro and macronutrients that help in enhancing the soil structures and the health of the Pothos. Using coffee grounds adds various humic substances to the soil. 

You can also try making a compost kind of tea using the coffee grounds, which is an excellent growth kind of food for the Pothos. Coffee ground is also used by the people growing Pothos to balance the soil’s ph level at substantial ratios, and hence the good health of Pothos is guaranteed.

Do Pothos like Coffee Grounds?

The answer is quite mixed as it depends on various situations and circumstances. The soil having a high Ph level can take coffee grounds as a positive additive. Whereas the soil, which consists of high acidity, can make the plant die if you add coffee grounds to it.

So the Pothos does like coffee grounds but in not every situation. So one should check the soil’s Ph level before adding coffee ground to it.

Also Read: How to Revive a Dying Pothos Plant?

Testing the acidity of the soil

Before going to the use of coffee ground in the soil, acidity must be checked for that take a sample of the soil. Put the taken sample into a container containing water and add baking soda to it then study the reaction. You will easily figure out whether to use the coffee grounds or not.

How to Use the Coffee Grounds?

First, take the coffee grounds and then sprinkle them one by one on the soil of the Pothos. It will act as an excellent soil fertilizer and will help it in its growth. 

You can use coffee grounds as a substance as mulch. You can add the coffee grounds to the compost. This is what most farmers advise the people to do. Don’t mulch the grounds of coffee on the seedlings or seed. If you do that, the growth of the seedling or the seed will stop immediately, and hence this is a harmful move.

Using them as mulch is fine till the time you add various organic substances like the compost and the leaf molds. The coffee grounds can add moisture and protect the plant from multiple diseases and from the fungi and bacteria; hence, healthy growth is promised.

How can you use the grounds of coffee as a substance as mulch?

  • For this, add a 1/2-inch good layer of the said coffee ground onto the required or present soil.
  • Then add a 4-inch mulch layer.
  • Then use a rake so that they do not clump.
  • You can also try mixing the grounds of coffee with the said compost, or you can also mix it to some other organic substance or matter.
  • After you are done mixing, the next step you can do is to mulch around the given soil of your favorite pathos. In this way you could complete the process.

Also Read: How Much Sunlight Does Peace Lily Need?

Other ways of using Coffee Grounds 

You can use coffee grounds in many other ways, like adding them to the pothos’ potting mix. This will certainly help you to increase the soil’s nutrient quotient. Make sure to add only 10 to 20 percentage of the above coffee grounds mixed with various other organic substances.

You can also create a compost form of tea for the Pothos. For this, you will need at least 5 gallons of water and another 2 cups of the grounds of coffee. Mix the above mixture and then soak them for overnight usage. In this way, you can prepare a compost tea and can use it for the Pothos.

Then it is time to water the soil. Coffee grounds are a very slow nitrogen-releasing component. So watering the Pothos within a span of 48 hours is very beneficial. 

When watering these Pothos make sure that the water penetrates deep down the roots of the plant and replenishes the soil very well. Therefore the plant will remain healthy and will not at all die.

You can also go for the drip-feeding method. In the bottle, fill the compost form of tea and then keep the bottle upside down with a hole so that the plant remains hydrated with time intervals automatically; in this way, you will not have to pose a greater pressure on yourself in taking the care of the plant.

Also Read: How to Get Rid of Bugs on Jade Plants?

Various benefits of using coffee grounds for Pothos

  • Coffee grounds help the plant to grow and keep it away from diseases and disease-causing organisms that can even hurt the plant or even kill it.
  • The grounds are efficient in binding the pesticide residue and is efficient in eliminating insects and pests.
  • Coffee grounds help in moderating the temperature of the soil and hence prevent the plant from too much dryness.
  • So balancing of water retention becomes very easy for the plant.
  • Coffee grounds are popular in producing various humic substances and hence helps in improving the fertility of the soil. It also benefits the architecture of the root.
  • Coffee grounds are famous for improving the structure of the soil. This ingredient is capable of enhancing the basic structure of the soil and therefore making the plant grow naturally well.
  • With coffee ground, you can easily enhance the copper, magnesium, and various other soil components.
  • Coffee grounds are famous for producing a Carbon/Nitrogen ratio, which is quite enough to quickly break down the various compost matter.
  • Coffee grounds in the soil also helps to keep the cats away from your plant. As cats hate the smell of coffee so if you sprinkle coffee grounds in the soil, the cat will not litter there.
  • Coffee grounds might make the growth of fungi possible, so to keep the plant away from this, use some organic matter while using coffee grounds to reduce this negative effect on the plant.
  • The coffee ground also acts as barriers and is known as very solid barriers to reduce this negative effect use organic matter.

Conclusion

So coffee grounds are very beneficial for your Pothos. They help in the quick growth of the plant. Coffee grounds are very beneficial in making the soil fertile. A good mixture of coffee ground is essential for making the soil fertile and useful. Coffee keeps the plant in good shape, but if used carefully. First, check the soil for its nutrient component and then decide whether to add the coffee grounds or not. Not every soil type can have coffee grounds. Then follow these above steps on how to use them and then use the coffee grounds for growing healthy Pothos. Then use the above-mentioned watering techniques and rest assured to get good Pothos in your house till you are there to take care of them.

Adding coffee grounds to the Pothos is essential and makes the soil in perfect condition. Pothos are lucky plants, and one should grow them in their house. Pothos can be grown well if correct and necessary steps are implemented while growing them. So grow these plants and live a happy and healthy life at home and outside.

How to Get Rid of Bugs on Jade Plants?

The jade plant is a lovely plant that is commonly seen as an interior house plant. It is indigenous to Southern African areas. The Jade plant is often known as the money plant. It encourages the growth of lovely yellow and green leaves. It may be grown and transplanted in both small and big pots. Despite its beauty, the jade plant draws a wide variety of pests. In an effort to keep the attractiveness of your Jade plant, one should keep bugs away from it.

If you’re not sure how your jade plant is acting strangely, it might be due to insect invasion. However, what pests damage the jade plant, or how do we get rid of them? Let us investigate!

How to Get Rid of Bugs on Jade Plants?

Bugs that commonly attack jade plants include:

  • Spider mites
  • Gnats
  • Mealybugs
  • Aphids
  • Scales

Ways to get rid of them –

Step 1 – Make use of Rubbing Alcohol

If you detect little scale insects (typically small & brown), take any rubbing alcohol then wipe it on the leaf surface. If the bugs are crawling up many branches, fill a spray container with alcohol to spray their leaves. Bring the plant outdoors with a napkin or a brush. Swipe or brush the insects that are clinging to the plant. Take back the plant into the house.

Also Read: Why Peace Lily Flower Turning Yellow, Brown or Black?

Step 2 – Cold, and moist exterior weather should be avoided.

Place your Jade plant in a sunny location to avoid moths and mealy bugs. The heat of the site helps warm the ground, reducing the wet conditions required for these sorts of pests to collect and survive off your Jade Plant. A Jade plant typically requires 4 hours of direct sunshine every day, and more if feasible. They do best in the early morning or late afternoon sunshine. Keep your Jade plant away from the hottest part of the day. Give immature Jade plants as little bright sun as possible.

Step 3 – Watering

Keep an eye on how much watering you give the Jade plant. The ground should constantly be on the dry end or just slightly wet. Excessive moisture encourages the growth of mosses and mealy bugs. Overwatering the Jade plant may result in root damage Mold, as well as mealy bugs, can collect on the roots. Jade plants require just occasional irrigation. To correctly calculate the Jade plant’s water requirements, check the soil using a moisture testing tool.

Step 4 – Make use of a gentle soapy liquid solution.

Soapy water may help to keep dust mites as well as spider mites at bay. Fill the base of a spray bottle halfway with soap. Stir the spraying container after filling it with lukewarm water. Spray on the leaves. But don’t over soak the greens and harm them. The leaves must have a little sheen or gleam from the washing water. Do over a couple of months, or sometimes often if dust mites and spider mites are found. Use normal dish soap with this process.

Also Read: How Much Sunlight Does Peace Lily Need?

What are Mealybugs?

The mealybug is by far the most frequent bug of jade plants. Mealybugs produce white, cottony spots at the connections where leaves connect to stems. Its mouthparts penetrate plant tissues, allowing them to feast on living plants. Mealybugs produce a sticky fluid called honeydew while they eat. Its sticky honeydew is a perfect habitat for the germs of the fungus-sooty mold. Not just can mealybug infestations cause sap depletion in jade plants, but they also frequently result in a sooty fungus infestation.

Mealybugs as well as other jade plant insects are hard to eliminate since jade plants are hyper delicate to horticultural cleaners and lubricants. These pesticides might be excessively strong on the delicate leaves, causing further damage. Rather, mealybugs on jade plants should be removed using rubbing alcohol-soaked cotton swabs or Q-tips. Mealybugs, soft scale, or spider mites all are tiny insects that go undetected for long periods and therefore can readily hide in difficult-to-reach plant surfaces.

Recognition:

  • The plant’s fluffy cotton
  • Oval in form
  • Sucking sap from the plant
  • Brown or cream in color
  • Undeveloped ones have a waxy texture.
  • Mealybug males have wings.

Signs:

  • Leaf development that is deformed
  • Growth has been slowed.
  • The yellow leaves
  • Leaf decline
  • discovered on the underside of the leaves or cuttings

Also Read: How to Revive a Dying Pothos Plant?

How to get rid of mealybugs on jade plants?

Rubbing alcohol is inexpensive and widely available; some people prefer MaxTite Isopropyl Alcohol 70 percent since it is both inexpensive and effective. You may also discover that utilizing a spray bottle helps make the procedure much simpler.

Now take the rubbing alcohol and just spritz this on the jade plant. Please ensure you sneak into all difficult spots since that’s where mealybugs generally congregate. If you discover the infection soon enough, 1 course of treatment will suffice. Otherwise, many mealybugs will emerge in 2-3 days and at that point, you should spray your plant once.

Follow this method every several days till the mealybugs vanish! The good news is that rubbing alcohol is secure for plants and will not harm the houseplant.

Why do pests infest jade plants?

If bugs inhabit your jade plant, we must take the appropriate actions to eradicate them lest they control over and destroy them.

Overwatering

Most problems with jade plants are caused by overwatering. Jade plants cannot withstand overwatering since they dislike being damp and would react negatively in such situations. It can happen if you overwater your jade plant or even if you irrigate it without monitoring the humidity content in the soil.

Excessive moisture will arise when the pot’s draining arrangement is inadequate. Even though you water the plants properly, they will struggle if there is no appropriate drainage. The ground and base of your jade plant never breathe when it is left in wet soil for an extended length of time. As a result, the humid condition in the ground and roots can result in root rotting situations.

This contributes to insect outbreaks by providing an ideal habitat for insects to exploit and germs and fungus to thrive. If the gardener doesn’t really recognize and resolve the issue early on, there is a good risk that the plant may die. The things you need to do are as follows:

  • Make sure your pot has adequate drainage.
  • Make use of well-drained garden soil.
  • Feed the plant whenever the soil becomes dry.
  • Put the plant in a well-lit area that receives at least six hours of clear indirect sunlight every day.

Also Read: Overwatered Peace Lily: Signs & How to Revive Peace Lily

Excessive humidity

Jade plants don’t really like excessive humidity because when grown in excessive humidity environments, they are more prone to root rot as well as insect problems. Excessive humidity can develop naturally as a result of weather conditions. Should you reside near water, your house may well have a high moisture content. High moisture content can also be caused by watering jade plants.

If you overwater your jade plant, then the humidity level may increase. Since the water evaporates from the surface of the ground, the moisture content surrounding your plants rises.

Insects have a special ability for detecting high moisture regions; they require a wet environment to thrive, else their small bodies would dry over and perish. That’s why, should your jade plant live in these kinds of circumstances, it may invite pests.

Inadequate air circulation

Jade plants thrive in areas with good ventilation. It contributes to the reduction of humidity. Plants also prefer oxygenated soil mixes that allow water and air to circulate freely throughout. The water would rapidly dry up, reducing the likelihood of fungal development and insect assault. But, if this situation remains, germs will flourish and proliferate rapidly.

Conclusion

A mealybug or other bug infection is unpleasant, and therefore no plant owner or passionate gardener likes to struggle with any of it. The easiest approach to prevent mites is to inspect your houseplants on a routine basis and search for patterns or tiny bugs. With some of these instructions, you get access to all potential cures and also information on how to get clear of mealybugs and other pests.

Why Peace Lily Flower Turning Yellow, Brown or Black?

Peace lily, otherwise known as closet plants or Spathiphyllum, is a popular plant choice in homes and offices. As an indoor plant, they are easy to take care of and require little attention.

Peace lilies have lush, shiny green leaves and a flower that is hooded by a white leaf; the plant is a delight to look at. They have high aesthetic value and also clean the air of the room they are kept in.

While growing peace lilies is a reasonably easy task, some gardening mishaps can cause them to die or their leaves to turn yellow, brown or black. 

Peace Lily Flower Turning Yellow

Is the flower of your race, lily turning yellow? This could be due to some common mistakes like overwatering and some pro mistakes like light issues. So let’s look at the possible causes of peace lily turning yellow.

Healthy peace lily plants have shiny deep-green leaves, lance-shaped flowers, and a white leaf that hoods the sweet-smelling flower. However, some actions can make it unhealthy, leading to discolouration.

Also Read: How Much Sunlight Does Peace Lily Need?

#1 Overwatering

One common reason for yellow leaves of peace lily can be overwatering. On average, a peace lily needs to be watered every 7-10 days. 

However, water intake can be monitored from time to time by checking the soil; if it seems dry, water the plant; if not, then don’t. Overwatering one’s plant can lead to waterlogging, preventing a plant’s root from absorbing and transporting water, thus essentially killing them.

Water your peace lily once a week and always check the soil for dampness before watering.

#2 Underwatering

Not only overwatering but underwatering your peace lily can also cause the leaves to turn yellow. When the soil dries out, the plants do not get sufficient water to do photosynthesis and thus start to wilt.

Chronic underwatering can result in weak, yellow and discoloured leaves. Check the dampness of the soil and create a regular schedule for watering your plants.

Water your plants moderately and keep a close eye on them to understand their needs. Let the soil mix become dry but not too dry, and then water it.

#3 Excess minerals

An excessive presence of minerals in the soil can also be a cause of yellow leaves. For example, if you use water from a water softener, there are chances that it has too many minerals in it.

In such a case, prune off the yellow leaves and flush the soil with bottled or filtered water as this water has far fewer minerals. Then, if the problem continues, you can repot the peace lily in fresh soil. 

Constantly water your peace lily with filtered, bottled or rainwater to prevent the build-up of excess minerals. Also, do not overwater.

Also Read: Do Marigolds Keep Snakes Away?

#4 High Chemical content

High chemical presence in water can cause yellow leaves. Chemicals like chlorine and fluoride, when abundant in water given to plants, can lead to discolouration.

If you use tap water, let it sit for a while so that chlorine may be off-gas; however, this will not eliminate fluoride. The best option is to stick to bottled, filtered and rainwater for your plants.

#5 Ageing

As plants grow in age, their leaves naturally start to turn yellow, brown, discoloured and die. With age, plant leaves become weak and discoloured.

If your peace lily is old, prune off its lower yellow leaves and not stress it. Use a sharp tool to shear them off as blunt blades can cause damage and infections in plants.

Natural ageing cannot be reversed or improved on, so prune your leaves.

#6 Too much light

Indoor plants like peace lily can thrive indoors because they do not need too much light or water. However, too much or harsh sunlight can cause yellow leaves.

You can check if too much light is the cause of yellow leaves by looking at the veins. When the problem is light, the leaves turn yellow, but veins stay green.

Peace lilies need low-to-medium light and thus suffer when given too much light. Avoid bright, direct sunlight or fluorescent light. Light fluorescent light is enough for peace lilies.

#7 Cold air

Freezing temperatures can damage peace lilies. Peace lilies thrive in temperatures from the 65-85 degrees Fahrenheit range. However, temperatures below 45 degrees Fahrenheit can cause damage and yellowing of leaves.

Please do not keep your peace lily out when it starts to get too cold. Instead, keep the plant in even and chill-free temperatures.

#8 Hunger

Lack of nutrients in the soil or water can cause yellowing leaves as they leave the plant hungry. Also, a lack of minerals such as iron or magnesium can cause yellow leaves as they must stay green.

Fertilise your peace lily once or twice a year to ensure that the mineral content is adequate. Remember, too much or too little of anything is harmful.

Use a high-quality potting mix that is high in organic mineral levels. Yellow leaves do not turn green again except when low mineral leaves cause yellowing, so don’t worry there’s still hope. 

#9 Pests

Pests like spider mite, heavy mealybug or aphid infestation are unhealthy for peace lilies and turn their leaves yellow. Therefore, it is uncommon for healthy peace lilies to be infested by them.

It is most likely that pests grew simultaneously with another problem: overwatering, poor placement, etc. They get rid of pests by washing or wiping them; if they persist, use neem oil insecticide.

#10 Diseases

Funguses or parasites can turn a peace lily’s foliage yellow. They can be prevented by taking good care of the plant; however, throwing away your plant is the best option if they show up.

Peace lily flower turning brown

Peace lilies are beautiful plants that can be easily maintained; however, if you see the leaves turning green, it is time to review your plant care steps.

A healthy peace lily has lush, green leaves and white flowers hoods by a resplendent white leaf. Brown leaves are a sign that there are some issues. Reasons for brown leaves

Water problems

Overwatering or underwatering are the most common reasons for brown leaves. Too much water will cause waterlogging, and underwatering will wilt the plant.

Irrigation problems can be avoided by keeping a regular water schedule and keeping a check on the dampness of the soil.

Also Read: How Long Can a Peace Lily Go Without Water?

Humidity

Peace lilies thrive in warm, wet climates, and thus humidity is necessary for them. A lack of moisture can be the reason for its foliage turning brown.

You can counter this by putting pebbles in a large saucer to trap moisture. This is especially important if you live in dry areas.

Fertiliser 

Excessive use of fertiliser is another cause of brown leaves. Peace lilies do not need much fertiliser. A few times a year is enough. However, excessive fertiliser will increase the mineral content and lead to brownness.

Salt

Similar to fertiliser, high salt content will also spoil a peace lily’s leaves. If you feel that the water is high in salt content, use bottled or filtered water.

Also Read: How to Revive a Dying Pothos Plant?

Why peace lily flower turning black?

Black discolouration on the leaves of a peace lily can be due to three main reasons, namely-

Too much or too little water

When too much or too little water is given to the peace lily, its leaves turn yellow, then brown and finally black. Therefore, checking the issue and rectifying it by adequately watering the plant is best.

Spruce off the black leaves and watering habits.

Temperature change

An extreme temperature exposure, whether too high or too low, will cause discolouration that gets black. So keep your peace lily indoors and maintain an even temperature.

Fungal infection

Fungal infection called Phytophthora or aerial blight turns the foliage black. To prevent its spread, you will need to keep water far from the leaves.

You may also need to treat both the soil and the leaves with a fungicide, preferably an organic one. This could be cumbersome so if you are a novice, consider getting a new plant.

The Bloom

Apart from the foliage turning black, another unhealthy situation is which the spadix or the spike-shaped white flower turns black. This protrusion is known as bloom and has minute flowers in it.

The bloom may also turn black, and its cause will depend on its age. If the bloom is a few weeks old and gets black, it shows that the bloom is in decline, a natural process in peace lilies. 

You can check if the bloom is declining by looking at the leaves; if they seem green and healthy, then there’s no issue. Next, get rid of the wilted bloom by cutting it off.

If the bloom is very fresh and blackening, then it is a sign of stress. If your leaves also show discolouration, there are chances that you are overwatering the plant. Check on the soil before watering.

Also Read: Does Swiss Chard Grow Back After Cutting?

Tips for maintaining your peace lily

Here are some tips that will make it easy for you to take care of your peace lily-

  • Have a watering schedule
  • Always check the dampness of the soil before watering
  • Do not overwater or underwater
  • Keep away from harsh light
  • Peace lilies do not enjoy low temperatures
  • Maintain an even temperature within the house
  • Fertilise the plant 2-3 times a year
  • Do not over-fertilise
  • Use bottled or filtered to water them
  • Water high in floured, chlorine and salt is not suitable for them
  • Wipe leaves with soapy water regularly to prevent pests
  • Wipe leaves with soapy water
  • Try to keep moisture trapped for them 

Conclusion 

Peace lilies are house plants that can be quickly taken care of. However, some unhealthy practices can cause the leaves to turn yellow, brown or black. 

Actions such as overwatering, underwatering, over-fertilisation, excessive light, high salt content, fluoride, chlorine, fungal infections etc., can damage the peace lilies. Another inevitable cause is ageing.

Take good care of your peace lily by following the steps mentioned above.

How Much Sunlight Does Peace Lily Need?

Anyone who loves to build a backyard filled up with their favourite house plants would also recognize a spoon shaped, single petaled flower clubbed with large leaves. You guessed it right! We are talking about peace lilies.

Peace lilies are known to enhance the beauty of whichever place they are kept in, and belonging to tropical regions, they require conditions familiar to the region, in order to thrive.

If you have peace lilies growing in your backyard, then you might face a lot of issues and disturbances before yielding the best plant. How much sunlight does peace lily need? Will peace lilies survive without sunlight? Do peace lilies require water? These and so many more questions might pop up in your mind when entrusted with the responsibility of growing peace lilies.

However, we assure you, it is not that difficult as it sounds. In the preceding article, we would be directing our attention primarily to the light requirements of peace lilies. In our journey, we would also gain some knowledge about what peace lilies are and how you can grow and maintain them at your home.

Scroll through to end your quest of finding everything about peace lilies.

Related: How Long Can a Peace Lily Go Without Water?

Know your peace lily

Scientifically known as Spathiphyllum, peace lilies are native to American and Asian tropical regions. They are also famously known as spath, and are usually available by this name commercially.

These evergreen plants have lush green leaves which are about 12-65 cm long and 3-25 cm wide.

Since the plant is evergreen, it does not pose special demands for large amounts of water or sunlight regularly.

According to a study by NASA, peace lilies are responsible for cleaning specific gaseous contaminants from the environment they are placed in, like formaldehyde and benzene.

A surprising fact is that peace lilies do not really belong to the family of lilies and are therefore mildly toxic to ingestion by humans and animals, unlike true lilies which are highly poisonous.

Cats and some other animals can suffer from acute kidney failure if they consume a leaf or flower of peace lily.

Now that we have had an idea about peace lilies, let us jump to the most important question surrounding the light requirements of the plant.

Meeting the light requirements of a peace lily plant

As we have seen earlier, due to the nature and origin of the peace lily plant, they do not require excess sunlight. But, this little piece of information is not really something that we have been looking for, right?

We need in depth information about how much light they require, why is it so, and what are the possible sources. Let us dive in to know more!

Also Read: Overwatered Peace Lily: How to Revive Peace Lily

How Much Sunlight Does Peace Lily Need?

Sources of light indoors

If you happen to place your peace lilies indoors for growing purposes, chances are that it will receive indirect sunlight for most part of its life, while the rest of the requirements would be met by artificial indoor plant light sources. So, how to take care of your peace lily, if it is placed indoors?

The foremost important rule is to try and let the plant receive as much indirect sunlight as it can. For this purpose, you can place the plant near a south facing window, where the rays of sun fall directly into a spectrum of light. This kind of light will provide maximum benefit to your peace lily plant indoors.

Note that if your house does not have a south facing window, you can always opt for a north facing window, as the light falling from the direct is less intense but still useful for the plant. Do not worry if your windows do not catch a direct pathway of sunlight. Your plants will gain the maximum benefit when placed near windows, since the heat and effect there would be more intense, even if the rays do not fall directly.

If, at any point of time, you feel that your plant is not able to achieve maximum light from the window, you might want to look at other factors that are key in increasing, decreasing, or modifying the intensity of light.

Some of them are, the cleanliness of the window, colour of the wall, and placement and positioning of the mirrors. Some of the high school physics lessons go into understanding why these factors are important, how they influence light intensity, and how to select them.

Light coloured walls (preferably white or cream) and mirrors reflect the incoming sunlight and light up the potted plant placed right in front of them. This would not work if you place your plant in front of a dark coloured wall with no mirrors. Further, you can make use of the simple shadow test to know if your plant is achieving the appropriate proportion of light indoors or not.

Also Read: How to Revive a Dying Pothos Plant?

Sources of light outdoors

If you are placing peace lilies or any other plant outdoors, then there is only one source of light left, sunlight, probably direct. Anyway, here is what to do if you have decided to plant peace lilies outdoors. Primarily, place it somewhere where the sunlight does not fall directly throughout the day. You can select a sheltered porch, a patio, or a spot under your favourite tree, whatever you desire.

Make sure that you place it somewhere you have constant access and flexibility to change the directions and positions. As and when the night starts to set in, it is preferred to take the plants indoors. Peace lilies cannot tolerate temperatures below 60 degrees fahrenheit, therefore you should take special care of this when you place it outdoors.

Placing peace lilies outdoors cannot stop it from getting influenced by the weather and seasonal changes that take place  throughout the year. Let us look at some specific seasonal considerations to grow peace lilies outside in the open.

Spring and Summer

During the spring and summer seasons, peace lilies do well when placed in low lighting conditions- however they do not thrive in those conditions. If you want the leaves, flowers, and the overall plant to achieve its maximum and best growth, it is ideal to move the light into a moderate to bright indirect sunlight receiving condition. It would help your plant bloom in no time.

If you feel that indoors, near the window is the perfect place for your plant to achieve the ideal amount of sunlight, then you can shift the plant anytime you want, for its betterment.

Also Read: Do Marigolds Keep Snakes Away?

Winter and Fall

As the seasons of autumn and winter kick in, peace lilies switch their demands from bright sunlight to low and moderate sunlight. Since it is difficult to predict the amount of sunlight in winters, it is preferable if you install artificial lights and make use of them for fulfilling the light requirements of your peace lily plant.

You can begin by installing a light fixture with two fluorescent bulbs hanging 10 to 12 inches above the plant. Make sure to set the timer on your light fixture such that your plant gets a steady amount of 16 to 18 hours of artificial light on a daily basis.

If the windows are giving excess sunlight, make sure to cover those with sheer and a light material curtain. Similarly, if placed outdoors, you can give your plant enough shade if the sun decides to bless the earth in that weather.

When the day reaches its brightest part, you can perform the shadow test with your hand to get shadows that are either too blurry or too edgy, according to the light that the plant receives. Make sure the former shadow on the wall or a sturdy surface is somewhere between the two.

Adjust the plant according to the amount of sunlight it achieves. This way you’d be able to test your peace lily for adequate sunlight in the most accurate and convenient way possible.

Also Read: Why Are the Leaves on My Christmas Cactus Drooping Leaves?

Do all types of peace lilies require the same amount of light?

Peace lilies come in various shapes and sizes. It would not be wrong to say that the light requirements differ for each peace lily. Below is a list of four of the most common species of peace lilies that are grown as houseplants, with the lighting requirements that each prefers.

You can check the light requirement of your plant according to the kind of peace lily you are growing.

Domino

The most commonly available, domino peace lily thrives and seeks out artificial light sources like fluorescent light. In short, it does not require direct sunlight and likes to stay away from it for most part of the day.

Office buildings or entrances are the ideal locations for placing Domino peace lilies for receiving adequate light, artificial or otherwise.

If placed indoors, Domino peace lilies do well in bright indirect sunlight coming from windows or window ledge. This is if the window is placed in the north eastern direction.

However, if placed in western or southern direction windows, the plants don’t do well in the falling indirect sunlight. If the houseplant is kept 8 to 10 inches away from the window or the window is sheltered appropriately, then the plant is not affected as such.

Overall, bright and indirect light will yield more flowers in a domino peace lily than no light.

Mauna Loa

Like its counterparts, maunaloa peace lily will yield blooming flowers under moderate light. In too low or severely high light, the plant either gets no flowers or gets bleached. West and east facing windows should be preferred for keeping maunaloa peace lilies.

Sweet Pablo

Locate a perfect spot near the window and place your sweet pablo peace lily variety on that spot. Keep it in a well lit area, away from direct sunlight.

Sensation

Low to moderate light are the most appropriate lighting conditions that supports the growth of sensation peace lily plants. Keep it away from dark areas, and relocate it at a place that receives bright and indirect sunlight. 

It is advised to keep the plant away from direct sunlight, since they can cause specific harm to its sensitive leaves.

What happens when the plant gets inappropriate light?

There might be times when your peace lily is not able to get adequate sunlight. How will you know? Here are two prominent symptoms that would help you mark lighting abnormalities within your plant.

Scarce flowers

Low light conditions do not provide enough impetus for the plants to bloom, creating a condition of closet plants.

Brown leaves

Too much light can cause the foliage of peace lilies to turn brown. This is a sign of leaf burn which results from the scorching heat of direct sunlight.

Conclusion

Usually grown as houseplants, peace lilies can sometimes fail to attain the adequate nutrition and survival necessities which would have been present otherwise. Nevertheless, if one really desires to grow the perfect peace lily, then they should be ready to go an extra mile for the same.

The aforementioned tips and information have been gathered from empirical research studies. If followed rightfully, the effort will not go in vain.

Happy gardening!

How to Revive a Dying Pothos Plant?

Pothos is one of the most common houseplants that are famous for the ease it provides to its caretaker while growing. However, nothing comes without a price.

It really doesn’t matter if your pothos is forgiving or not, because once you start distressing it, it would give up one day and decide to terminate its life.

Perhaps, this is why you are here, to ask “how to revive a dying pothos plant.” You are at the right place! In the preceding article, you will be informed about the signs that tell you if the pothos is dying or not, along with tips to revive your pothos plant. 

How to Tell if Pothos is Dying?

A dying pothos will give you numerous signals before it finally takes off. All you have to do is, catch those signs rightfully and begin doing the needful. Let us have a look at the most common symptoms of a dying money plant: 

  • The very first is dropping or limp leaves. When the leaves start to droop down, it is a red flag.
  • White spots on your pothos plant leaves indicate the presence of fungal diseases, which have the capacity to end your plant.
  • Water stress, low light, and over-fertilization can result in a dramatic yellowing of leaves, which is fatal for many pothos, if not treated timely.
  • Brown leaves indicate low humidity in the environment, and the plants cannot tolerate that, resulting in their death.
  • Pests and overwatering can get the leaves of your pothos plant to curl, something that is harmful to the health of your plant. 

Also Read: How Long Can a Peace Lily Go Without Water?

Reasons of dying pothos plant 

A lot of signs that we saw above stems from reasons that are mutual between these symptoms. Understanding the logic can not only help us prevent further damage, but would also straitjacket us from performing such activities in the future. 

Overwatering 

If we are to list the reasons for pothos dying, overwatering should undoubtedly top the list. Here’s why-

Excess water in the pothos plant tends to turn the leaves brown while also causing root rot. Next, if you want to evaporate the water, you would expose it to light which can promote the drooping of leaves.

That is how this deadly loop is created. 

Underwatering

You might think, okay, if not overwatering, then maybe underwatering can do the trick. Well, well, this is not how it works.

If you are devoid of your pothos plant of adequate water and moisture supply, you are taking the most critical source of nutrition away from your plant. The plant does not tolerate this for long, and it dies.

Also Read: Overwatered Peace Lily: Signs & How to Revive Peace Lily

Lighting issues

Pothos can grow without light, but they cannot thrive without it. If you alienate your plant from sunlight or any other source of light for a considerably huge amount of time, then it would reflect in their stunted growth, lack of food and nutrition, and leggy growth. 

These reasons provide enough impetus for a pothos plant to die. 

Improper Drainage

This problem is very well linked to our very first issue of overwatering. If you allow the plant to sit in excess water for more significant periods of time, then it would create no space for aeration and a foul odor.

It can result in root rot, wet and soggy soil, and finally, the death of your plants. 

What else?

These reasons are not the only ones that can contribute to fatal conditions for your plant. Following unhealthy habits like over-fertilizing the plants, not treating fungal infections and pests timely, providing an improper potting mixture, and lack of maintenance are also famous for encouraging the ill health of your pothos plant. 

Check this out: Do Marigolds Keep Snakes Away?

How to revive a devil’s ivy? 

We know you might be overwhelmed to look at all those dangerous reasons and signs that indicate that your pothos plant is dying, but what if we gave you perfect solutions for your problems? That’s right. Look at these big five solutions to revive your devil’s ivy houseplant. 

Without further ado, let us begin!

Correcting the watering techniques

We saw how both overwatering and underwatering could be a problem for your pothos plant. So, how to know the correct watering technique and amount. You can solve the problems of underwatering and overwatering independently. 

If your plant is overwatered, prune the damaged leaves, and stop watering for a few days, or at least until the soil becomes arid and dry again. You can also prevent overwatering by watering only when the soil seems dry and drain out the excess water immediately. 

Further, if you want to correct the problem of underwatering, remove all the damaged leaves carefully, and start by watering your plant until it regains its lost moisture content. Follow this by misting the plant and by incorporating the bottom watering method. 

Fixing the lighting issue

Pothos loves to thrive in plenty of indirect bright light, but it also despises too much sunlight. What to do? You can begin by simply stressing your plant with abundant, direct sunlight. Next, you need to find a spot that offers the ideal amount of sunlight for your plant. Relocate the pot at that position. 

Do not let the plant receive more than 3 hours of sunlight. It is dangerous. Take care that your plants are precisely placed indoors only. 

Checking for root rot

Mushy roots usually indicate that nothing more can be done to prevent your plant from dying, so you need to follow these steps carefully since the life of your plants depends on them, quite literally. 

Start by pruning the damaged leaves, if any. Take the plant out carefully and check the roots. Carefully get the plant rid of the existing soil and root ball. Identify feeder roots, and take special care in not destroying them. 

Place the roots underneath running water and dry them in fresh air for 24 hours. Choose a pot of appropriate dimensions and size, lay the bed with nourishing and healthy soil, and repot your plant. 

Preventing pest infection

Insect infestation can be challenging to treat if you do not have the proper measures to treat them. Identify the puckered leaves and chop them off nicely. Dilute some neem oil with water and spray the solution on leaves. 

Continue spraying the solution weeks after the infestation is tackled and gotten rid of. You can dab a cotton ball absorbed with isopropyl alcohol and rub the leaves with the solution for instant relief. 

Adjusting the temperature and humidity

Choose the right temperature and humidity conditions for your pothos plant to grow. Note that in order for the pothos plant to survive, both temperature and humidity are required to be ideal and constant. 

Cut the affected leaves, and maintain a temperature range of about 30 to 55 degrees Fahrenheit. Finally, keep the humidity conditions above 60% at all times. If needed, remove the dehumidifier from the surroundings of your pothos plant. 

Conclusion

Once you diagnose your plant for the right symptoms of death, you might feel that there is nothing you can do to save it. 

But, as we saw above, this might not always be the case. As soon as you identify your plant dying, administer the required steps with the utmost care, groom your plant, and nothing can stop you from reviving your devil’s ivy. 

Overwatered Peace Lily: Signs & How to Revive Peace Lily

Peace lilies are one of the most beautiful and popular houseplants that can be grown to enhance the beauty of your house garden or office balcony. However, it is not easy to keep track of everything that a peace lily requires. 

The problem of an overwatered peace lily is one of them. If you overwater your peace lily, many uninvited issues can damage your plant in ways that are hard to explain. Nevertheless, the problem can be prevented if we know what signs indicate the problem and practices that are amazing in helping us revive those beautiful and tiny plants. 

So, without further ado, let us begin. 

Overwatered Peace Lily

How do I know if my peace lily is overwatered?

There are certain signs and symptoms that can prevent your peace lily from damaging through overwatering if noticed timely. You know your peace lily is overwatered if:

  • The leaves are drooping and limping one after another 
  • Prevalence of leaf edema. It occurs when the leaf tips start turning brown, supported with water blisters
  • No visible sign of growth, or stunted growth from a long period of time
  • Leaves begin to pale overtime, till they finally become yellow
  • Presence of fungal and bacterial infections in the form of yellow spots across the leaf
  • Root rot occurs. The roots release a foul smell, blacken over time and become mushy.
  • Initial symptoms are easy to ignore. The yellowing of leaves begins from the lowermost part of the leaf.
  • Untimely wilting of the peace lily plant leaf begins. 

Also Read: How Long Can a Peace Lily Go Without Water?

Factors contributing to overwatering of the peace lily

While we have listed a few signs and symptoms that indicate that your peace lily is overwatered, we would also like to share some of the most prevalent contributing factors behind this issue. 

Check if you are following these malpractices unknowingly and terminate them from your gardening habits immediately. 

Pot Size

Analyze the size of your plant carefully, and now look at the size of your pot. Do you see any differences? 

If you have installed a pot that is larger than the size of the plant, then there are chances that you might end up watering your plant more than it requires.

This is because the water holding capacity of the pot is greater than the plant. 

Pot Material

It is important to identify between porous and nonporous pot materials. For example, glazed ceramic pots, metals, and plastics are non-porous pot materials because they restrict the loss of water from the soil. On the other hand, materials like wood and terracotta are porous pot materials that result in the loss of moisture through the pot walls. 

Temperature, Humidity, Wind

When humidity levels are considerably high, the rate of transpiration reduces, thereby also reducing the amount of moisture that sits within the plant. Similarly, high temperatures are favorable for suiting the watering conditions of the plant. 

Conclusively, high wind speed should be preferred while watering plants because it increases the rate of evaporation. 

Increased watering frequency

This one is the most apparent yet common mistake that we all commit. Frequently watering the peace lilies leads to overwatering. Instead, one should wait for the uppermost layer of the soil to dry out before watering again. 

Also Read: Why Are the Leaves on My Christmas Cactus Limp (Drooping Leaves)?

Seasonal changes

Due to the absence of sunlight and other environmental reasons, peace lilies have a history of growing slower in the winter season. Therefore, they also have a hard time absorbing water during the winter season, making them more prone to overwatering. 

Water in the drip tray

Once you are finished watering your plant, look at the drip tray in which the pot is sitting. First, check for any excess water. Then, lift it up and drain it completely. The tray should be empty after you are done watering, or there are greater chances of developing a root rot, which hampers the plant growth. 

Also Read: How to Grow Chinese Cabbage from Cuttings?

Is my peace lily overwatered or underwatered?

It can be tricky to identify if the peace lily leaves turn brown due to overwatering or underwatering. Unfortunately, many people suffer this dilemma because they do not have adequate knowledge of what they are dealing with. 

However, we can make the deal easier. We have carefully researched and extracted relevant data that would help you make an informed decision about your next watering session for your peace lilies. 

Given below is a systematic comparison of how houseplants like peace lilies would react when they are underwatered or overwatered. 

Overwatered lily Underwatered lily 
Leaves start to become yellow. They also show early signs of limping and dropping. Leaves change their color to yellow. They also become dry and crispy soon after they are devoid of enough water.
The soil becomes visibly wet and soggy.You can observe the top few inches of soil getting dry and cranky
The plant becomes entirely water-soaked. Some signs that confirm this are visible brown spots on the leaves surrounded by a yellow haloThe leaves become dry and only have brown spots, not ringed by anything else
The roots start to turn increasingly wet, mushy, and abnormally heavyThe roots here are dry and brittle with lightweight properties. 
In an overwatered peace lily, wilting becomes a common phenomenon impacting the leaves and overall plant health. In an underwatered peace lily, leaves show signs of curling, wrinkling, and shriveling.

How to revive an overwatered peace lily?

As we promised you, it is completely possible to fix or revive your peace lilies once you have ensured that they are being overwatered. Here are some tried and tested tips as to what you should follow. 

Changing the watering routine

The first step in changing the water routine involves eliminating the watering schedule that you have been following all this while. Watering according to a schedule is the major contributor to overwatered peace lilies. 

One should check the texture of the soil before watering the plant. One of the most trusted methods to do so is by plunging the finger inside the soil and feeling if it is wet or dry. 

If you feel that the dryness is perpetuating till 1 or 2 inches at the soil depth, that is your cue to water the plant again. 

Since the evaporation rate differs for each day, it is difficult to water according to a fixed schedule. If you go by the rule we described above, you would be surprised to see how sometimes you need to water only once a week, while at other times, the frequency extends to three times a week. 

Relocating plant: lighting and temperature

If your plant is diagnosed with overwatering, you need to pick the container up and relocate it to a place that suits the lighting and temperature needs of an overwatered plant. 

This is simple science. The greater the sun exposure your plant gets, the more is the rate of evaporation. So, if you have overwatered your plant, it would be ideal to relocate it to a place where the sun shines the brightest. It can either be indoors or outdoors. 

Similarly, if you are considering relocation of your overwatered peace lily, nothing will be best than a spot that receives the maximum sunlight, has the highest temperatures, and low humidity. 

Humidity

With technology occupying almost every arena of human life, there is something invented for those who face problems while living in highly humid conditions. This machine is known as a dehumidifier and it effectively acts to eliminate all the humidity from the surroundings. Humidity in the atmosphere does not allow excess water from the plant to evaporate, thereby making it difficult for your peace lily to lose excess water. 

Therefore, it is important that you select a place for your lilies that does not account for humid conditions or install a dehumidifier for best results. 

Feeding

Your plants need energy, food, and sunlight to grow. But, what does its feeding requirements have anything to do with the problem of overwatering?

A primary source of plant food is fertilizers. Fertilizers are significant for the proper growth and development of your peace lilies. However, they can also turn dangerous under certain circumstances.

If your plant is waterlogged and overwatered, the last thing you want to initiate is fertilization. In this case, it will definitely do more harm than good. Once you have repotted your plant, keep the fertilizers away from it till a good amount of 3 months.

Fertilizers are vital for plant growth, but only if used in the right situations. Once your plant looks healthy, green, and fine, should you continue fertilizing it with nothing other than organic materials.

Repotting

Repotting means changing the container of the plant with the potting mixture. But, if we are following the steps that are mentioned above, then what is the need for repotting? 

Well, here it is. If you wait for your waterlogged plant to dry up following the natural process of evaporation, then it might induce risks on your plant to develop fungal infections and root rot. 

You should not waste time as it will only do more harm than any good. Carefully extract the plant out of your existing potting mixture. Prepare a proper bed in a new container of the same size, with the help of fresh and porous soil. Next, place your plant into the new pot and give it time to adjust. 

As the plant roots get more oxygen to breathe, the root rot restores itself to a healthy position on its own. Therefore, repotting becomes an emergency go-to technique to solve the problem of overwatering. 

Additional watering tips

Apart from what we told you earlier, there are some additional watering tips that need to be present in mind, which only enhance the position of your overwatered peace lily plant. 

  • Every peace lily plant has different leaves. However, the key to remember is that if your plant has more leaves then it will also need a greater amount of water to thrive. 
  • If you are choosing a pot of non-porous material, then do not water frequently, and reverse the situation if the potting material is porous. 
  • Don’t water your plants in the winter season. Instead, when the plant undergoes a flowering period or period of vegetation growth, it requires more water. 
  • Whenever you water the plant, let it settle down overnight. It will make the plant happy, more than you can imagine.  

Conclusion

The bottom line is if you find that you have accidentally overwatered your peace lily, do not worry. While we decide to take care of this houseplant, the problem of overwatering is most common. The good news is, it isn’t that big of a deal. You can prevent and fix your plant by following the tips mentioned earlier.

If you are growing a peace lily for the first time, then we guarantee you there is a lot more learning to do. 

Do Marigolds Keep Snakes Away?

Recently, people have been actively engaging in the practices to find snake repellent plants for growing in their own backyards. While there are ongoing speculations about whether or not marigold is a successful snake repellent, we are here to clear all your doubts surrounding it. 

We will be answering the question “do marigolds keep snakes away” while also keeping in light some other plants that have been useful throughout. 

Let us begin our quest by gaining insights about marigolds and how they help in keeping snakes away if that is what they actually do. 

What are marigolds?

Commonly available in the vibrant colors of yellow and orange, marigolds are scientifically known by the name Tagetes and are a genus of the sunflower plant. This plant is exotically native to the regions of North America and South America, varying in size dramatically. You can find marigolds being as short as 5 inches in height to as long as 3 feet in length. There are no specific reasons for these variations, but we will assume it to be completely normal. 

Marigolds are famous for their smooth nature, making them easy to grow and available throughout the annual season. 

Also Read: Why Are the Leaves on My Christmas Cactus Limp?

The most intriguing factor about marigold is its ability to be able to perfectly fit in either a closed container or an open garden. Marigolds are available in the markets as 50 different species, with three species dominating the profits. These are the African marigolds, French marigolds, and the Signet marigolds. 

Do marigolds keep snakes away?

Long answer short, yes. Marigolds play a foundational role in keeping snakes away. In fact, some botanists suggest people buy marigolds if they are searching for the perfect bait to repel snakes.

Before we step into the know-hows of how marigold keeps the snakes away, let us understand the damage that snakes can produce with their presence in your garden. Snakes- as we all know- are highly poisonous creatures; at least some of them are, therefore they are deep theta to you, your pets, or the thriving green thumbs in your garden. Factually saying, pests such as slugs, mice, voles, and beetles provide more damage to plants than snakes. 

They do not provide potential harm to your plants as such. 

Having said that, commercially bought snake repellents can never surpass the effect that organic tricks sustain. There is undoubtedly no better organic tip to keep snakes away than to grow marigolds. 

As snakes slither over marigolds, they display a sense of disorientation and discomfort, primarily due to the bitter taste and potent smell that marigolds produce. Snakes cannot tolerate strong odor and are therefore used to chase away serpents and snakes.  

It is important for you to know that no research claims support this evidence, but gardeners do swear by the efficiency of marigolds in rendering the garden serpent free. Marigolds are inexpensive and beautiful to look at. Their ability to drive away snakes adds to their never-ending benefits. 

It is advisable to sow marigold seeds as soon as the winter season passes by, preferably in spring. To keep snakes away, grow marigolds in the outbuilding and at the outer boundaries of your yard. Take care of their sunlight, water, and soil requirements, for they should be adequately taken care of. 

If marigolds don’t work out, try removing all the garden debris and covering pet food so that there are no baits left to attract snakes. In addition to this, chemical-free commercial serpent repellents can also be of use. 

Also Read: How Long Can a Peace Lily Go Without Water?

Other plants that keep snakes away

After much empirical research, it turns out that marigolds are not the only plants that you can grow to drive snakes away. Instead, there are a lot of easily accessible and cost-effective alternatives that can be used to do the same job. 

Some of the most common plants used by gardeners are Pink agapanthus, Variegated snake plant, Lemongrass, Sarpagandha, Garlic, Indian snakeroot, Mugwort, Lily of the Nile, Wormwood, Society Garlic, Kaffir-Lime, Cactus, Jimsonweed, and Creat or Green Chireta. 

While there are many non-venomous snakes that do not cause harm to living beings and can, in fact, prove advantageous by eating unwanted rodents and insects, venomous snakes are less likely to come in the absence of an attractive food source. 

Also Read: Mold on Microgreens: How to Prevent & Get Rid of Them

How to keep your marigolds intact?

Marigolds play an essential role in keeping away dangerous reptiles like snakes from entering your garden, and we have examined the how and why of the same.

However, what is essential is for us to establish supportive and nurturing conditions for our marigold plant so that it thrives, remains intact, and assists us in keeping bugs, insects, and snakes away from entering the house. 

Following are some valuable tips listed that would aid you in growing dream-like marigolds of supreme quality. The only trick is to follow them as stated: 

  • If your plants are becoming leggy and having a hard time blooming to their full potential, try pinching their tops off immediately after establishing their roots. It will encourage them to grow bushier. Further, observe the dying blossoms and remove them as soon as they turn brownish in color.
  • Summers induce scorching weather and extract all the water out of the soil quicker than ever. Therefore, water marigolds more often under high heat conditions. When watering, take care not to do so from overhead; instead, water at the plant base.
  • When the marigolds are undergoing periods of growth, it is crucial to keep the fertilizers as away from them as you can. This unpopular opinion stems from scientific facts claiming that nitrogen-rich fertilizers would not benefit marigolds in the long run if sprayed during their growth.
  • While it is important to meet the daily watering requirements of your plant, it is also essential to keep a check on not overwatering the soil. Too wet or too soggy soil tends to encourage root rot and foul leaves, which is a direct source of arm for the progress of your marigolds. 
  • For suppressing unwanted plants, or weeds, add a layer or two (if it’s a thin layer) of mulch between the plants. This is much needed when the plants are young.
  • Given their exquisite color and vibrant fragrance, it is difficult to believe that marigolds do not attract many pests and diseases. Nevertheless, spider mites and aphids still find their way to infest the blooming plants and their flowers. They do not require much to drive them away. A spray of water or a bar of insecticidal soap is more than enough to protect your plants.
  • If you continue to dispense your plants with additional water needs, be ready to encounter fungal infections like powdery mildew on your marigold leaves. Under such conditions, you can only act to reduce the amount of water sprayed on your plants dramatically. Also, you can exchange your soil for well-drained soil that absorbs essential nutrients and keeps the additional water draining systematically.
  • If you wish to decorate your interiors with marigolds, you will be delighted to know that they remain dry and fresh even after much time of removing the flowers from the plants.
  • Marigolds have edible properties, and they make a perfect addition to summer dishes. If you wish to, you can also consume them as a tiny part of your meal. 

Conclusion

When we started, we had a perpetuating question in mind, that is, whether or not marigolds play a successful bait in keeping away snakes.

Not only we got our answer to that, but we also came to realize marigold is not the only plant in the race, but there are 14 other plants that have proved their effectiveness in keeping these dangerous animals at bay. 

Further, we also got to know more about marigolds and the conditions they thrive in. We hope that now you are all set to plant those beautiful marigolds in your backyard.